

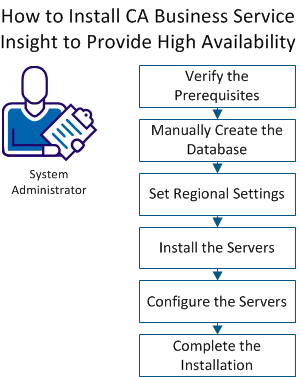
As a system administrator, you are responsible for ensuring continuous availability of CA Business Service Insight. CA Business Service Insight provides a high availability installation that is based on Windows Cluster Technology and Windows Network Load Balance (NLB) Technology.
CA Business Service Insight uses the following options to provide high availability:
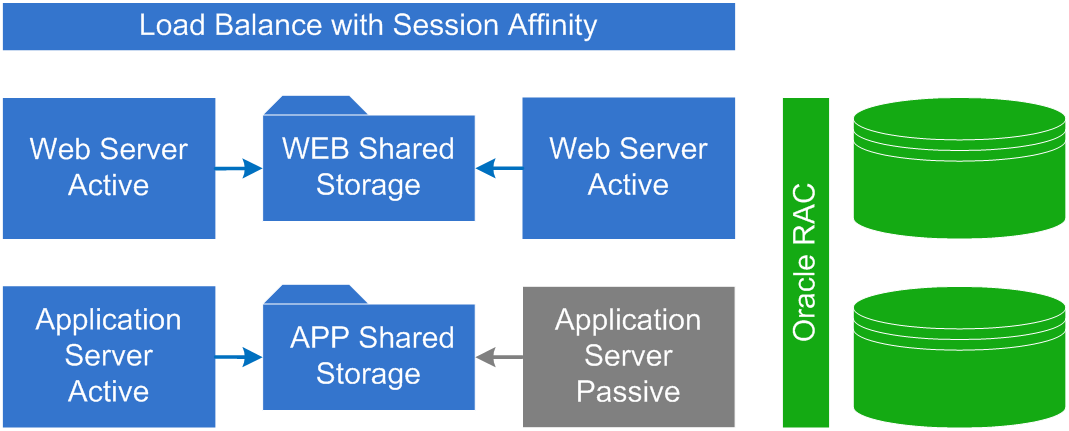
Both the web servers and application servers require a High Availability shared file system to share files between the nodes. Use any storage operating environment that complies with High Availability requirements.
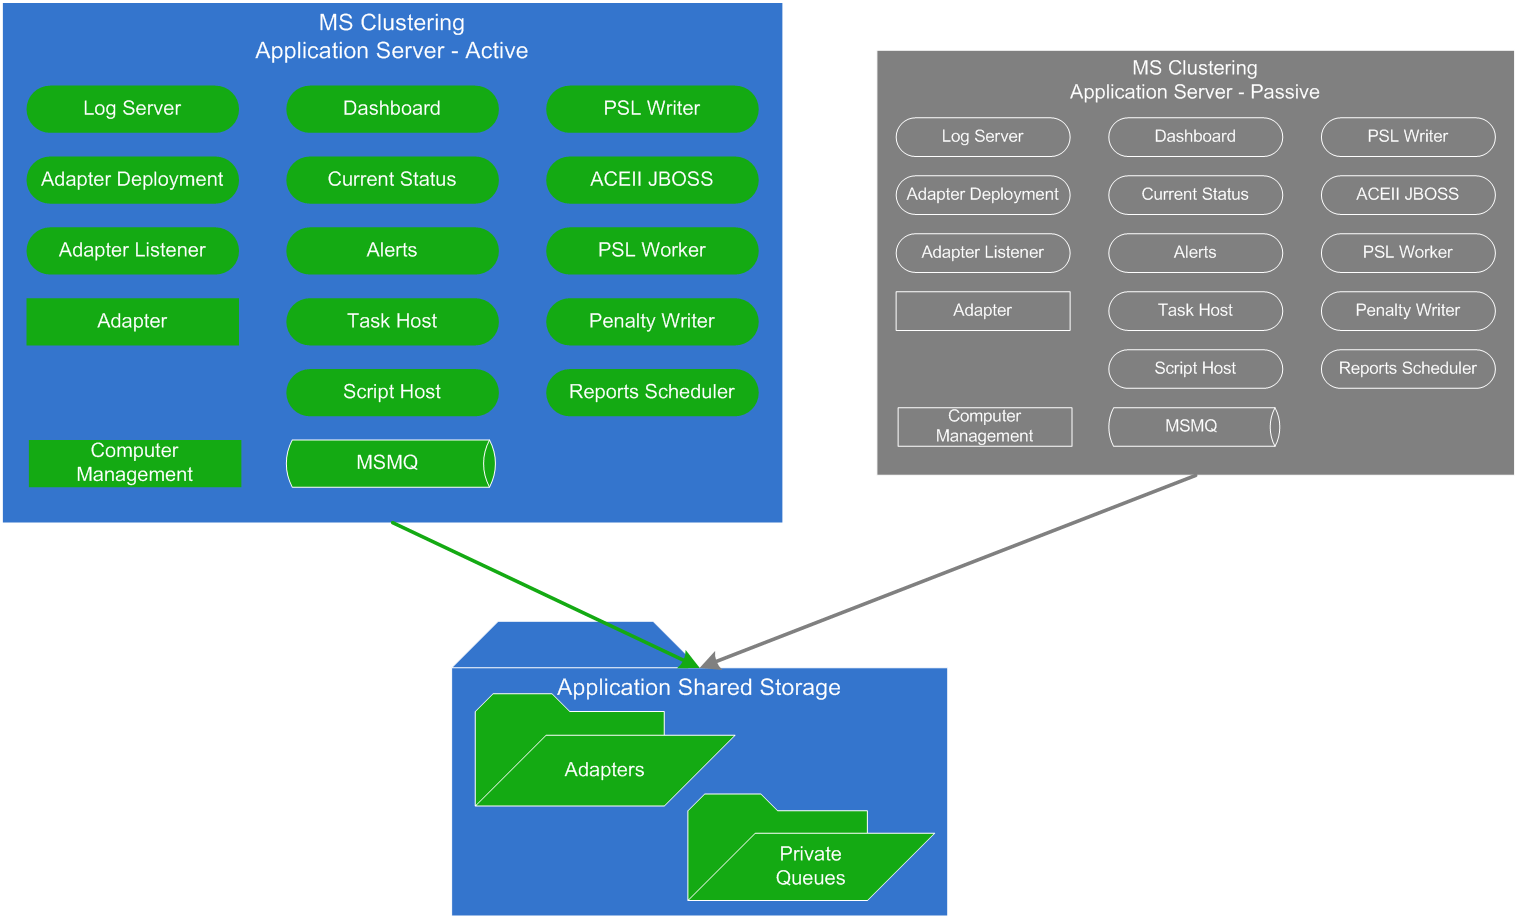
Application Server
The application server is deployed in an active/passive mode. The services on the application server run on only one of the servers at a time. The underlying High Availability infrastructure is configured to perform failover of the services from the active server to the passive server. The shared data in the application server consists of the Adapter configuration, state files, and the MSMQ data files.
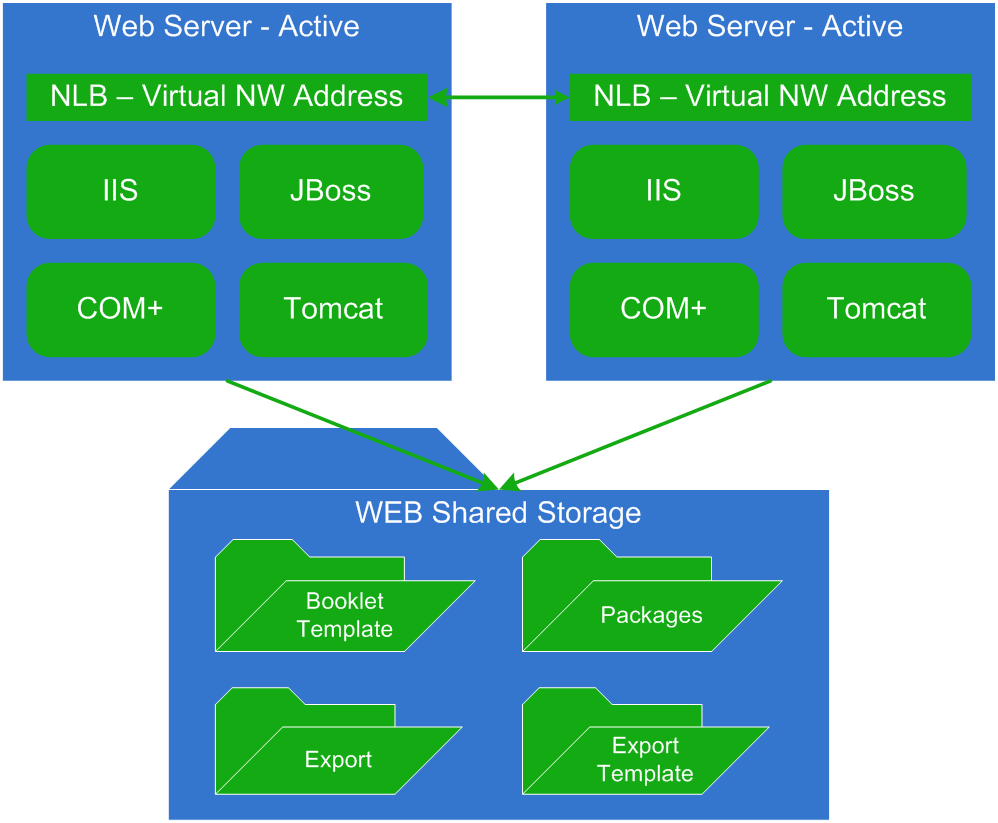
Web Server
The web server is deployed as Active/Active. All web servers are active simultaneously and serve clients as needed. Because the web server stores data in the IIS session, the NW load balancing must use affinity when assigning a web server to the client. Most load balancers support this functionality. The SMI GUI components that run under Tomcat use some of the states that the legacy Oblicore Web Server used.
Use this scenario to guide you through the process:
|
Copyright © 2014 CA.
All rights reserved.
|
|