

This section contains the following topics:
Update the Agent Authentication Key
View and Control Agent or Connector Status
How to Configure Agent Management
How to Protect Agents from Impact of Server IP Address Changes
How to Apply Subscription Updates
Create an Agent Diagnostics File for Support
When planning agent installation, the planner needs to determine how many agents are needed and where to install them. The individual who installs the agents may do this planning or it may be performed by a network administrator or systems architect.
To plan agent installations
|
Event source platform |
Host name or IP address where event source is running |
One of the following: |
Host name or IP address where agent is to be installed |
|---|---|---|---|
|
|
|
|
|
|
|
|
|
|
|
|
Benefit
|
Cost or Limitation
|
|---|---|---|
|
Agentless - Direct from CA User Activity Reporting Module - no installed agent |
No agent installation is required |
Can accommodate collection of only those event sources compatible with the soft appliance platform. Costs of Agentless-Collection point also apply. |
|
Agentless - agent on collection point |
No agent needs to be installed on the host where the event source is running. Consolidating collection to a common point reduces the number of agents that need to be installed compared with agent-based collection. |
Suppression rules can be applied only at the CA User Activity Reporting Module server. This lacks the advantage of reducing network traffic. The communication of events between the source and the CA User Activity Reporting Module server is not encrypted. The event source must be able to be accessed remotely. |
|
Agent-based - agent on end-point |
You can apply suppression rules at the source rather than at the CA User Activity Reporting Module server. This reduces the network traffic between the point of collection and the CA User Activity Reporting Module server. The communication of logs between the source and the CA User Activity Reporting Module server is encrypted. Can accommodate the highest event volume of the three solutions. |
An agent must be installed where the event source is running. |
The EiamAdmin user installs agents based on the determination of the best collection method. Methods evaluated include the following:
The analysis that precedes installation can uncover some of the information needed by the Administrator who configures the agents and connectors.
The first step in configuring agents is to get the agent planning spreadsheet from the EiamAdmin or the alternative used to document where agents are installed. After configuring the first Administrator, the EiamAdmin user provides the Administrator with the annotated agent installation planning worksheet. The first Administrator, in turn, plans the needed connectors for each agent before beginning configuration.
The Administrator configures each agent installed by the EiamAdmin. In addition, the Administrator configures a connector for each event source, regardless of the collection method (agentless-direct, agentless-collection point, or agent-based). The Administrator configures connectors on each agent while logged on to the CA User Activity Reporting Module server which is to receive events from collected by that agent.
Note: The fewer connectors configured on an agent, the better the performance.
An exception to this process is when agent installation is performed silently. In this case, it is the installer who configures the connectors. The connectors configured on an agent enable the agent to collect raw events from specific event sources. The connectors translate raw events to refined events and pass the refined events to CA User Activity Reporting Module.
Creating agent groups is optional. If no custom agent groups are created, agents are assigned to the Default Agent Group. Administrators create agent groups for the following reasons:
Collected event logs are sent to a CA User Activity Reporting Module server for processing and initial storage. Administrators must configure the server that is to receive logs for each agent or agent group. Assigning a server to an agent group is a quick way to assign the server to all agents in the agent group.
The CA User Activity Reporting Module is installed with a default agent that can be used for direct log collection. It is called direct collection because the use of the default agent requires no agent installation. The default agent can collect events from almost any event source, with the following limitations.
You configure the default agent just like you configure a separately installed agent. Direct log collection by the default agent is ideal for a very small system.
CA User Activity Reporting Module provides log sensors that can run on the CA User Activity Reporting Module server to facilitate agentless direct log collection. As of the release of this document, the following are supported:
To determine the integrations supported by the default agent
The Integration drop-down includes the integrations from which you can create a connector for deployment on the default agent. Each integration, on which connectors are based, is designed to retrieve events from a specific event source.
For a complete list of supported log sensors and integrations, see the CA User Activity Reporting Module product page at Customer Support.
Note: A log sensor is an integration component designed to read from a specific log type such as a database, syslog, file, or SNMP.
Agentless log collection can be implemented by installing an agent on a collection server that collects events from multiple remote event sources.
Consider the following when planning the configuration of agentless log collection from a collection server:
After the installer installs an agent on a server with local event sources, Administrators configure a connector on that agent for each locally running event source.
If there are many target servers with the same types of event sources, consider grouping those target servers into an agent group and performing configuration at the agent group level.
Guaranteed delivery can be a problem for direct collection of syslogs. To counter this, configure a syslog listener on an agent installed with the syslog event source.
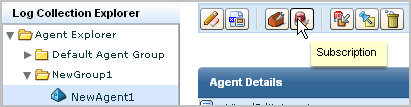
The Subscription, Apply Suppression Rules, and Status and Command options can be selected from various levels. For example, Subscription configuration can be initiated from the following levels:
To configure an option so that it applies to all agents in all groups, select Agent Explorer and then click the button for the action you want to perform.

To configure an option so that it applies to all agents in a selected group, select the group name and then click the button for the action you want to perform.

To configure an option so that it applies to just one agent, select the agent and then click the button for the action you want to perform.
The Agent Explorer lets you view and manage the event collection agents in your environment. You can use the Agent Explorer interface to perform management tasks in the following areas:
You can view and update the key used by agents to register with the CA User Activity Reporting Module server. Changing this key regularly helps prevent unauthorized agents from being installed in your environment. By default, the key is the same for all CA User Activity Reporting Module servers across application instances. However, you can set this key to be unique by application instance.
The agent installer must enter this agent key as the Authorization Code in the agent installation wizard.
To update the agent authentication key
The Log Collection folder list appears.
Agent management buttons appear in the details pane.
The Agent Authentication Key pane appears.
A success confirmation message appears.
You can download agent binaries and install them on your local computer without using other installation media.
To download agent binaries
The Log Collection folder list appears.
Agent management buttons appear in the details pane.
The Agent Binaries List appears, showing the available agents and their current versions.
The download dialog appears.
The file is saved in the chosen location, and a confirmation message appears.
You can configure an installed and registered agent after you access it in the Agent Explorer.
To configure an agent
The Log Collection folder list appears.
The folder expands, displaying Agent Group folders.
Agent details appear in the details pane.
Defines the user name under which the agent runs.
Sets the port the agent uses to communicate with CA User Activity Reporting Module.
Defines the group to which the agent belongs.
Sets the maximum number of files that can be created in the event reception file queue. The Max Number limit is 1000 files.
Sets the maximum size, in MB, for each file in the event reception file queue. When a file reaches the maximum size, CA User Activity Reporting Module creates a new file. The Max Size limit is 2048 MB.
Defines which of the following transmission styles the agent uses:
Sets the agent to use AES128 to encrypt the events it transmits. Enabling event encryption will affect performance.
Sets the agent to send events only in a certain time span. Selecting the Enable Dispatch Sending check box displays Start Time and End Time fields. Enter the GMT time values you want in 24-hour clock format, with the following qualifications:
Sets the agent to replace the IP address of an event source with the hostname of the event source. All the connectors within the agent inherit this feature. If you want to enable the feature for all the agents in your environment, configure each agent separately. If you enable this feature, CA User Activity Reporting Module replaces the IP address with the hostname for the following CEG fields:
Controls the CA User Activity Reporting Module servers to which the agent routes events, and the order in which they are contacted. You can use the shuttle control to select available servers and the arrow buttons to the right of the selected servers to set communication priority.
Note: Update your CA User Activity Reporting Module servers before you update agents. CA User Activity Reporting Module servers support agents at or below their current version number. To help ensure proper storage of collected events when you configure or update agents, verify that the agent sends events only to CA User Activity Reporting Module servers whose level is the same as the agent or higher.
Agents use a configuration file stored in memory when they are running. If someone tampers with a configuration file while the agent is running, the agent does not use the tampered file. When an agent receives a new configuration from the CA User Activity Reporting Module server, the agent replaces the disk file with the received file before restarting. In this way, a tampered file is automatically replaced with the correct file.
If someone restarts the agent from external source after tampering with the file, the Agent detects that the file is tampered and shuts down. The agent does not accept any configuration data, including from the CA User Activity Reporting Module server list from the tampered file.
The Agent Explorer shows the agent as not responding. Use the CA User Activity Reporting Module server status and command tools to reset the agent configuration. The agent resumes working properly after this action.
You can view the agent dashboard to view the status of agents in your environment. The dashboard also displays details such as the current FIPS mode (FIPS or non-FIPS), and usage details. These include events per second load, CPU percentage use, and most recent update date and time.
To view the agent dashboard
The Log Collection folder list appears.
Agent management buttons appear in the details pane.
The agent search panel appears, displaying status for all available agents in a details chart. For example:
Total: 10 Running: 8 Pending: 1 Stopped: 1 Not Responding: 0
A list of agents meeting your search criteria appears, displaying information including:
You can monitor the status of agents or connectors in your environment, restart agents, and start, stop, and restart connectors as needed.
You can view agents or connectors from different levels of the Agent Explorer folder hierarchy. Each level narrows the available view accordingly:
You can determine the FIPS mode (FIPS or non-FIPS) for an agent from all three levels.
To view agent or connector status
The Log Collection folder list appears.
Agent management buttons appear in the details pane.
The status panel appears.
The agent or connector search panel appears.
A details chart appears, displaying status for agents or connectors that match your search. For example:
Total: 10 Running: 8 Pending: 1 Stopped: 1 Not Responding: 0
Note: If you update the configuration of an agent, CA User Activity Reporting Module requires a maximum of five minutes to synchronize the updated status of this agent with the other agents in a federation.
Note: You can click the On Demand button for an agent or connector to refresh the status display.
You can create an agent group to organize your agents by location, operating system, or any other convenient category. The process of creating an agent group using the Agent Group wizard has the following steps:
To create an agent group or edit an existing one, open the agent group wizard.
To open the agent group wizard
The Log Collection folder list appears.
Agent management buttons appear in the details pane.
The agent group wizard appears.
When using the wizard:
You can add identifying details to your agent group.
To add agent group details
Servers matching your search appear in the Available area.
If you click Save and Close the group is created, otherwise the step you choose appears.
You can add agents to a group for administrative purposes. For example, you might create groups by geographical region or operating system.
Note: The properties of an agent group apply to all the agents in that agent group.
To add agents to a group
Agents matching your search appear in the Available Agents area.
Note: You cannot move an agent into an agent group that does not have configured CA User Activity Reporting Module severs.
The agent group appears in the list.
Note: If you delete an user-created agent group, the agent within this agent group are moved into the Default Agent Group, and the agents inherit the properties of the Default Agent Group.
You can configure your agents or agent groups to report to different CA User Activity Reporting Module servers in your federated environment. This lets you configure groups or agents to send event information to chosen CA User Activity Reporting Module servers.
The process of configuring agent management using the assign Log Manager Servers wizard has the following steps:
To configure agent or agent group assignments, open the assign Log Manager Servers wizard.
To open the assign Log Manager Servers wizard
The Log Collection folder list appears, displaying agent management buttons in the details pane.
The assign Log Manager Servers wizard appears.
When using the wizard:
To assign agents to a server for event reception and archiving purposes, you must choose which agent or group to assign to a specific CA User Activity Reporting Module server.
To select target agents
You must choose which CA User Activity Reporting Module server you want to assign agents or agent groups to.
To select log manager servers
The agents or grouped agents are assigned to the servers you selected.
When you install an agent, you assign a primary CA User Activity Reporting Module server for the agent to contact first with collected events. When you configure an agent, you add other CA User Activity Reporting Module servers in an ordered list. When an agent that is ready to send collected logs to the primary server cannot reach it, the agent contacts each secondary server in the list until it finds an available one. Configuration of an ordered list of secondary servers guarantees log delivery from agent to server. An agent can send events to only one CA User Activity Reporting Module at a time; that is, there is no event duplication.
When the servers that you select to manage an agent are assigned new IP addresses, the ability of the agent to forward collected events to a server on its list can be impacted. By taking precautionary steps, you can help ensure that servers remain highly available to the agents that use them, even when these servers undergo manual or dynamic reassignment of their IP addresses.
The IP address of an installed CA User Activity Reporting Module could change in the following cases:
The CA User Activity Reporting Module server in a single-server system is configured to have DHCP assign its IP address. At some point after this server is selected to manage agents, DHCP assigns it a new IP address. This can occur when the CA User Activity Reporting Module is offline long enough for the IP address lease to elapse. No user notification is required when IP addresses are dynamically changed.
The CA User Activity Reporting Module servers are configured with static IP addresses. Due to a site process where IP addresses are reassigned as part of deploying a new subnet, new IP addresses are manually assigned to the CA User Activity Reporting Module servers.
Take appropriate action to ensure high availability of servers to agents, when those servers' IP addresses are subject to change.
If you select DHCP when installing a single-server CA User Activity Reporting Module, specify the hostname (not the IP address) of that CA User Activity Reporting Module when installing each agent. This will ensure that any DHCP-reassignment of the IP address of the CA User Activity Reporting Module server will not impact the agents that use it.
If you specify the IP address of the CA User Activity Reporting Module server when installing the agents and that dynamic IP address changes, you will need to reinstall the agents to restore the availability of the single-system CA User Activity Reporting Module server. To avoid this potential problem, we recommend you install an additional CA User Activity Reporting Module server and add it as a secondary server for all agents. This will ensure high availability of servers.
If you install the CA User Activity Reporting Module servers with static IP addresses and later plan to renumber them, use the following workflow to ensure continuous high availability to the agents with these servers on their ordered lists. It is not necessary to restart the agent after any step since the agent refreshes its configuration information every 5 minutes by default.
Important! If the agent is configured with only one CA User Activity Reporting Module server in a multi-server system, be sure to add a second server to the ordered list before assigning new IP addresses. If this is not done, you may need to reinstall and reconfigure the agent after the server IP address assignment to reinstate the server's availability.
To ensure that agents can reach a CA User Activity Reporting Module server on their ordered list during a reassignment of static IP addresses to servers
The Assign Log Manager Server wizard appears with the Select Targets step selected.
Note: You can manually restart the agent to refresh the information immediately.
Note: In the case where you added a temporary server, you can retain it for failover purposes or you can uninstall it and then delete it.
You can apply CA subscription updates to agents or connectors. The process of applying subscription packages using the Updates List wizard has the following steps:
Note: If there are agent and connector updates, you must apply the agent updates first in order for the update to be completed properly.
To update agents or connectors to the latest version, open the updates list wizard.
To open the updates list wizard
The Log Collection folder list appears.
Agent management buttons appear in the details pane.
The updates list wizard appears.
When using the wizard:
You can check for available updates by specifying search criteria for candidate agents or connectors.
To select agents or connectors for update
The Updates Selection List appears.
Note: If there are agent and connector updates, you must apply the agent updates first in order for the update to be completed properly.
Update packages matching your search qualifications appear in the next wizard step, Version Selection. You must advance to the Version Selection step to view and apply them.
You can compare the version of each listed agent or connector with the downloaded update versions to determine whether an update is needed, and then specify whether to replace the current version with a different version.
To update agents or connectors
The list of agents or connectors meeting your search criteria appear
The agent installs the updates, replacing the current version with the selected agent or integration update.
Note: You can verify that all agents or connectors have the latest version applied by reviewing these details after the selected updates have been applied.
You can review the log files and configuration files of a selected CA User Activity Reporting Module agent. The AgentDiagnostics utility packages system information and log files into a compressed .tar file for transmission to CA Technologies Support personnel. You can transfer this file using FTP or another file transfer method.
Note: Some of the information in the resulting file can be sensitive, for example, IP addresses, system configurations, hardware logs, and process logs. Use a secure method for storing and transporting this file.
To create an agent diagnostic file
Default path in Windows: C:\Program Files\CA\elmagent\bin
Default path in UNIX/Linux: /opt/CA/ELMagent/bin
An agent diagnostic file is created with the file format agenthostname_DDMMYYYY_HHMM.tar.gz.
|
Copyright © 2014 CA Technologies.
All rights reserved.
|
|