

Use the External Filter/Class Manager to modify an External Filter.
To modify an existing External Filter
You are connected to the Host and that Host is highlighted in the Host List.
The External Filters/Classes Manager dialog is displayed.
The External Filter you want to modify is listed in the Available Filters pane.
Note: Modify is enabled only when an External Filter is selected in the Available Filter pane.
Note: External Filters must have a Source Object to be valid. You cannot create an External Filter without specifying a Source Object if you are using the External Filters/Classes Manager. However, External Filters are stored in a PDS and it is possible for users to write a filter directly to its member. Such filters might not contain a Source Object. If you are using the External Filters/Classes Manager to modify an External Filter that does not contain a Source Object then an error message is displayed when you click Modify and the modify process stops. The syntax of the External Filter must be corrected manually in the PDS member. For more information, see the CA Vantage SRM Reference Guide.
The External Filters/Classes Manager Modify dialog is displayed. The following is an example of the External Filters/Classes Manager Modify dialog showing the NEWNAME External Filter:
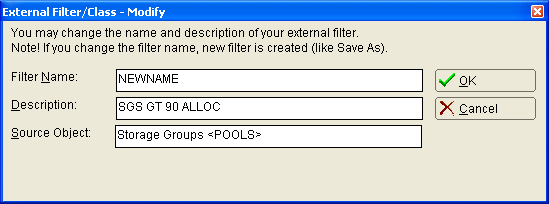
Note: If you change the Filter Name, a new External Filter is created with the new name using the existing External Filter as a template.
Observe the following:
The External Filters/Classes Manager Modify dialog closes and the External Filters/Class dialog is displayed.
Note: For more information about filter expressions, see the section Defining a Filter.
The External Filter/Class dialog closes and a confirmation dialog is displayed.
The confirmation dialog closes and the External Filters/Classes Manager dialog is displayed.
|
Copyright © 2013 CA.
All rights reserved.
|
|