

Integrating with BMC Remedy › How to Configure a BMC Remedy Integration › How to Configure BMC Remedy Integration Components › Configure Processes for BMC Remedy Integration
Configure Processes for BMC Remedy Integration
You configure the processes by which CA Process Automation communicates with CA SOI and BMC Remedy. This configuration requires the CA Remedy Gateway.xml and ITPAM-Remedy_Custom Operators.xml files included with the CA SOI installation media.
Follow these steps:
- Follow these steps for CA Process Automation r3.1 or go to Step 2 for CA Process Automation r4.0/4.1:
- Click CA Process Automation Client at the upper right of the CA Process Automation Management Console.
A JNLP application starts and the Process Automation Client displays.
- Select File, Open Configuration Browser.
- Expand Default Environment in the Browser pane and double-click Orchestrator.
The Folders pane displays on the left and an empty Environment pane displays on the right.
- Continue with Step 3.
- Click the Library tab.
- Right-click the root folder in the Folders pane and select Import.
A page opens for selecting a file to import.
- Locate the CA Remedy Gateway.xml file on the CA SOI installation media at Disk1\Integrations\ITPAM-Remedy\ITPAM_Server_Files and click Open.
The Import Object page displays.
- Select the Set imported version as current check box to make the object current and click OK.
The processes are imported and the CA Remedy Gateway folder displays in the Folders pane.
- Repeat Steps 3-5 and import the ITPAM-Remedy_Custom Operators.xml file located on the CA SOI installation media at Disk1\Integrations\ITPAM-Remedy\ITPAM_Server_Files.
The Custom Operators folder displays in the Folders pane.
- Select the CA Remedy Gateway folder.
The imported integration processes display in the Default Environment pane.
- Double-click the \CA Remedy Gateway\ITSM\CreateITSMTicket (for the ITIL Remedy version) or the \CA Remedy Gateway\HelpDesk\CreateHelpDeskTicket (for the non-ITIL Remedy version) process and click Edit User Preferences at the bottom-left of the screen..
- Select all options except for "Default to horizontal line orientation" on the Configuration tab, select the Palette Properties tab and enter 12, and click OK.
- The process for CA Process Automation r4.0/4.1 looks similar to the following graphic. The functionality of the CA Process Automation r3.1 flow is the same but the icons are different.
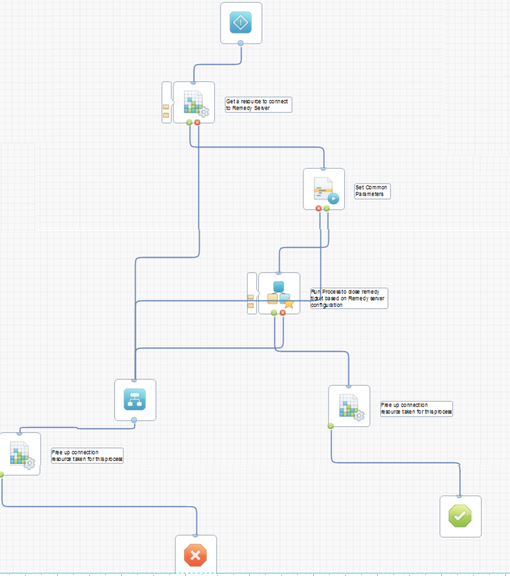
Note: If any  icons display in the process, the required CA Process Automation Remedy connector is not installed properly. For more information about reinstalling connectors, see Reinstall Connectors.
Copyright © 2013 CA.
All rights reserved.
|
|