

Creating Table Procedure Specifications › Define a Table Procedure Specification › Select the Entry Record
Select the Entry Record
After you complete the SQL Options tab, Quick Bridge displays the Entry Record tab. The entry record describes the first record in the primary path that leads to the target record.
To select an entry record
- Select a record from the drop-down list box. The entry records that Quick Bridge displays in the drop-down list box either have a CALC-key or are members of a system-owned indexed set.
- Optionally, select the fields that define a unique key for the record. The unique key can be the CALC key, index key, or any other combination of fields. If you do not specify a unique key, CA IDMS accesses the record sequentially. To perform insert operations, you must select a unique key, unless the set that connects the target record with the last path record is not automatic.
- Click Include to include the selected field names. Each field name appears under the Unique Key Field Name column along side an SQL column name, which you can change to anything you like. For information about SQL column naming conventions and editing, see Editing SQL Column Names.
- Click Next to add more records to the primary path or Target if the entry record is also the target record of the table procedure. Click Remove if you want to change the basic options you selected in the SQL Options tab.
In the following screen, the DEPARTMENT record is the entry record for the EMPEXPT table procedure specification. The CALC key for the DEPARTMENT record is the DEPT-ID-0410 field, so it is selected as the unique key field name for the entry record:
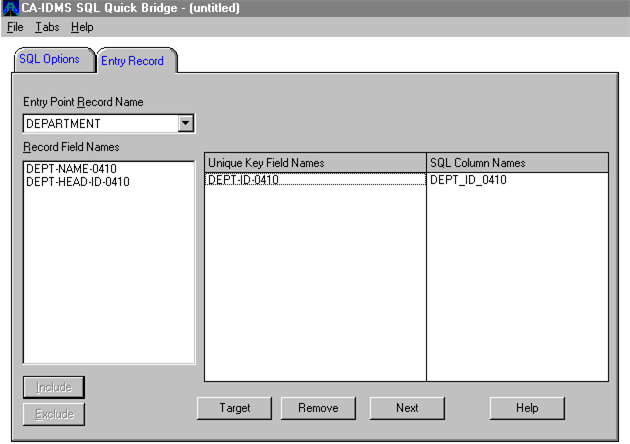
NOTE: Notice that Quick Bridge automatically replaces hyphens with underscores in the SQL column name.
Copyright © 2013 CA.
All rights reserved.
|
|