

Setting up the ENS Components › Using the DECwindows Interface to the Configuration Editor › Add Scans
Add Scans
See the chapter Understanding ENS for information about scans.
To add a scan
- Start the configuration editor as shown in Chapter 10, “Understanding ENS.”
- Pull down the Edit menu and choose the Scan Profile / Create submenu. This displays the Scan Name dialog box.
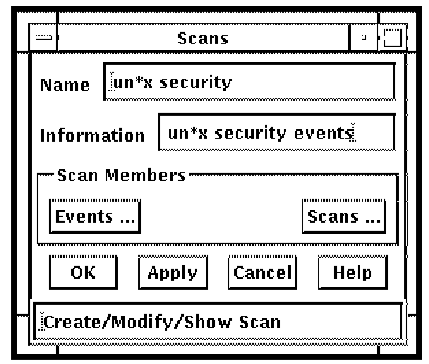
- Click the space provided for the name of the scan and enter a name. For example, un*x security.
- Click OK. This displays the Scans dialog box as shown in the following figure.
- Complete the fields in the dialog box as follows using the following table to help you.
- Enter a description of what the scan does in Information. For example, un*x security events.
- To add events to the scan, click Events ... This displays a selection box with two columns, Selected Events and Available Events, as shown in the following figure. Click the events you wish to add to the scan from the list of available events on the right side of the dialog box. For example, un*x security. These events will then be transferred into the column displaying the selected events on the left side of the dialog box.
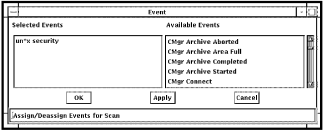
- Click OK.
- To add additional scans to the scan, click Scans ... This displays a selection box with two columns, Selected Scans and Available Scans, as shown in the following figure. Click the scans you wish to add from the list of available scans on the right side of the dialog box. For example, Interactive Logins and Non-interactive Logins. These scans will then be transferred into the column displaying the selected events on the left side of the dialog box.
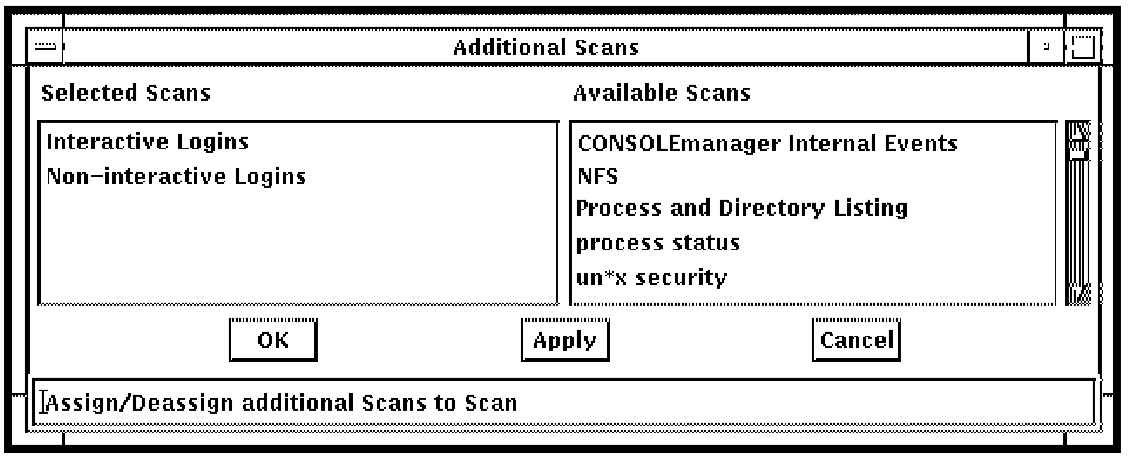
- Click OK.
- When you have finished, click OK in the Scans dialog box.
- Continue to enter other scans, if you wish.
Copyright © 2010 CA.
All rights reserved.
|
|