

Deploying the appliances creates preconfigured virtual machines on your VMware ESX Server. To deploy the CSDP platform, use the OVF templates that are provided in each appliance.
Appliances include:
Note: To enter the specific values that are required during the deployment process, use the Server Access Credentials worksheet.
Deploy the OVF templates in the following sequence:
Important! Install the templates in the order that is specified in this guide because the deployment and configuration are interdependent. We do not support any deviations from the following deployment and configuration procedures. These procedures also assume that you have the required infrastructure and non-CA Technologies software installed.
Important! We recommend that you verify appliances in the order you deployed them during the implementation process.
Follow these steps:
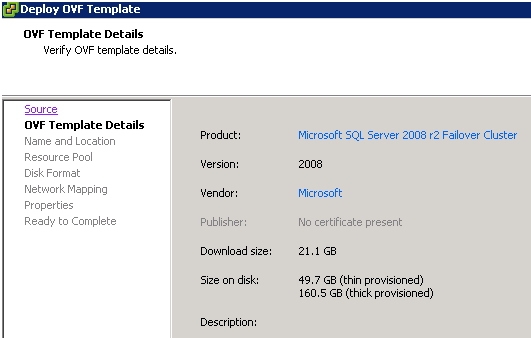
Example: Failover Cluster\Microsoft SQL Server 2008 r2 Failover Cluster.ovf
The OVF Template Details page displays the details that are stored in the OVF template such as the download size, available disk size, and vendor name.
The Name and Inventory Location page lets you add a name to identify the OVF and specify the datacenter where you want to provision the server.
Note: The default name that is displayed in the Name field is from the OVF Template Details page. We recommend using the default name for the template.
The Host / Cluster page displays the available clusters.
The Resource Pool page opens.
Note: If the vSphere Client is connected to an ESXi host, the Resource Pool page does not appear.
The Disk Format page opens.
Important! For the SQL Server cluster, if you are not able to select Thick Eager Zeroed then, select Thin Provision when deploying the database. For more information on how to update the drives, see section Configure SQL Server Disks.
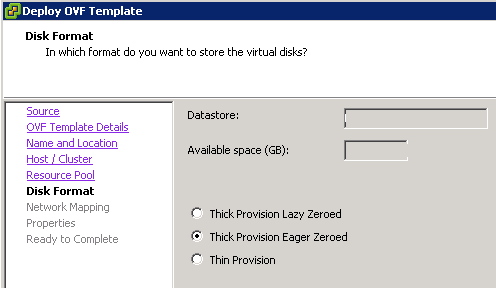
Note: If you are using the earlier versions of VMware vSphere Client, select Thick provisioned format.
The Network Mapping page opens.
For more information, see Create a Private Heartbeat Network. The Private Network must be accessible only to the SQL servers in the SQL cluster. Do not use this network for any other deployment.
The Properties page opens to customize the vApp parameter for this OVF template. This page contains the Host settings.
Note: You can specify the values after you deploy the appliances and before you power it on.
The Ready to Complete page opens and displays a summary of the details you entered in the previous pages.
Important! Do not select Power on after deployment.
Click Finish.
Note: For more information about configuring Microsoft SQL Server, see Configure SQL Server Disks.
The deployment of CA CSDP is complete.
Important! Verify that the appliance is up and running before you power on the next appliance.
Note: While you log in for the first time if, you see a message asking to reboot the server click Yes on the message box.
|
Copyright © 2014 CA.
All rights reserved.
|
|