

This section contains the following topics:
Create a User Account for the Agent
Set the Agent Authentication Key
Download the Agent Installation Program
Create a Connector Based on NTEventLog
Configure a Windows Event Source
View Logs from Windows Event Sources
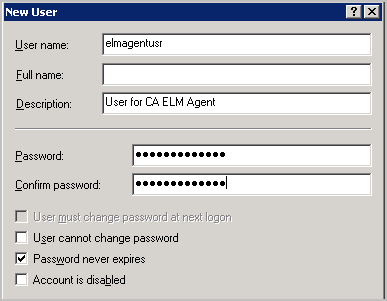
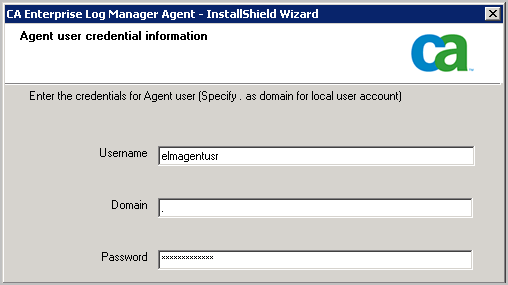
Before installing an agent on a Windows operating system, you create a new account for the agent in the Windows Users folder. The purpose of creating this low-privileged account for the agent is to allow it to run with the lowest possible privileges. You supply the user name and password you create here when you install the agent.
Note: You can bypass this step and specify the domain credentials of an Administrator for the agent when you do the installation, but this is not considered a good practice.
To create a Windows user account for the agent
The Windows dialog, New User appears.
Important! Remember this name and password or record it. You will need to enter it when you install the agent.
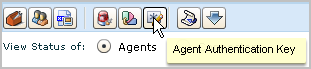
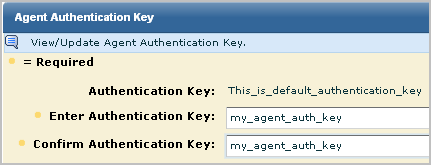
Before you install the first agent, you must know the agent authentication key. You can use the default, if no key has been set, use the current key, if one is set, or set a new key. The agent authentication key configured here must be entered during the installation of each agent. Only an Administrator can perform this task.
To set the agent authentication key
https://<IP address>:5250/spin/calm/
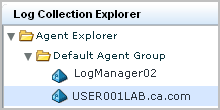
The Log Collection Explorer displays in the left pane.
A toolbar appears in the main pane.
Important! Remember or record this key. You will need it to install the agent.
If you just set the agent authentication key, you are positioned to download the agent installation program onto the desktop.
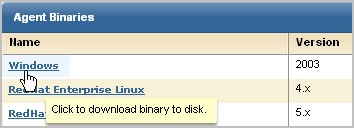
To download the agent installation program
Links for the available agent binaries appear in the main pane.
The dialog, Select location for download by <IP address>, appears.
![]()
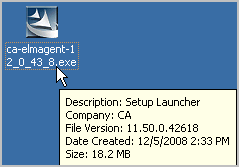
A message showing the progress of the download of the selected agent binary appears, followed by a confirmation message.
The Setup Launcher for the agent installation program appears on the desktop.
Before you begin, have at hand the following:
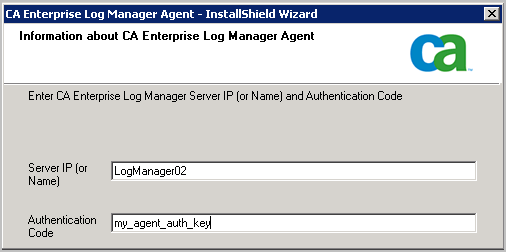
To install an agent for a Windows host

The installation wizard starts.
Note: Since the CA User Activity Reporting Module in this example scenario uses DHCP for IP address assignment, you should not enter the IP address here; doing so introduces the risk of having to reinstall the agent if the IP address of the server ever changes.
An example follows:
The Start Copying Files page appears.
The agent installation process completes.
After connectors are configured, the collected events are sent to the CA User Activity Reporting Module Event Log Store through port 17001.
Important! If you do not allow outgoing traffic from the host on which you installed the agent and you use the Windows Firewall, you need to open this port on your Windows Firewall.
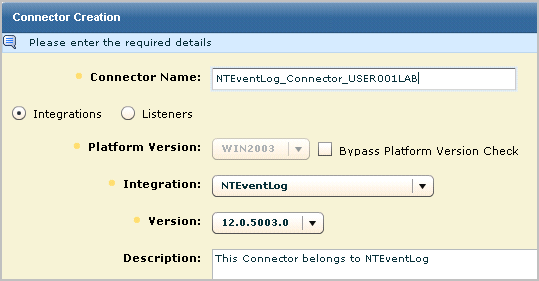
After installing an agent, you create a connector to specify the event sources for the events you want to collect. Since you installed an agent on a server with a Windows operating system, you create a connector based on the NTEventLog integration and specify settings for the WMILogSensor as described in the connector guide you open from the New Connector Creation wizard. You specify the name of the host on which the agent is installed for agent-based log collection. Optionally, you can add another WMI log sensor for this connector and specify a host other than the one where the agent is installed. This enables agentless log connection. The additional host or hosts must be in the same domain and have the same Windows administrator as the first host you added.
To configure a connector based on NTEventLog
The name of the computer where you installed the agent appears.
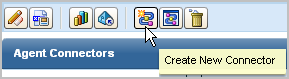
The Agent Connectors pane appears.
The New Connector Creation wizard appears with the Connector Details step selected.
The Connector Name and Description fields are populated based on the selection of Integration.

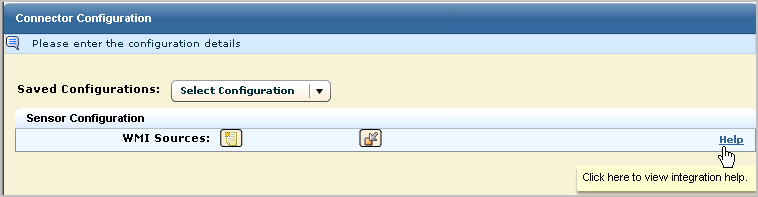
The Sensor Configuration pane appears with a Help button to the Connector guide for NTEventLog, which provides help on the fields for sensor configuration.
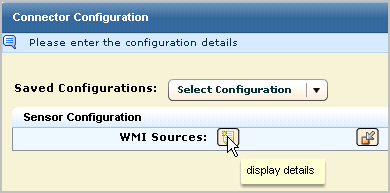
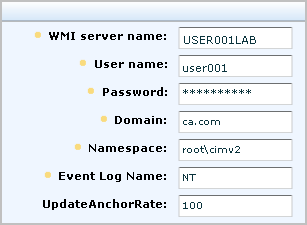
The following example shows a configuration where the user is a Windows administrator on the specified WMI server. The domain is for the WMI server.
The following illustration shows a configuration with two WMI sources.
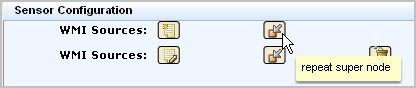
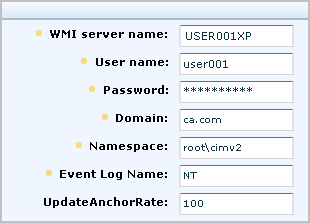
The following example shows a configuration for a second WMI log sensor in the same domain and with the same administrator credentials.
The Status Details pane appears.

The displayed status of the target configured in the connector includes the CPU percentage, memory usage, and average events per second (EPS).
After configuring a connector using the NTEventLog integration on the agent, you should be able to see events through your Event Viewer. If events are not being forwarded to your event viewer, you should change the Windows settings for your Local Policies on the event source.
To configure local policies on the event source for a NTEventLog connector
The Connector Guide for NT Event Log (Security, Application, System) appears.
Note: If your system is Windows Server 2003, select Control Panel, Administrative Tools, Local Security Policy, and then expand Local Policies.
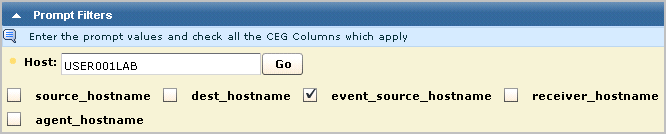
One of the quickest ways to view query results on incoming events is to use the Prompt for Host. You can also select queries or reports.
To view incoming event logs
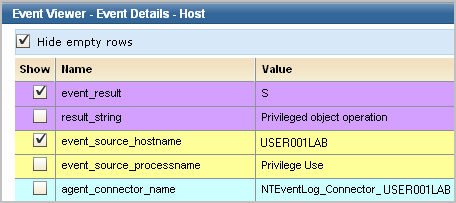
The Queries subtab displays.
Events from the WMI server event sources appear.


Note: See online help or the Administration Guide for details on scheduling reports on information you are interested in analyzing.
|
Copyright © 2014 CA Technologies.
All rights reserved.
|
|