To create a virtual host environment, register the virtual center.
- Open the CA SRM Windows Client main window.
- Select Open Systems, Register, Network Storage, Virtual Host.
The CA SRM Virtual Host Server Registration Wizard welcome dialog appears.
- Click Next.
The Select the Type of Virtual Host Server Data Collection dialog appears.
- Select the Virtual Center.
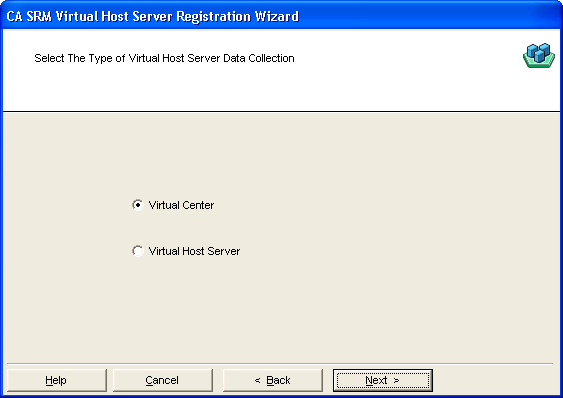
- Click Next.
The Set Virtual Center Details dialog opens.
- Type the IP address of the virtual host server name.
- Type the username of the application host listening for information.
- Type the password associated with the user name.
- Select the Secure Connection check box if you had installed the virtual center in either secured or non secured mode.
- Select the proxy collector from the drop-down list.
The proxy collector is the computer through which CA SRM performs data collection on the host server.
If the proxy collector you want to use is not available in the drop-down list, you have not registered the computer with CA SRM. For more information about registering a computer with CA SRM, see Registering New Objects in the chapter “Managing Network Storage Objects.”
- Specify how often you want CA SRM to perform data collection. Click the Ellipsis button.
The Data Collection Frequency dialog opens.
Use this dialog to set the data collection frequency you want. The default value for data collection is once every day. Click OK to save the settings and close the dialog.
- Click Next in the Virtual Host Server Details dialog.
- Select the check box(s) next to the virtual host servers that you want to manage in the Devices managed by the Virtual Center/Virtual Host Server dialog.
- (Optional) Click Telnet Credentials to set telnet credentials for the selected VHS servers listed in this dialog.
The Telnet Credentials dialog appears.
- Click Next.
The Set Organization and Location dialog appears.
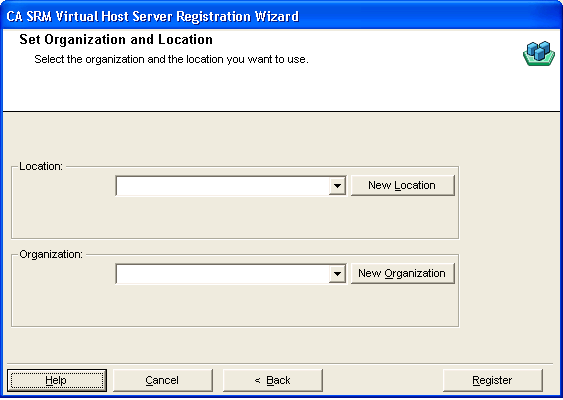
- Edit the fields in this dialog if you want to add a different location, organization, and contact:
- Location-Lets you attach a geographic location to the computer or server. Select a location from the drop-down list. You can also click New Location to add the details of the new location in the Create New Location dialog. Click OK to exit the dialog.
- Organization- Lets you attach organization to the computer or server. Select an organization from the drop-down list. You can also click New Organization to add the details of the new organization in the Create New Organization dialog. Click OK to exit the dialog.
- Contact- Lets you add a contact. Click New Contact to add a contact using the Create New Contact dialog. Enter the name, telephone number, and email address of the new contact. You can access your default address book by clicking the To: Button and select the email address from there.
Note: You can also add new contacts by clicking New Contact in the Create New Location dialog or Create New Organization dialog.
- Click Register to complete the registration.
The CA SRM Virtual Host Server Registration Wizard displays the registration complete message.
- Click Close to exit the wizard.

