

All reports sent to an output destination, as well as Object Log data collected from the host, can be directed to a file server location within your domain. To have reports sent to a file server within your domain you can choose any of the following Destinations or any combinations of the Destinations from the View and Output Destination wizard:
Note: If you want to use Web Publishing to send web style reports to your file server you can do so and the published reports will appear as if you are looking at a web site. When the Web Publishing reports have been published by the Windows Client you can view them by using Internet Explorer to open the published file WebPublishing.htm. For information on how to use Web Publishing to publish to a web server on your domain, see the section Web Publishing to a Web Server.
Important! Using the View and Output Destination wizard, you can type in the full address in the File field however you must not select a mapped letter drive under My Computer for a server on your network, if you select a mapped letter drive under My Computer for a server on your network then you cannot use the Scheduler to schedule output to the file server now or at a later date.
Note: In the following examples PDF type reports has been selected. All the options are similar except Web Publishing.
To send output reports to a server using the View and Output Destinations wizard
Note: If you are going to use Web Publishing to send web style reports to your file server then you should create a new directory for this purpose on your file server. The reason is that the Windows Client is going to send web style files and graphics to this directory and you do not want them to clash with existing files and graphics.
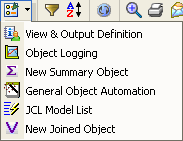
The View and Output Definition wizard is displayed.
A new Destinations page is displayed where you specify where the report should be output to.
The Browse for File to Save in window is displayed.
Note: You must not select a mapped letter drive under My Computer for your file server, if you select a mapped letter drive under My Computer for your file server then you cannot use the Scheduler to schedule output to the file server now or at a later date.
Scroll down to the sub directory where you want the reports sent and select or create the desired directory. In the File name box type in the file name you want the Windows Client to use or use the default file name and click Save. The File (Formatted Report) dialog is displayed showing the full address in the File: box.
Observe the following:
|
Copyright © 2013 CA.
All rights reserved.
|
|