Previous Topic: Modify Mouse-Over Preview FormNext Topic: Modify Notebooks on Detail Form


Modify Data Grid List on List Form

Data grid lists let you view the contents of a product page on a list form without opening a new page. This data-bound control lists items from the data source in a table so you can select items, sort items, and fetch data. For example, the expand and collapse options on the Incident List form.

Follow these steps:

  1. Open a list form.
  2. Locate the blue area after the labeled fields near the end of the form in the Design view. If you prefer Source view, the data grid appears between the following lines of code:
    <PDM_MACRO name=lsStart>
    <PDM_MACRO name=lsEnd>
    

    The following example shows this data grid area in Design view:

    This area of the form lets you modify data grids in the Design view.

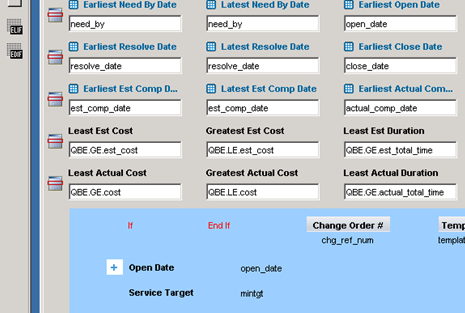
    The plus sign in the data grid area represents the beginning of the expansion section of the row (the fields that are displayed only when a user clicks plus on the row in the list form grid). The following code generates the plus sign in the Source view:

    <PDM_MACRO name=lsCol attr=open_date label="Open Date" sort="DESC" startrow=yes>
    

    The startrow=yes parameter specifies to start a row, and it starts the expansion section of the row.

  3. Drag-and-drop columns to move them in a list. You can move columns between the main part of the row and the expansion section. You cannot move an existing control after the grid area.
  4. To insert a list column, right-click a control or anywhere within the blue background, and select either Insert Column or Insert Control.
  5. Select Tools, Preview to check how the form is displayed to the end user. Although it resembles a standard CA SDM window, and most buttons and menus are functional, it is not a standard session, and you should not attempt to use it that way.
  6. Click File, Save.

    The data grid list is modified on the list form.