

You can populate custom groups manually, by adding managed items that you select. Adding managed items to groups individually can be necessary when you are fine-tuning group structure. However, setting up group rules is usually a more effective strategy.
Important! If you create a group for a CA Infrastructure Management Data Aggregator data source, we recommend limiting group membership to 10,000 items. This count includes the children of managed items. Observing this limit keeps reporting time to less than 10 seconds.
Follow these steps:
The page displays current groups in a tree structure.
Note: System groups appear with a "lock" symbol in the Groups tree to indicate their read-only status. You cannot add items to or remove them from system groups.
If items have already been added to this group, they appear in the right pane.
Note: Items that are added directly to a group as a manual step appear as Direct Items in the Group Properties pane. Items that are added to a group because they are children of a managed item are Inherited Items in the Group Properties.
The Properties page opens.
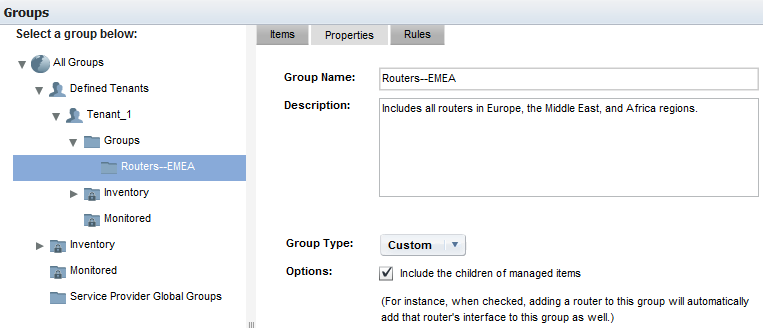
Adds the children of managed items automatically when the items are added to this group. If you disable this option and add a router to the group, the interfaces on that router are not included. Therefore, their data is not visible in drilldown views.
Default: Selected.
The Show Items list appears. It does not apply to groups that do not yet contain members.
The Add Items dialog opens.
The list of items refreshes to show items of the selected type that are available to add to the group.
The available items depend on the item type, the data sources registered, and the items discovered.
To see additional pages of items, click the links below the list. Or use the Search field to search for an item in the list.
The Items tab refreshes to show the new group members, but the Add Items dialog remains open.
The Add Items dialog closes. The Items tab shows the items that you have added.
|
Copyright © 2013 CA.
All rights reserved.
|
|