

The groups that you create while administering a tenant are specific to that tenant. Custom groups are not shared among tenants. Create groups that reflect the unique virtual and physical systems of each tenant in a multi-tenant monitoring environment.
Follow these steps:
Or set the tenant scope to access tenant configuration while logged in as a global administrator.
The Administering Tenant indicator appears to show that you are administering the selected tenant environment.
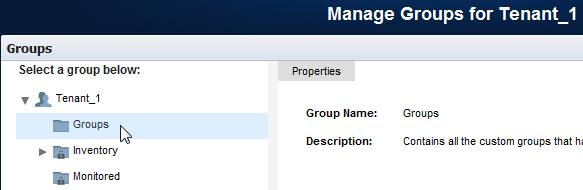
The Manage Groups for [Tenant Name] page opens.
When scoped to a tenant, the top-level node in the Groups tree is a system group automatically created for the tenant. You can add subgroups to this group, but it cannot otherwise be modified.
The Groups tree contains nodes for tenant IP domains and Service Provider nodes for system groups that are shared among tenants at the discretion of the global administrator. The Service Provider groups are read-only to tenant administrators.
The Add Group dialog opens. The New tab is selected by default.
Specifies a name for the group. Do not use the following special characters in group names: /&\,%.
(Optional) Helps you identify the group.
Adds the children of managed items automatically when the items are added to this group. If you disable this option and add a router to the group, the interfaces on that router are not included. Therefore, their data is not visible in drilldown views.
Default: Selected.
The new group appears in the Groups tree under Tenant\Groups. Users who are associated with this tenant only see groups and items in this section. They have no access to groups or items associated with other tenant domains.
The group contains no items until you add them. You have two options for adding items to a custom group:
|
Copyright © 2013 CA.
All rights reserved.
|
|