

If the predefined user roles do not fit your requirements, you can add custom user roles. Ideally, you create the roles that each unique product operator needs to be able to perform his or her job responsibilities.
Custom roles work best within a system of custom groups. Custom groups let you precisely grant access to dashboards and product features while restricting access to sensitive data. The same groups that you create to organize data can serve as “permission groups” when you set up user account permissions.
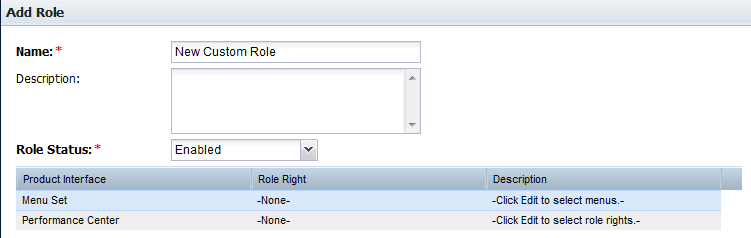
A new role has no rights until you add them. The following graphic shows the Add Role dialog in the CA Performance Center Console with a role that is beginning to be defined.
Follow these steps:
The page displays the current list of roles.
The Add Role dialog opens.
(Optional) Identifies the role. Limited to 45 characters.
(Optional) Describes the role. For example, identifies the job-related duties that the associated user performs.
Enables the role to make it active. Required to give users with this role the access granted by role rights.
The Edit Menu Set dialog opens. Menus in the 'Available Menus' list can be added to the role.
Use Shift + Click or Ctrl + Click to select multiple items.
Each selected item moves to the Selected Menus list.
You return to the Add Role page.
A dialog opens, which you use to select Performance Center access rights.
The access right moves to the Selected Rights list.
You return to the Add Role page.
A dialog opens, which you use to select access rights for CA Network Flow Analysis in the same way you selected access rights for Performance Center.
The new role is created and appears in the Role List.
You return to the Manage Roles page (CA PC) or Roles List page (NPC).
Note: When you finish creating a role, assign it to a user account as a separate step. Roles are inoperative until they are assigned to user accounts. Only users with the 'Administer Users' and 'Administer Roles' role rights can assign roles to user accounts.
|
Copyright © 2013 CA.
All rights reserved.
|
|