

BLOB › Design › Client Design › Layout the window design › Add the pushbuttons and define their actions
Add the pushbuttons and define their actions
Follow these steps:
Next we will add the four push buttons. Three of the four push buttons will have click events associated with them. The fourth push button, cancel, will use a special action.
- From the Menu Bar, click Add, Push Button.
- In the Button Text field enter select image. By default, it Executes the Procedure Step. Click Events.
- In the Event Processing dialog click Add to have it create the Click event. It will be added to the list of events associated with this push button as follows:
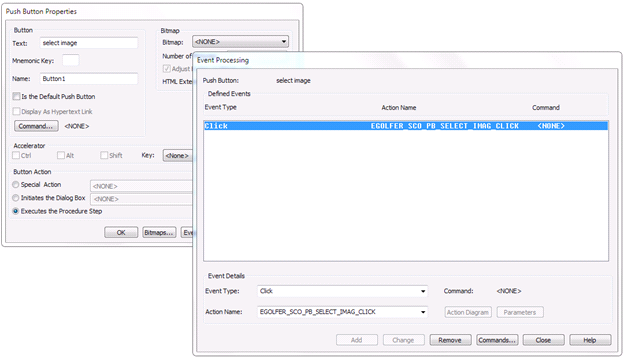
- Click Close on the Event Processing dialog and then OK on the Push Button Properties dialog and place the push button roughly in the location desired.
- Repeat the steps above for the “remove image” push button.
- Repeat the steps above for the “ok” push button.
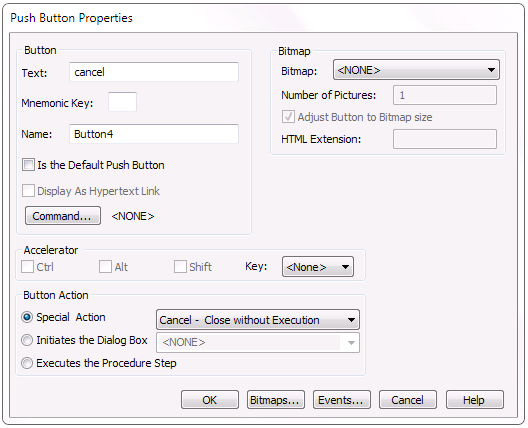
- For the “cancel” push button, on the Push Button Properties dialog for the Button Action property select Special Action and in the dropdown select Cancel – Close without Execution. The push button properties will look as follows:
- Select the OK push button and place it appropriately.
Copyright © 2013 CA.
All rights reserved.
|
|