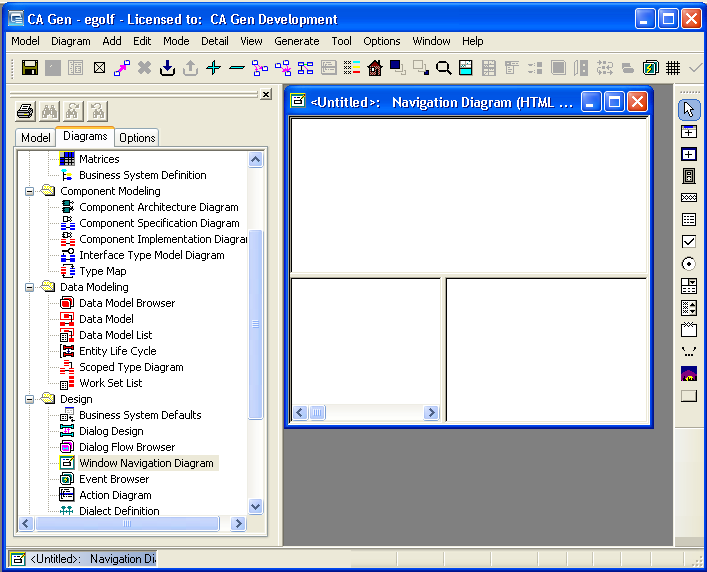

The primary diagram used in client/server design is the Window Navigation Diagram.
Follow these steps:

Note: The Window Navigation Diagram is made up of three panes:
Contains a graphical representation of the client/server system structure. This structure includes the client procedure's windows and dialogs, the server procedures, and the flows between them.
Contains an indented list of essentially the same information that is in the Network Pane.
Lists the specific GUI controls used on a window or dialog selected from either of the other two panes and the specific actions that can occur against those controls.
This Navigation Diagram is <Untitled>. You can have multiple Navigation Diagrams; each diagram would then have a name of your choosing assigned to it. We will name and save this navigation diagram now.
 icon and then (with the crosshairs
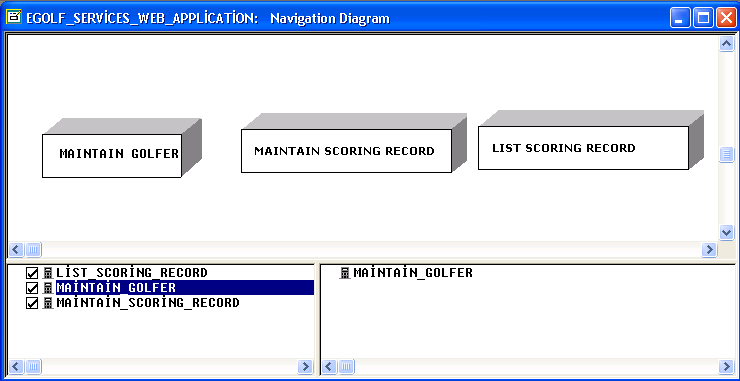
  ) select anywhere in the Network pane. In the Server/Procedure Step Properties dialog, enter maintain golfer in the Server Name entry field and then select the OK push button.
The Toolset adds a three-dimensional box representing the server in the Network pane, as well as an entry in the Hierarchy pane. You will probably find it useful to zoom out  or zoom in
  on the diagram by using the appropriate Toolbar options. You can also resize the panes in the Window Navigation Diagram by moving your cursor over the edges of the pane until it turns into double-sided arrow and then dragging the edge to a different position.
Note: If you have made a mistake in the name, you can select the server, select Detail from the Main Menu, select Properties, and then enter the new name.

You can move objects around in the diagram by selecting the object and then dragging it to where you want it. You can move multiple objects at the same time by selecting each object while holding down the Ctrl key on your keyboard. Then, after selecting the last object, click-and-drag any of the highlighted objects (as a group) to the new location.
|
Copyright © 2013 CA.
All rights reserved.
|
|