

You can add any number of Action Sets to a single site project in the Web Service Access Designer. You need to map the Actions to access the business logic in the WSDL file.
Follow these steps:
The Action displays in an editor in the Editor view.
Note: The Web Services should be already imported. For more information, see Import WSDL Files to Web Services.
Note: You can also drag-and-drop Web Service operations.
The operation is added to the Action Steps in the Editor view.
The parameters' information displays in the mapping tabs. You can navigate to input or output mapping using the Input Mapping and Output Mapping tabs. Be default, the Input Mapping tab is active.

Indicates the name of the parameter. You cannot change the name of the parameter.
Indicates the data type of the parameter. You cannot change the data type of the parameter.
Specifies the mapping style of the parameter. Select any one of the following mapping styles:
None—Identifies that no mapping is required for this parameter. You can choose not to assign a mapping for a parameter. This results in the parameter not being used on the user interface.
Field—Identifies that a request to a Web Service or response from a Web Service is a text field. If the user enters an invalid value for a parameter that has a list of permitted values, then the default value of the parameter is automatically assigned.
Literal—Identifies that a request to a Web Service or response from a Web Service is a value.
Not Set—Indicates that no mapping is required for this parameter.
Table—Identifies that a request to a Web Service or response from a Web Service is a two-dimensional array. Use this mapping style to map fields to columns. You must specify a collection parameter as a Table and define the table through a separate dialog box before you map the child parameters to columns.
Column—When a collection parameter is defined as a Table, you must map the child parameters to columns. Map one parameter to one column. Columns are identified by indices (0-based).
Row—Selects a single row of data from a collection that can be mapped to individual fields in the HTML page. The fields in the HTML page must contain a unique ‘id’ attribute to be mapped.
Defines any data specific to the parameter.
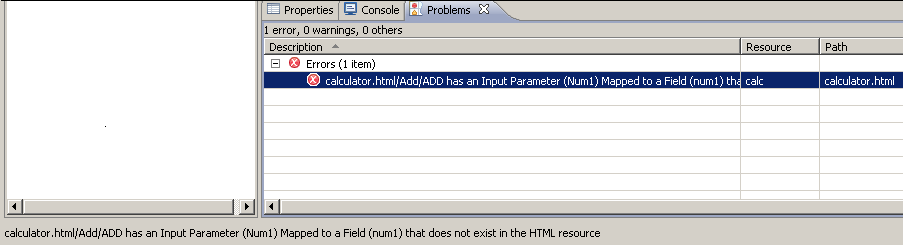
Note: You may see a red X symbol in the Web Service Access Navigator, the action name, or the parameter name in the Editor view. This means that all the parameters showing the red X symbol need to be resolved.
The mapping information will eventually allow the Web Service Access Designer to generate the required XML and XSL files for data access in the site directory.
If you delete an HTML control or rename the ID/name of an HTML control in Adobe Dreamweaver that is mapped in the Web Service Access Designer perspective, an error is displayed in the Problems view.
|
Copyright © 2015 CA Technologies.
All rights reserved.
|
|