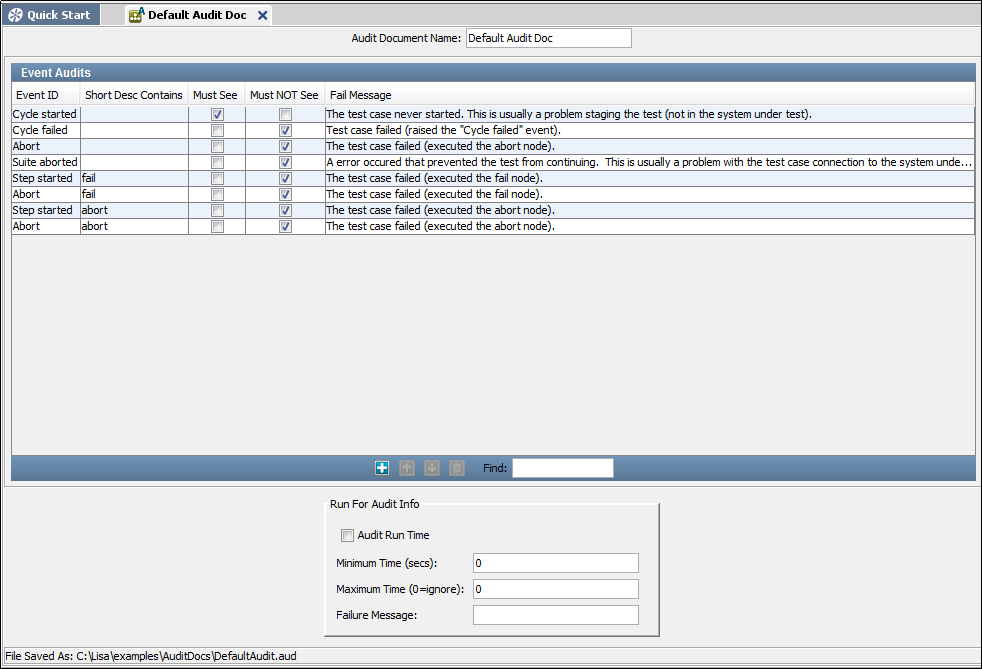

An audit document lets you set success criteria for a test case in a suite.
An audit document can track:
You can specify audit documents in the Base tab of the suite document editor. Be sure to select the Record All Events check box in the Reports tab.
Audit documents are located in the AuditDocs folder of a project. The file extension is .aud.
When you create a project, the AuditDocs folder contains a default audit document with the name DefaultAudit.aud.
Note: When you use audit documents, test step names cannot contain any short description from the audit document that is used in the test. For example, if Abort is a short description in the audit document, then you cannot use the word Abort in a test step name.
The following graphic shows the audit document editor. The editor contains an Event Audits panel and a Run for Audit Info panel.

To create an audit document:
The audit document editor opens.
The Event Audits panel lets you specify events that must occur or must not occur during a test.
To add an event:
Each row has the following parameters:
To filter an event by the value of the short description of the event, enter the keywords from the short description in this column.
Select this check box if the event must occur during the test.
Select this check box if the event must not occur during the test.
If this audit fails, a message to log.
If you try to add event audits that logically conflict with each other, the editor displays a warning message.
You can rearrange rows by clicking Up ![]() and Down
and Down ![]() .
.
You can delete rows by clicking Delete ![]() .
.
The Run for Audit Info panel lets you audit the execution time.
This panel has the following parameters:
To enable the execution-time audit, select this check box.
The minimum time (in seconds) that the test must run.
The maximum time (in seconds) that the test can run and still be considered a successful audit. If there is no maximum time constraint, then enter 0.
If this audit fails, a message to be logged.
|
Copyright © 2014 CA Technologies.
All rights reserved.
|
|