

Getting Started › CA Service Virtualization Tutorial › Tutorial 2 - Record an Android Test Case › Step 6 - Activate Config File
Step 6 - Activate Config File
For DevTest to use the newly created config file as the primary or active config file, activate it.
To activate the config file:
- In the Project panel, right-click the VSRecorder config file.
- Select Make Active.
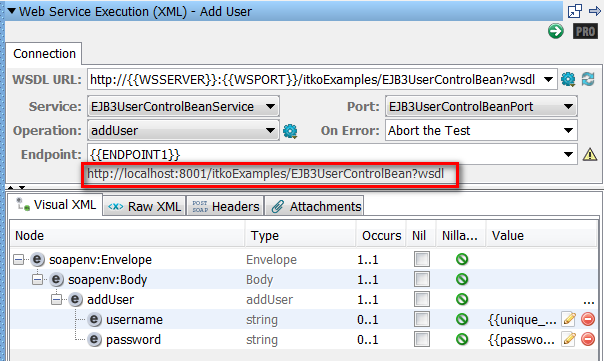
To confirm that the ENDPOINT1 value from the VSRecorder config file is being used:
- Double-click the webservices test case in the Project panel.
The editor opens.
- Double-click the Add User test step and verify that the Endpoint is on port 8001.
- Continue with "Step 7 - Configure the VSE Recorder".
Copyright © 2014 CA Technologies.
All rights reserved.
|
|