

The Windows Client JCL Model List feature helps you manage JCL. The JCL Model List feature provides the same functionality as the Member Editor (Submit) function however it presents your JCL working environment (the Object Table, the Associated JCL Members, the Substitution Variable List, and the PDS Member Editor) in one window so that working with your JCL is much easier.
Note: Currently, the Web Client does not have a JCL Model List feature.
You can use the Windows Client JCL Model List feature to select JCL models to be used by objects or a group of objects using pattern matching. These models can be used to perform actions or mainframe management functions in batch jobs. The models can contain object variables that are substituted upon request or at submit time.
You can start the JCL Model List feature two ways, from the Object Tree Pop‑up Menu or from the object view Toolbar.
To start the JCL Model List feature from the Object Tree pop-up menu in the Windows Client
The Object Tree pop-up menu appears.
The JCL Model List dialog appears.
To start and use the JCL Model List feature from the object view Toolbar
The Object view appears.
The Definitions drop-down menu appears.
The JCL Model List dialog appears. The JCL Model List dialog displays the object data and the list of JCL members associated with that object in separate panes as shown in the following sample:
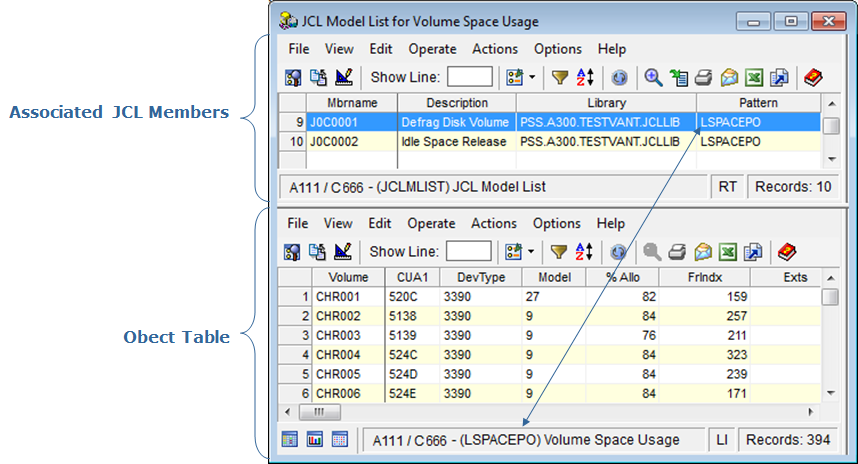
The Object Table pane displays the object selected. You can use the object view menu options in the pane to change the object view, such as sort, filter, zoom, and so on.
The Associated JCL Members pane displays the JCL models you have created and linked to the object selected. You can use the Associated JCL Members Action options to modify the JCL Model information displayed in the pane, add new JCL models, and to delete JCL Models.
Note: For more information about the Associated JCL Members pane, click the menu bar Help option and select Help About Object.
The following sample shows how the JCL Model List displays all 4 panes in the JCL Model List dialog.
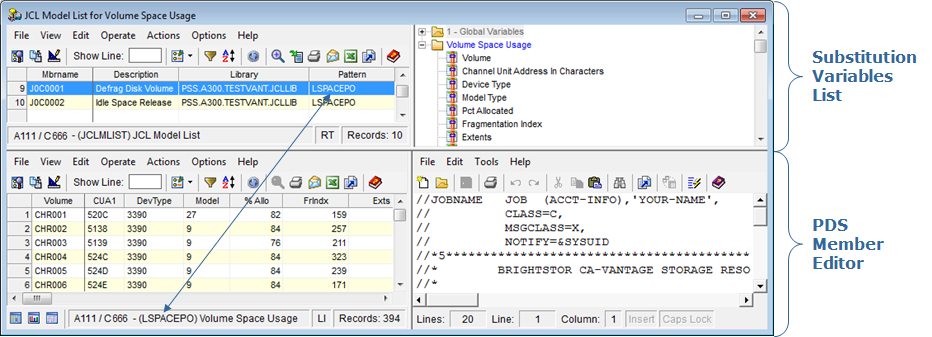
Using the PDS Member Editor pane you can edit the model JCL, create new JCL Models, insert variables, substitute variables with object information, submit the JCL, and so on.
Note: For more information about PDS Member Editor options click the Help option on the PDS Member Editor pane Menu Bar.
The variable appears in the PDS Member Editor pane where you indicated.
Now you are ready to substitute the variables in your JCL with object line information.
When you do this, a new PDS Member Editor dialog is opened with the resulting JCL; that is, the field values from your selected object table lines are substituted into the variable locations in a copy of your JCL model in a new PDS Member Editor dialog.
A message dialog appears advising that your JCL has been submitted.
Note: For more information about working with the JCL Model List, see the CAVantage SRM User Guide.
|
Copyright © 2011 CA Technologies.
All rights reserved.
|
|