

The Color Code option lets you set conditions for color coding values in object Table Views.
Note: The Customize View Wizard in the Web Client provides a row and field coloring feature. For more information, see the CAVantage SRM Web Client Guide.
To color code values in object views in the Windows Client
The View and Output Definition dialog appears.
The Fields dialog appears.
The Color Coding dialog appears. The following Color Coding dialog sample shows how you can select a condition, enter a condition value, and then select a background color for the item that meets the condition.
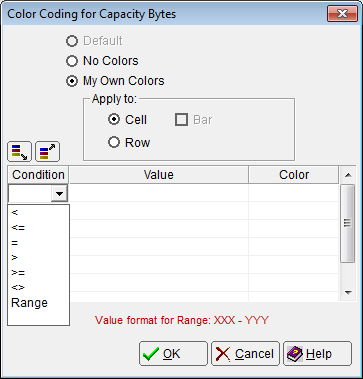
The condition, value, and color code you selected are displayed in the Color Code dialog.
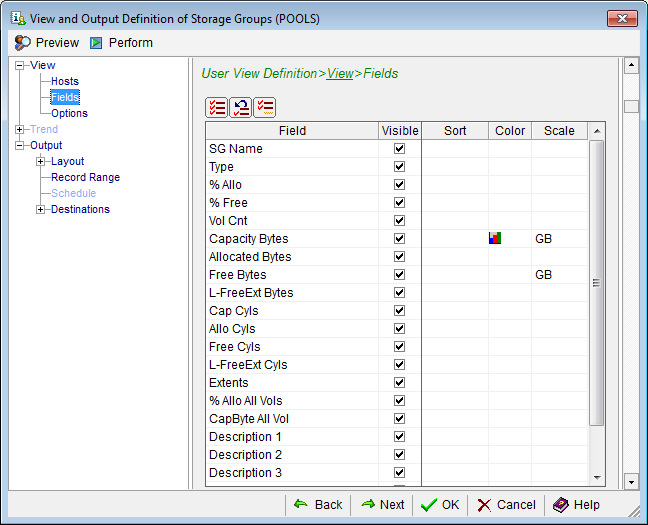
The Color Code dialog closes and the field Color icon (![]() ) appears in the Color cell in the Fields dialog, as shown in the following sample.
) appears in the Color cell in the Fields dialog, as shown in the following sample.
The View and Output Definition dialog closes. The object Table View appears with background of values that meet your conditions color coded.
|
Copyright © 2011 CA Technologies.
All rights reserved.
|
|