

|
|
|
You can perform application level restores of Microsoft SQL Server data with the following:
Note: Before you begin, read the prerequisites in Application Level Restores.
Important! Microsoft SQL Server granular restore is not supported from CA ARCserve Central Host-Based VM Backup backup sessions. To restore Microsoft SQL Server data at a granular level, back up the SQL Server data using CA ARCserve Central Protection Manager or CA ARCserve D2D.
To restore SQL Server data
https://<server name>/<share name>/vm@<host name or IP address of the ESX Server system>
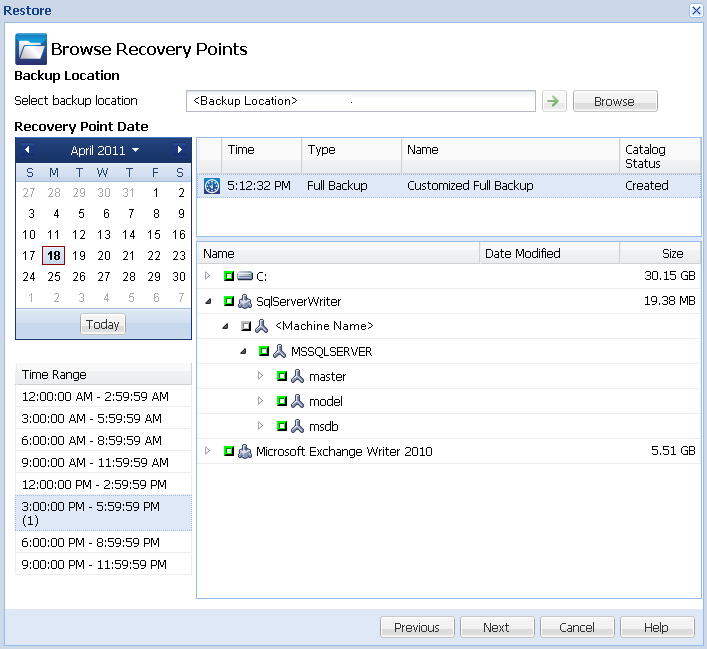
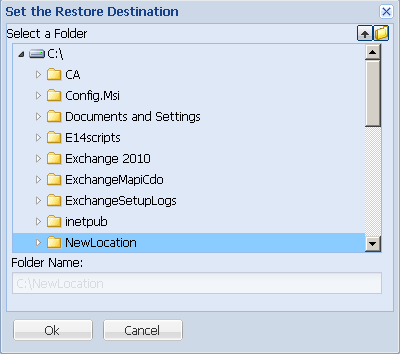
Select the destination for the restore. The available options are to restore to the original location of the backup, restore the dump file only, or restore to an alternate location.
Restores to the original location from where the backup image was captured.
Restores the dump files only.
Dump files are created when an application crashes and contains additional (time-stamped) information that can be used to troubleshoot the cause of the problem.
When you select this option, you can then specify or browse to the folder location where the dump file will be restored to.

Restores to an alternate location (not the original location).

Because backups can be copied to network locations, they can be used by multiple SQL Server instances. Multiple database restore can be performed (simultaneously) from the instance level. From this listing, you can select the database instance and specify a new database name and alternate location to restore the database to. In addition, you can also browse to the alternate location where the database will be restored to.
| Copyright © 2012 CA. All rights reserved. |
|