

This section contains the following topics:
Integrating with CA Access Control
How to Modify CA Audit Policies to Send Events to CA User Activity Reporting Module
How to Configure a CA Access Control iRecorder to Send Events to CA User Activity Reporting Module
How to Import CA Access Control Events from a CA Audit Collector Database
Securing CA User Activity Reporting Module Using CA Access Control
You can integrate CA User Activity Reporting Module with CA Access Control using one of several different release levels. The general approach is the following:
For CA Access Control releases that use a TIBCO message server for routing events, do the following:
Note: These implementations use components that are part of the CA Access Control Premium Editions.
For CA Access Control releases that use selogrd for routing events, do the following:
If you are currently sending CA Access Control events to CA Audit, use of the following methods to get events to CA User Activity Reporting Module:
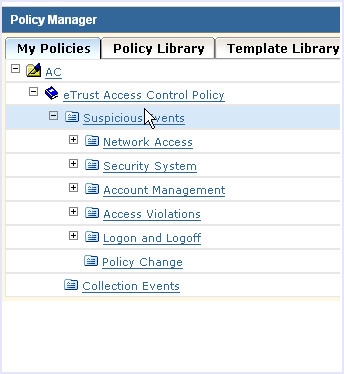
The guidelines that follow use the r8 SP2-series for the Policy Manager user interface. The general procedures are the same when you are using earlier CA Audit releases, though the user interface is different.
The process for modifying an existing CA Audit policy to send events to CA User Activity Reporting Module involves the following steps:
https://<IP_address_of_CA Audit_PM>:5250/spin/auditadmin
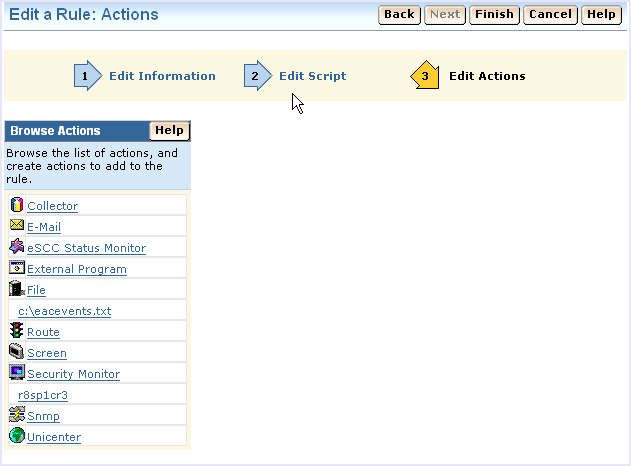
If you plan to create a Collector action, configure the SAPI collector. If you plan to configure a Route action, configure the SAPI router.
Note: The example in this section uses the Collector action.
Repeat this process to add new rule actions to other policy rules, as needed.
Use this procedure to configure the SAPI collector adapter to receive CA Access Control events from a CA Audit implementation.
You can modify CA Audit policies that use Collector actions to send events to a CA User Activity Reporting Module server in addition to, or in place of, sending events to the CA Audit collector database. Configure this service before you modify CA Audit policies to verify that no events are lost.
(You can configure a SAPI Router service in a similar way. If you use both the Router and Collector services, be sure that the ports listed are different, or that the port mapper service controls them.)
To configure the SAPI collector service
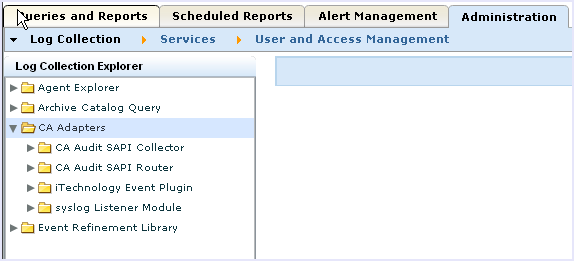
The Log Collection subtab displays by default.
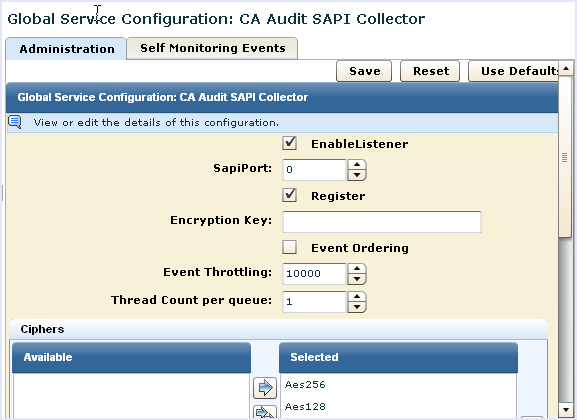
The default CA User Activity Reporting Module value, 0, uses the Portmapper service to map the ports. If you have a port defined in CA Audit, use that setting here.
If you select the Register check box, specify a SAPI port value.
Use this procedure to enable a CA Audit client to send events to both CA User Activity Reporting Module and the CA Audit collector database. By adding a new target to the Route or Collector actions on an existing rule, you can send collected events to both systems. As an alternative, you can also modify specific policies or rules to send events only to the CA User Activity Reporting Module server.
CA User Activity Reporting Module collects events from CA Audit clients using the CA Audit SAPI Router and CA Audit SAPI Collector listeners. (CA User Activity Reporting Module can also collect events using the iTech plugin directly, if you configured any iRecorders to send directly to the CA User Activity Reporting Module server.) Collected events are stored in the CA User Activity Reporting Module event log store only after you push the policy to the clients and it becomes active.
Important: Configure the CA User Activity Reporting Module listeners to receive events before you modify and activate the policy. If you do not do this configuration first, you can incorrectly map events between the time that the policy becomes active and the listeners can correctly map the events.
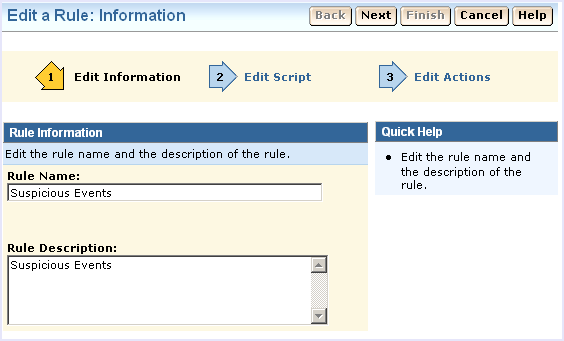
To modify an existing policy rule action to send events to CA User Activity Reporting Module
The rule wizard starts:
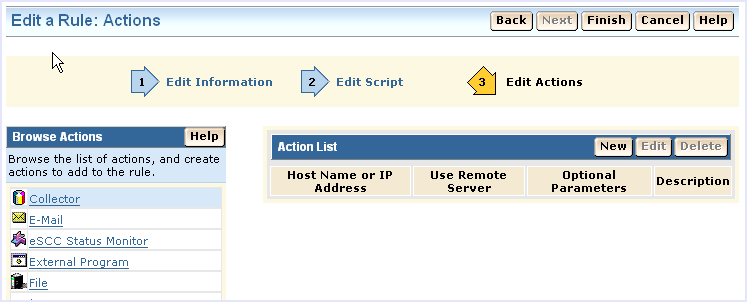
The rule actions page displays:
You could also use the Route action, but the collector action offers the additional benefit of an alternate host name for basic failover processing.
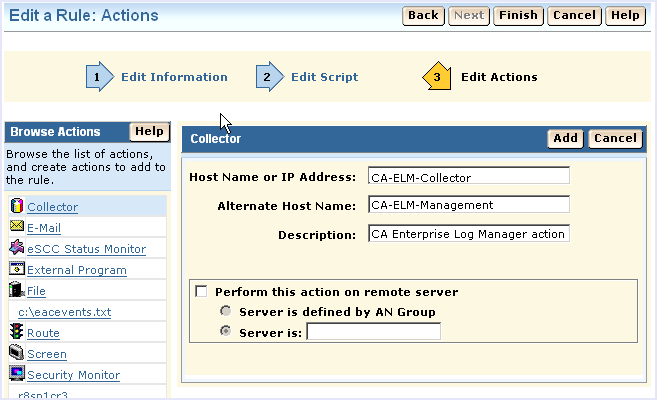
For a CA User Activity Reporting Module implementation with two or more servers, you can enter a different CA User Activity Reporting Module host name or IP address in the Alternate Host Name field. This takes advantage of CA Audit's automatic failover feature. If the first CA User Activity Reporting Module server is not available, CA Audit automatically sends events to the server named in the Alternate Host Name field.
Note: Next you check and activate the policy, so do not log out of the CA Audit Policy Manager.
After you change an existing policy to add a rule action, check (compile) it and then activate it.
To check and activate a CA Access Control policy
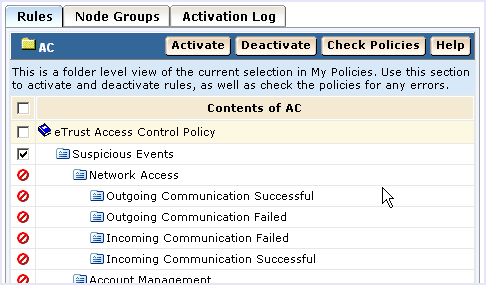
Make any needed modifications to the rule and ensure that it compiles correctly before you activate it.
You can configure a standalone CA Access Control iRecorder to send the events it collects directly to the CA User Activity Reporting Module server for storage and reporting. The process includes the following steps:
Note: iRecorders can send their events to only one destination. When you configure using this procedure, the only destination is the named CA User Activity Reporting Module server.
Before you reconfigure an iRecorder to send events directly to CA User Activity Reporting Module, you need to configure a listener to receive those events.
To configure the listener
You can collect CA Access Control events to send to a CA User Activity Reporting Module server even if you do not have CA Audit installed. When you collect events in this way, you are using an iRecorder in standalone mode. You can obtain an iRecorder from the CA Technologies Support web site.
Note: iRecorders are supported only with CA Access Control r8 and later releases.
To download and install a iRecorder
https://support.ca.com/irj/portal/anonymous/phpdocs?filePath=0/154/cacirecr8-certmatrix.html#caacirec
Use this procedure to configure your iRecorder to send CA Access Control events to CA User Activity Reporting Module.
Important! A standalone iRecorder can only send its events to a single destination. If you configure an iRecorder using the procedure that follows, all of the iRecorders installed on this system will send their events only to the named CA User Activity Reporting Module event log store.
iRecorders that are installed on the same computer as a CA Audit client send events to the client directly. For those servers, you should modify an existing CA Audit policy to add rule actions and after configuring the CA User Activity Reporting Module SAPI collector or router adapters.
To configure the iRecorder to send events to CA User Activity Reporting Module
The following is a sample iControl file with the sections you need to change in boldface type:
<?xml version='1.0' encoding='UTF-8' standalone='no'?>
<iSponsor>
	<Name>iControl</Name>
	<ImageName>iControl</ImageName>
	<Version>4.5.0.2</Version>
	<DispatchEP>iDispatch</DispatchEP>
	<ISType>DSP</ISType>
	<Gated>false</Gated>
	<PreLoad>true</PreLoad>
	<RouteEvent>false</RouteEvent>
	<RouteEventHost>localhost</RouteEventHost>
	<EventsToCache>100</EventsToCache>
	<EventUseHttps>true</EventUseHttps>
	<EventUsePersistentConnections>true</EventUsePersistentConnections>
	<EventUsePipeline>false</EventUsePipeline>
	<StoreEventHost max="10000">localhost</StoreEventHost>
	<RetrieveEventHost interval="60">localhost</RetrieveEventHost>
	<UID>ef1f44ef-r8sp1cr3596a1052-abcd28-2</UID>
	<PublicKey>Public_Key_Value</PublicKey>
	<PrivateKey>Private_Key_Value</PrivateKey>
	<EventsToQueue>10</EventsToQueue>
</iSponsor>
<RouteEvent>true</RouteEvent>
This entry tells the iGateway to send its events, including all iRecorder events, to the host named in the RouteEventHost tag pair.
<RouteEventHost>Your_CA_Enterprise_Log_Manager_hostname</RouteEventHost>
This entry tells the iGateway to send its events to the CA User Activity Reporting Module server using its DNS name.
This action forces the iRecorder to use the new settings and starts the flow of events from the iRecorder to the CA User Activity Reporting Module server.
The process for importing CA Access Control events from an existing SEOSDATA table includes the following:
Before you using the LMSeosImport utility, do the following:
Solaris: /opt/CA/SharedComponents/iTechnology
Windows: \Program Files\CA\SharedComponents\iTechnology
Before you can import data from your SEOSDATA table, you must copy the LMSeosImport utility from the CA User Activity Reporting Module Application installation DVD-ROM to your Windows Data Tools server.
Note: The LMSeosImport utility requires the presence of the etsapi and etbase dynamic link libraries. These files are part of the base Data Tools server installation. Before you try to use the LMSeosImport utility, ensure that the directory, Program Files\CA\eTrust Audit\bin, is included in your system PATH statement.
To copy the utility
The utility is ready for use after you copy it to the designated directory. There is no separate installation to run.
Before you can import data from your SEOSDATA table, you must copy the LMSeosImport utility from the CA User Activity Reporting Module Application installation DVD-ROM to your Solaris Data Tools server.
Note: The LMSeosImport utility requires the presence of the etsapi and etbase libraries. These files are part of the base Data Tools server installation. Before you try to use the LMSeosImport utility, ensure that the CA Audit install directory is included in your system PATH statement. The default directory is opt/CA/eTrustAudit/bin.
Before you run the utility, set the following environment variables with the env command:
To copy the utility
The utility is ready for use after you copy it to the designated directory and set the required environment variables. There is no separate installation to run.
To determine whether an existing SEOSDATA table contains CA Access Control events, and to decide upon an import method, you should run an event report. The logname for CA Access Control events is eTrust Access Control. The report lists all events in the database separated by their log names. The easiest way to import CA Access Control events is to import them based on their log name.
To create an event report
LMSeosImport -dsn My_Audit_DSN -user sa -password sa -report
After processing, the utility displays a report that resembles the following:
Import started on Fri Jan  2 15:20:30 2009


No transport specified, defaulting to SAPI...

Preparing ODBC connections...

Successfully attached to source [My_Audit_DSN]

---------- SEOSDATA Event Time Range ----------

Minimum TIME = 2008-05-27
Maximum TIME = 2009-01-02

---------- Event Count Per Log ----------

Unix : 12804
ACF2 : 1483
eTrust AC : 143762
com.ca.iTechnology.iSponsor : 66456
NT-Application : 5270
CISCO PIX Firewall : 5329
MS IIS : 6765
Netscape : 530
RACF : 14
Apache : 401
N/A : 28222
SNMP-recorder : 456
Check Point FW-1 : 1057
EiamSdk : 2790
MS ISA : 609
ORACLE : 2742
eTrust PCM : 247
NT-System : 680
eTrust Audit : 513
NT-Security : 14714
CISCO Device : 41436
SNORT : 1089

---------- SEOSDATA EntryID Range ----------


Minimum ENTRYID : 1
Maximum ENTRYID : 10000010243


Report Completed.

Successfully detached from source [My_Audit_DSN]

Exiting Import...
The boldface line in this report excerpt shows that there are CA Access Control events contained in this SEOSDATA table.
---------- Event Count Per Log ----------

Unix : 12804
ACF2 : 1483
eTrust AC : 143762
com.ca.iTechnology.iSponsor : 66456
NT-Application : 5270
...
You can use the import preview to fine-tune your import parameters. This example demonstrates two preview passes, based on a need to import events from a specific time period. The example assumes the following things:
The output from the command with the -preview option sends sample import results to STDOUT. (This example uses the value My_CA-ELM_Server to represent a CA User Activity Reporting Module server name.)
To preview the import
LMSeosImport.exe -dsn My_Audit_DSN -user sa -password sa -target My_CA-ELM_Server -log "eTrust Access Control" -preview
The -preview command shows information like the following:
Import started on Fri Jan  2 15:35:37 2009


No transport specified, defaulting to SAPI...

Preparing ODBC connections...

Successfully attached to source [My_Audit_DSN]

No starting ENTRYID specified, using minimum ENTRYID of 1...

Import (preview) running, please wait...

.........

Import (preview) Completed (143762 records in 4 minutes 12 seconds).

---------- Imported Events (preview) By Log ----------

eTrust AC :     143762

Last EntryId processed: 101234500

Successfully detached from source [My_Audit_DSN]

Exiting Import...
The preview results note that there are a fairly large number of CA Access Control events to import. Suppose for this example that you only need to import the events that occurred in a two-month period. You can tailor the preview command to import a smaller group of events by date.
LMSeosImport.exe -dsn My_Audit_DSN -user sa -password sa -target My_CA-ELM_Server -log "eTrust Access Control" -mintm 2008-11-01 -maxtm 2009-12-31 -preview
The amended command shows information like the following:
Import started on Fri Jan  2 15:41:23 2009


No transport specified, defaulting to SAPI...

Preparing ODBC connections...

Successfully attached to source [My_Audit_DSN]

No starting ENTRYID specified, using minimum ENTRYID of 1...

Import (preview) running, please wait...

.........

Import (preview) Completed (143762 records in 4 minutes 37 seconds).

---------- Imported Events (preview) By Log ----------

eTrust AC :     2349

Last EntryId processed: 5167810102

Successfully detached from source [My_Audit_DSN]

Exiting Import...
This import preview shows that the date range results in a smaller subset of events to import. You are now ready to run the actual import.
After you run the event report and an import preview, you are ready to import CA Access Control events from the SEOSDATA table.
To import CA Access Control events
Use the command from the preview without the -preview option to retrieve the CA Access Control events from the named date range:
LMSeosImport.exe -dsn [My_Audit_DSN] -user sa -password sa -target [My-CA-ELM-Server] -log "eTrust Access Control" -mintm 2008-11-01 -maxtm 2009-12-31
The utility displays results like the following:
Import started on Fri Jan  2 15:41:23 2009


No transport specified, defaulting to SAPI...

Preparing ODBC connections...

Successfully attached to source [My_Audit_DSN]

No starting ENTRYID specified, using minimum ENTRYID of 1...

Import running, please wait...

.........

Import Completed (143762 records in 5 minutes 18 seconds).

---------- Imported Events (preview) By Log ----------

eTrust AC :     2241

Last EntryId processed: 5167810102

Successfully detached from source [My_Audit_DSN]

Exiting Import...
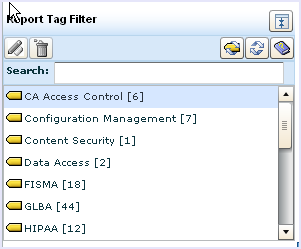
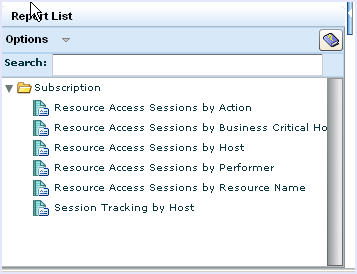
CA User Activity Reporting Module provides a number of queries and reports for examining events collected from CA Access Control. Use the procedure that follows to access CA Access Control queries and reports.
To access CA Access Control queries
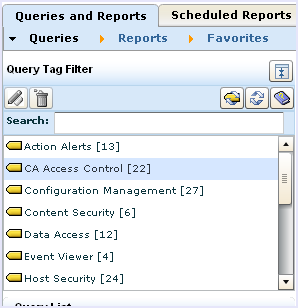
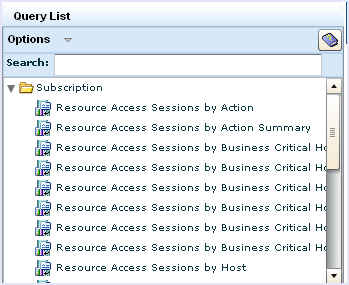
To access CA Access Control reports
To secure CA User Activity Reporting Module using CA Access Control, you must install CA Access Control on CA User Activity Reporting Module. You can control user access and secure audit logs received from a product or generated by CA User Activity Reporting Module by creating rules on CA Access Control.
Note: For information about creating rules on CA Access Control, see the CA Access Control documentation set.
Example: Create a Rule that Monitors User Access to the /data Folder
Suppose that you want to create a rule on CA Access Control that monitors user access to the /data folder of CA User Activity Reporting Module, do the following:
Default Installation Path: /opt/CA/Access Control
selang
The CA Access Control command line interpreter is displayed.
nr GFILE CA_ELM_DBFILES owner(nobody) warning
A new resource group CA_ELM_DBFILES is created for the DBFiles.
newres FILE /data/hot/* owner(nobody) defaccess(none) warning audit(failure)
A new resource rule is created for the CA User Activity Reporting Module hot database files.
newres FILE /data/raw/* owner(nobody) defaccess(none) warning audit(failure)
A new resource rule is created for the CA User Activity Reporting Module raw database files.
editres GFILE CA_ELM_DBFILES mem+(/data/hot/*)
The resource rule for the CA User Activity Reporting Module hot database files is added to CA_ELM_DBFILES.
editres GFILE CA_ELM_DBFILES mem+(/data/raw/*)
The resource rule for the CA User Activity Reporting Module raw database files is added to CA_ELM_DBFILES.
authorize GFILE CA_ELM_DBFILES uid(caelmservice) access(all)
The message 'Successfully added caelmservice to CA_ELM_DBFILES's ACL' is displayed. A rule is created to monitor user access to the /data folder of CA User Activity Reporting Module.
seaudit -a
Before you create rules on CA Access Control, do the following:
Note: For information about installation procedures on Linux, see the CA Access Control documentation set.
|
Copyright © 2014 CA Technologies.
All rights reserved.
|
|