

If you do not yet have a CA User Activity Reporting Module environment implemented, you can create an all-virtual log collection environment. This scenario assumes that have a sufficient number of physical servers available, each with a group of at least four processors, to install each of the intended CA User Activity Reporting Module servers.
Install one CA User Activity Reporting Module server to act as a management server. During configuration, do not send event logs to this server or use this server to generate reports. Configuring your environment in this way maintains the event log collection throughput required for enterprise-level production.
Generally, you install two, four-processor CA User Activity Reporting Module servers in place of each of the appliance-class servers you would typically install when using certified hardware. (Appliance-class servers have a minimum of eight processors.)
The process you follow to create a virtual environment using virtual appliance includes the following procedures.
Important! If you want to provision a CA User Activity Reporting Module server using the virtual appliance, the Application Instance Name of the primary CA User Activity Reporting Module server must be CAELM.
The distribution image for the CA User Activity Reporting Module virtual appliance is available from Support Online from the Downloads link. There are five files that you must download:
When you install the virtual appliance manually, perform the following tasks:
You can specify the properties of virtual appliance in an OVF template. VMware uses this template to provision a CA User Activity Reporting Module server. Use the VMware vSphere Client to deploy the OVF template.
Note: The screenshots in the following procedures contain sample data for your reference. These sample screenshots are in reference to VMware vSphere Client 4.0.0. We recommend that you specify data appropriate to your environment.
To deploy an OVF template
The VMware vSphere Client dialog opens.
The application window opens.
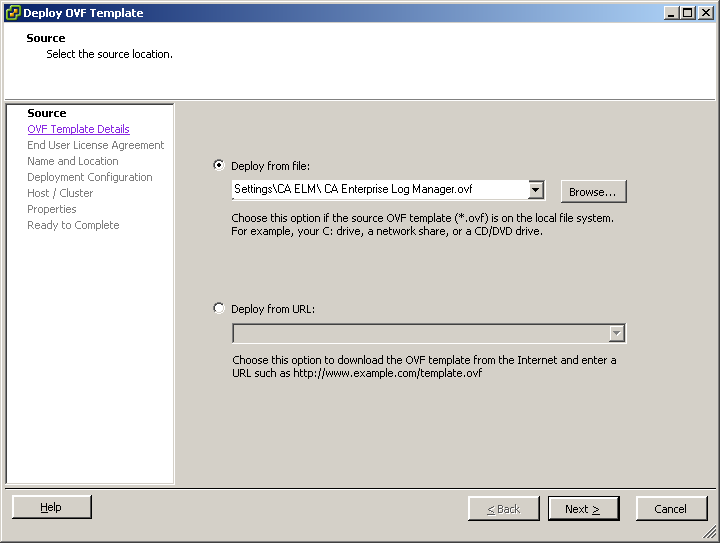
The Deploy OVF Template window appears. By default, the Deploy OVF Template window displays the Source page. You must enter the location of the OVF template in this page.
Note: The pages displayed in the Deploy OVF Template window vary according to the VMware vSphere Client version and settings you are using.
The path of the OVF template location is displayed in the Deploy from file field.
The OVF Template Details page opens. This page displays the details stored in the OVF template such as the download size, available disk size, and vendor name.

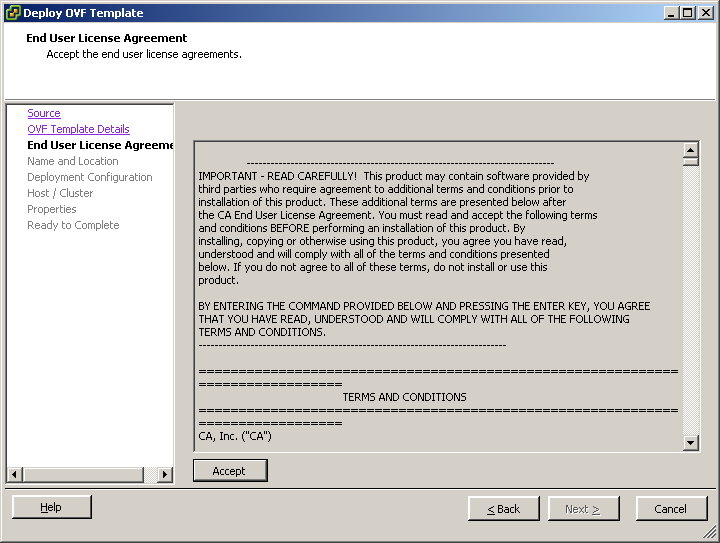
The End User License Agreement page opens. This page displays the license agreement for third-party products. You must accept this license agreement to install CA User Activity Reporting Module.
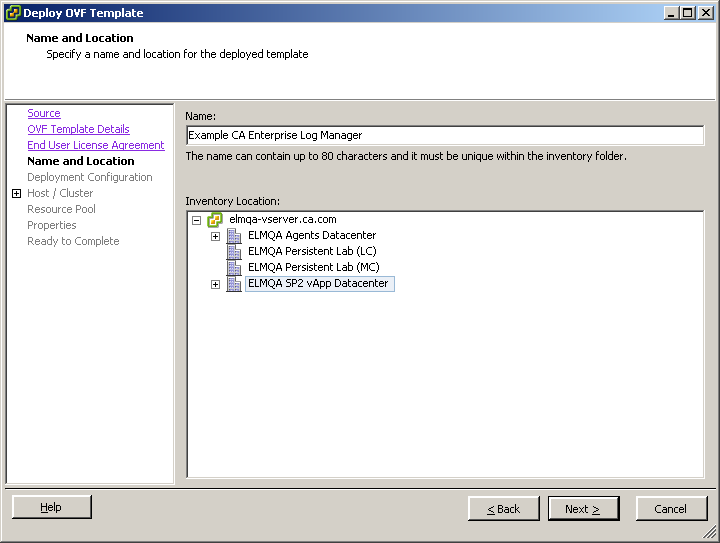
The Name and Location page opens. This page lets you add a name to identify the CA User Activity Reporting Module server, and specify the datacenter where you want to provision the CA User Activity Reporting Module server.
Note: By default, the name specified in the OVF template is displayed in the Name field.
The Deployment Configuration page opens. The Deployment Configuration page lets you specify the configuration mode of the CA User Activity Reporting Module server you want to provision.
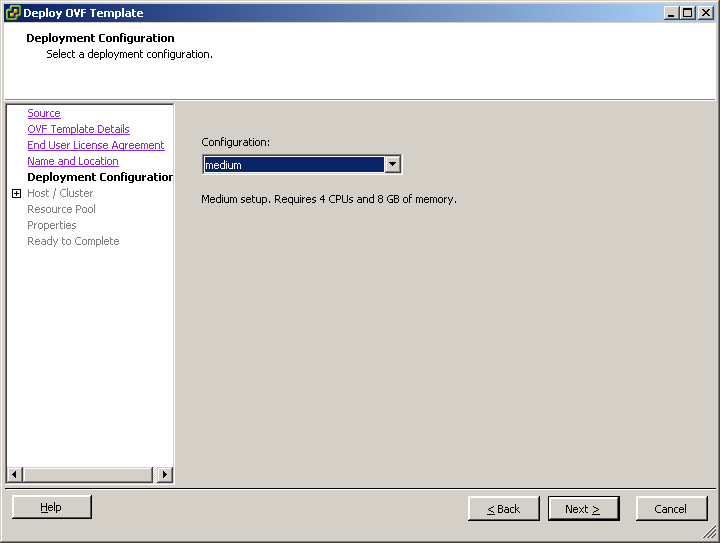
If you select medium, VMware provides four CPUs with 8 GB RAM for each CPU. If you select large, VMware provides eight CPUs with 8 GB RAM for each CPU.
Note: We highly recommend that you use a medium deployment configuration to provision a collection server, and a large deployment configuration to provision a management or reporting server.
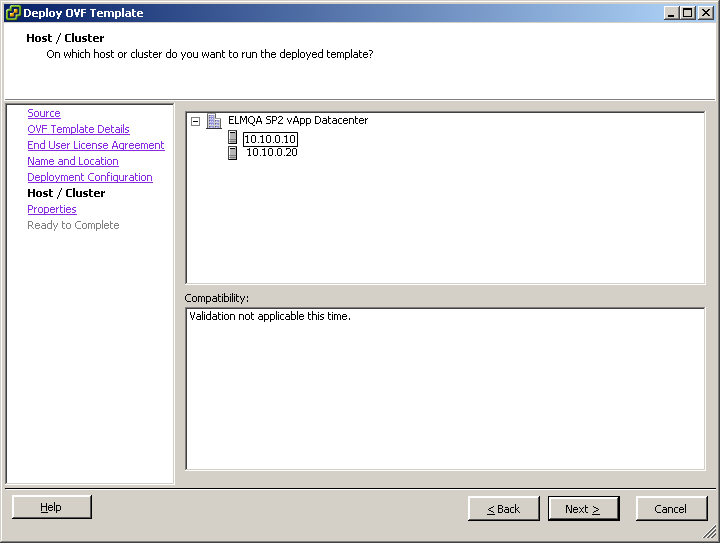
The Host / Cluster page opens. This page appears only if you have not selected the resource pool before you start importing the OVF template. The Host / Cluster page displays the datacenter you selected and its available clusters. You must specify the cluster location under the datacenter where you want to provision the CA User Activity Reporting Module server.
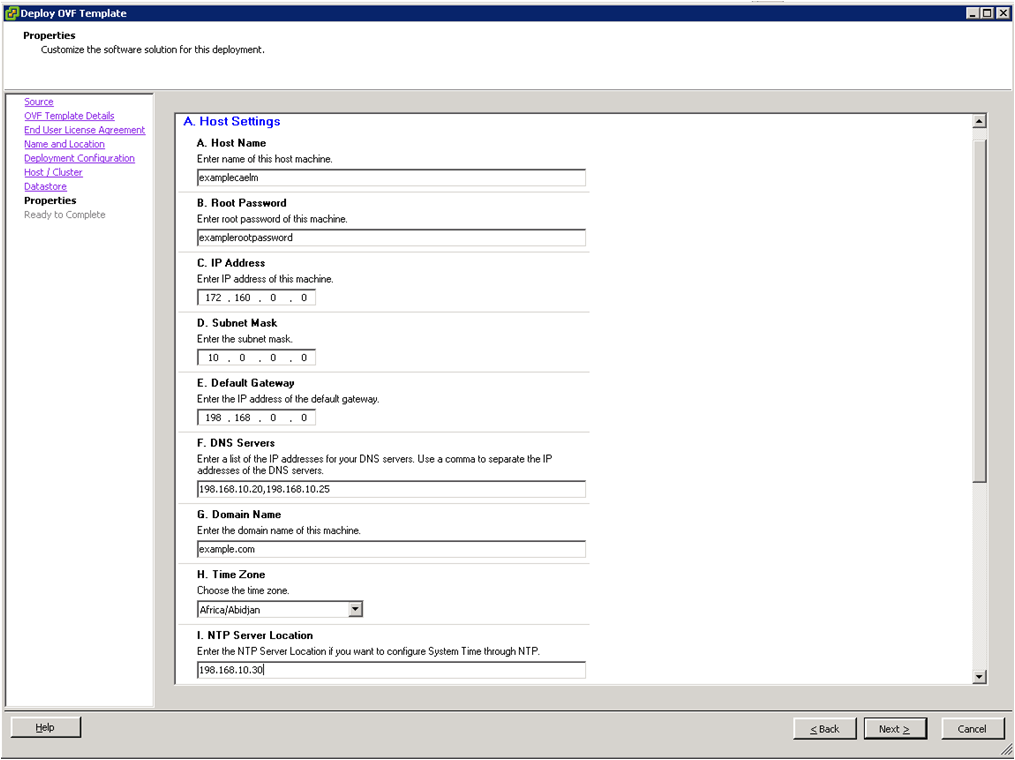
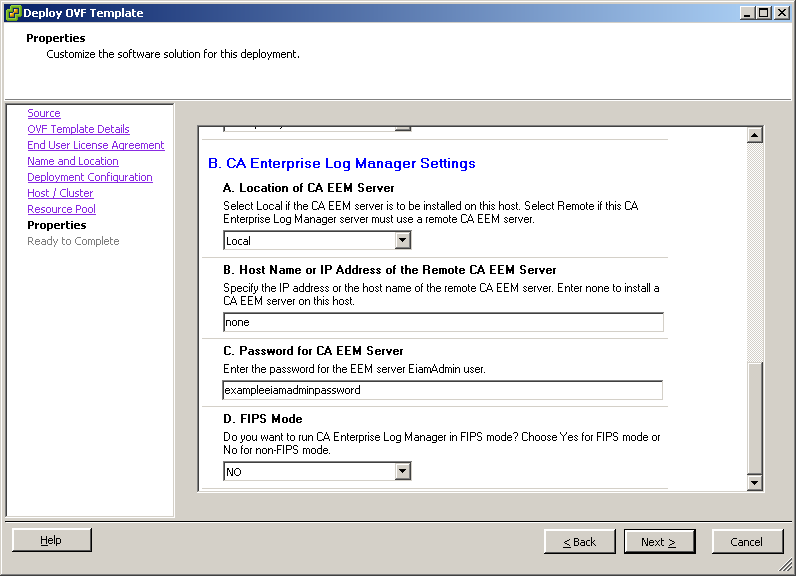
The Properties page opens. This page contains the Host settings and CA User Activity Reporting Module settings.
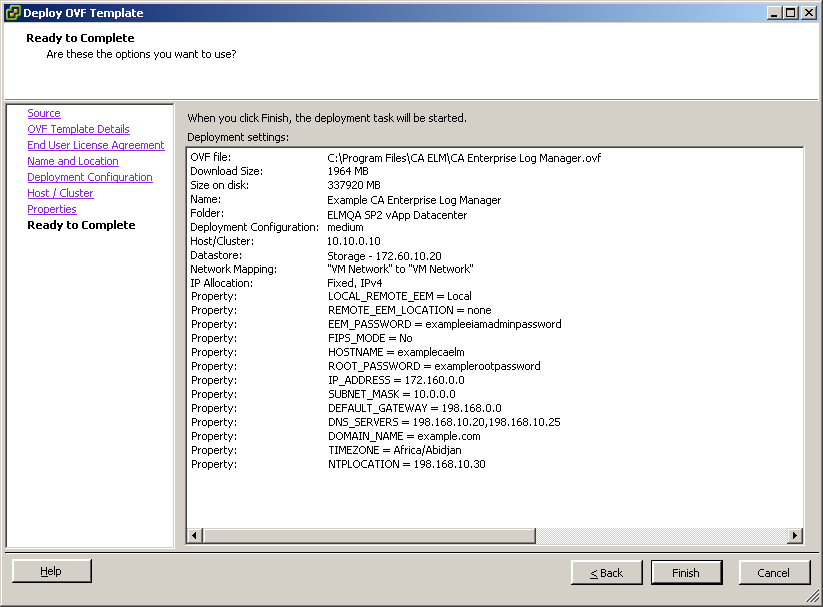
The Ready to Complete page opens. This page displays a summary of the details you have entered in the previous pages.
The message Opening VI target is displayed. The deployment status of the virtual appliance is displayed. If the installation is successful, the virtual appliance is listed under the datastore you selected in the left pane.
After you import the OVF template, you must manually set the resource settings to improve the performance of the provisioned CA User Activity Reporting Module server.
Note: Verify that you set the CD/DVD Drive to Client Device.
Follow these steps:
The <CA User Activity Reporting Module Virtual Appliance name> - Virtual Machine Properties window appears.
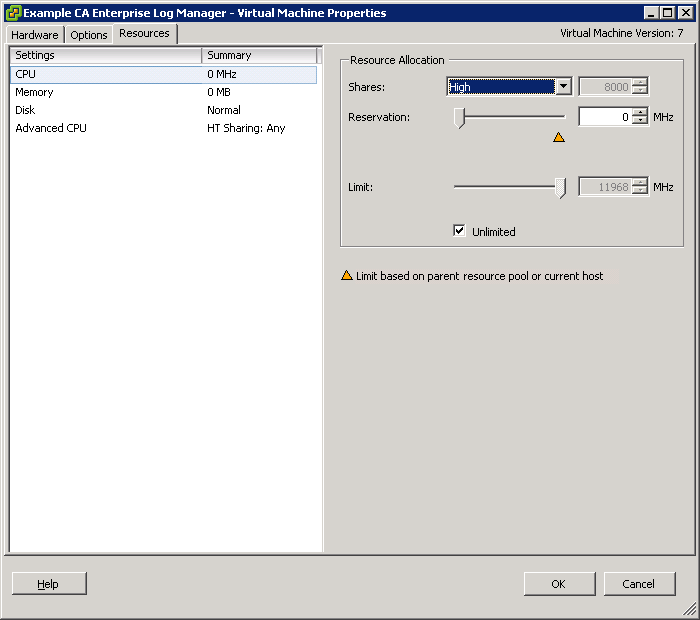

Note: For more information about the Resource settings, go to www.vmware.com.
You must power on the CA User Activity Reporting Module server to start running it.
To power on a CA User Activity Reporting Module server
The CA User Activity Reporting Module server is powered on.
Note: Verify that a primary CA User Activity Reporting Module server is running before you power on a secondary CA User Activity Reporting Module server.
When you install the virtual appliance silently, you must perform the following tasks:
The following table describes the parameters used to deploy CA User Activity Reporting Module using the OVF tool. You must specify these parameters as command line arguments in the command line.
|
Required information |
Value |
Comments |
|---|---|---|
|
Host Specific Settings |
||
|
HOSTNAME |
hostname for this CA Enterprise Log Manager server For example: CA-ELM1 |
Specify the host name for this server using only supported characters for hosts. Industry standards recommend A-Z (case-insensitive), 0-9, and hyphen, where the first character is a letter and the final character is alphanumeric. Do not use the underscore character in a host name, or append a domain name to this host. Note: The host name must not exceed 15 characters. |
|
ROOT_PASSWORD |
new root password |
Create and confirm a new root password for this server. |
|
IP_ADDRESS |
relevant IPv4 address |
Enter a valid IP address for this server. |
|
SUBNET_MASK |
relevant IP address |
Enter a valid subnet mask for use with this server. |
|
DEFAULT_GATEWAY |
relevant IP address |
Enter a valid subnet mask and default gateway for use with this server. |
|
DNS_SERVERS |
relevant IPv4 addresses |
Enter one or more DNS server IP addresses in use in your network. The list is comma-separated with no spaces between entries. If your DNS servers use IPv6 addressing, enter these addresses in that format. |
|
DOMAIN_NAME |
your domain name |
Enter the qualified domain name in which this server operates, for example, mycompany.com. Note: The domain name must be registered with the Domain Name Server (DNS) server in your network to enable resolution of the hostname to IP address. |
|
acceptAllEulas |
Accept |
Accept the CA license agreement to continue provisioning a CA User Activity Reporting Module server. |
|
deploymentOption |
medium or large |
If you select medium, VMware provides four CPUs with 8 GB RAM for each CPU. If you select large, VMware provides eight CPUs with 8 GB RAM for each CPU. |
|
TIMEZONE |
your desired time zone |
Select the time zone where this server resides. |
|
NTPLOCATION |
relevant hostname or IP address |
Enter the host name or the valid IP address of the NTP server from which the CA User Activity Reporting Module server gets date and time information. |
|
Application Specific Settings |
||
|
LOCAL_REMOTE_EEM |
Local - for the first installed server (management server)
Remote - for each additional server |
Indicate whether you plan to use a local or a remote CA EEM server. For a management CA User Activity Reporting Module server, choose Local. The installation prompts you to create a password for the default EiamAdmin user account. For each additional server, choose Remote. The installation prompts you for the management server name. Regardless of whether you chose local or remote, you must use the EiamAdmin account ID and password to log on to each CA User Activity Reporting Module server the first-time. |
|
REMOTE_EEM_LOCATION |
IP address or hostname |
Enter this value only if you select Remote in the Local or Remote server option. Enter the IP address or host name of the management CA User Activity Reporting Module server that you installed first. The host name must be registered with the DNS Server. If you want to use a local CA EEM server, the default value is none. |
|
EEM_PASSWORD |
EiamAdmin account password |
Record the password for the default administrator account, EiamAdmin. Your CA User Activity Reporting Module server requires these account credentials for the initial login. If you are installing the management server, you are creating and confirming a new EiamAdmin password here. Make a note of this password as you must use it during the installations of other CA User Activity Reporting Module servers and agents. Note: The password you enter here is also the initial password for the default caelmadmin account that you use to access the CA User Activity Reporting Module server directly through ssh. You can create additional administrator accounts to access the CA EEM functions after installation, if desired. |
|
FIPS_MODE |
Yes or No |
Specifies if the virtual appliance must run in FIPS mode or non-FIPS mode. If you choose to use a local CA EEM server, you can choose any mode. If you choose to use a remote CA EEM server, you must choose the mode that the remote CA EEM server uses. |
Note: You must install the OVF Tool 1.0.0.0 before you perform the silent installation.
You must pass the configuration parameters as command line arguments to invoke the OVF Tool.
Note: We highly recommend that you use a medium deployment configuration to provision a collection server, and a large deployment configuration to provision a reporting server. We also recommend that you use thick deployment method as outlined in the VMware documentation.
To invoke the OVF Tool from command line
ovftool -dm=thick --acceptAllEulas --name=value --deploymentOption=value --prop:ROOT_PASSWORD=value --prop:LOCAL_REMOTE_EEM=value --prop:REMOTE_EEM_LOCATION=value --prop:EEM_PASSWORD=value --prop:FIPS_MODE=value --prop:IP_ADDRESS=value --prop:SUBNET_MASK=value --prop:HOSTNAME=value --prop:DEFAULT_GATEWAY=value --prop:DNS_SERVERS=value --prop:DOMAIN_NAME=value --prop:TIMEZONE=value --prop:NTPLOCATION=value <OVF_Name.ovf> vi://username:password@hostname_of_VMware_vSphere_Client/Datacenter/host/hostname
The message Opening VI target is displayed. The deployment status of CA User Activity Reporting Module server is displayed. If the installation is successful, the CA User Activity Reporting Module server is listed under the datastore you selected in the left pane.
Note: If a property value contains space, enclose the property value in double quotes (""). For example, if the OVF name is CA ELM, enter the value as "CA ELM.ovf".
Example
ovftool -dm=thick --acceptAllEulas --name="example_server" --deploymentOption=medium --prop:ROOT_PASSWORD="example_password" --prop:LOCAL_REMOTE_EEM=Local --prop:REMOTE_EEM_LOCATION=none --prop:EEM_PASSWORD=calmr12 --prop:FIPS_MODE=Yes --prop:IP_ADDRESS=172.168.0.0 --prop:SUBNET_MASK=10.0.0.0 --prop:HOSTNAME="example_server1" --prop:DEFAULT_GATEWAY=198.168.0.0 --prop:DNS_SERVERS=198.168.10.20,198.168.10.25 --prop:DOMAIN_NAME=example.com --prop:TIMEZONE=Asia/Kolkata --prop:NTPLOCATION=198.168.10.30 "C:\Program Files\CA ELM\CA Enterprise Log Manager.ovf" "vi://administrator:password@examplevmwarehost/ELMQAvAppDatacenter/host/10.0.10.0"
After you import the OVF template, you must manually set the resource settings to improve the performance of the provisioned CA User Activity Reporting Module server.
Note: Verify that you set the CD/DVD Drive to Client Device.
Follow these steps:
The <CA User Activity Reporting Module Virtual Appliance name> - Virtual Machine Properties window appears.
Note: For more information about the Resource settings, go to www.vmware.com.
You must power on the CA User Activity Reporting Module server to start running it.
To power on a CA User Activity Reporting Module server
The CA User Activity Reporting Module server is powered on.
Note: Verify that a primary CA User Activity Reporting Module server is running before you power on a secondary CA User Activity Reporting Module server.
When you power on the provisioned CA User Activity Reporting Module server, a URL to access CA User Activity Reporting Module is displayed in the Console tab of the VMware vSphere Client window. Use this URL and the following default login credentials to access CA User Activity Reporting Module:
Default Username: EiamAdmin
Default Password: The password you entered during the CA User Activity Reporting Module server installation procedure
|
Copyright © 2014 CA Technologies.
All rights reserved.
|
|