

Administration Guide › Action Alerts › Working with SNMP Traps › Example: Alerting CA Spectrum of Configuration Changes › Send SNMPv2 Traps to CA Spectrum
Send SNMPv2 Traps to CA Spectrum
The following example shows how to create an alert that notifies CA Spectrum of configuration changes with SNMPv2 traps.
To send SNMPv2 traps to CA Spectrum
- Open the Alert Scheduling wizard.
- Click the Alert Management tab and the Alert Scheduling subtab.
- Click the Schedule an Action Alert button.
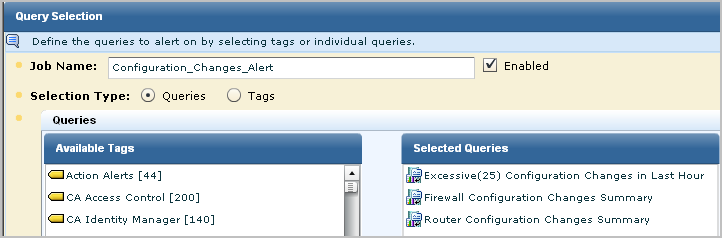
- Complete the Alert Selection step.
- Type a job name; this is required for any alert.
- Verify selection type is Queries.
Selection of SNMP trap destinations is not allowed for alerts based on tags.
- If the queries you want to select are tagged Action Alerts, click the Action Alerts tag to filter the displayed list.
- Select the query or queries you identified.
- (Optional) Complete the Alert Filters, Result Conditions, and Schedule Jobs steps as documented in the online help for this wizard.
- Set the SNMP trap details.
- Click the Destination step.
- Click the SNMP Trap tab.
The configured SNMP Trap destination and the queries selected in step 1 of the wizard appear.
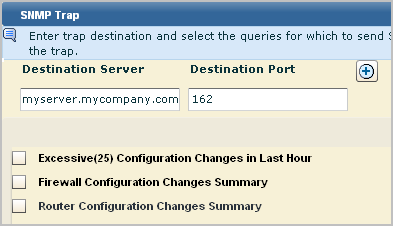
Note: By default, the SpectroSERVER listens on the standard SNMP trap port 162. If changed, the port must match the snmp_trap_port parameter in the SPECTRUM .vnmrc file located in the SS directory.
- (Optional). To send the trap to up to nine servers in addition to the configured destination server, click the Add button and enter the IP address and port of the server.
- For a query where you want all fields included in the trap, just select the query.
All fields of a selected query are selected by default. The name of the selected query appears above the field list.

- For a query where you want selected fields included in the trap, select the query and clear the fields that are not to be sent.

- Select the SNMP Version supported by the selected trap destination for traps received from applications.
Note: Some trap destination accept Version 3 traps sent directly by devices, but only Version 2 traps from applications that collect events from devices. For this example, we accept Version 2.
- Select the server and specify whether the query should return results from just selected server(s) or from this server and all of its child (if hierarchical) or peer (if meshed) federated servers.
- Click Save and Close.
The job appears on the Action Alert Jobs list. Unless you cleared the Enabled check box on the first step of the wizard, it is displayed as enabled (true in the Enabled column). An abbreviated example follows:

Copyright © 2013 CA.
All rights reserved.
|
|