

|
|
|
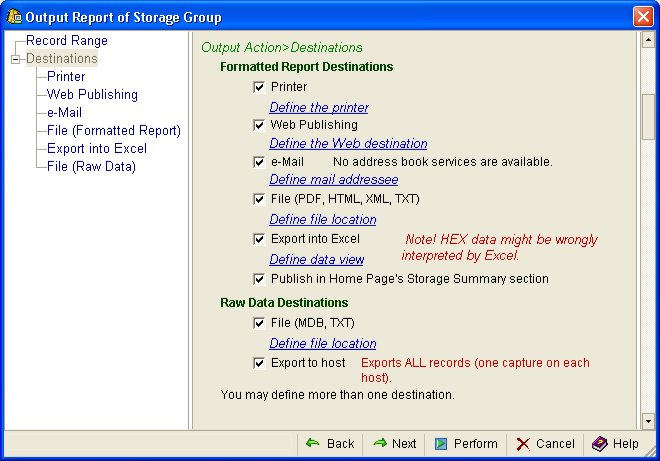
When you select Destinations in the Output Action dialog you can indicate where you want a report to be published, as shown in the following sample:
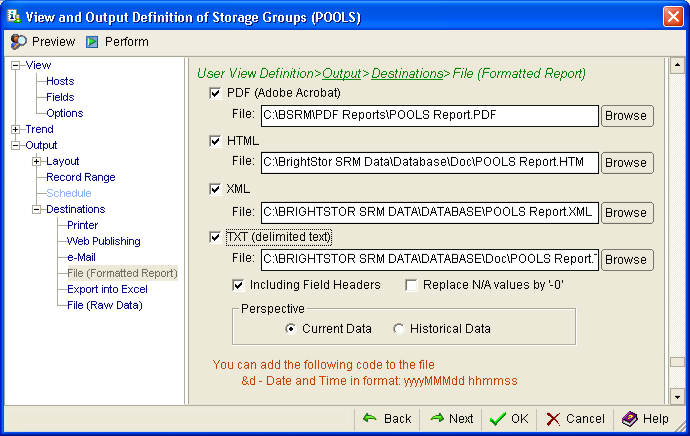
Each Output Destination gives you additional options; for example, the File (Formatted Report) destination dialog gives you the choice of file formats and a Browse button that allows you to select the output directory, as shown in the following sample:
If you want to quickly print or send the information shown in the view to multiple destinations, click the Print Report icon  or the Mail Report
  icon from the toolbar of the object view. This will give you the following Output Action dialog:
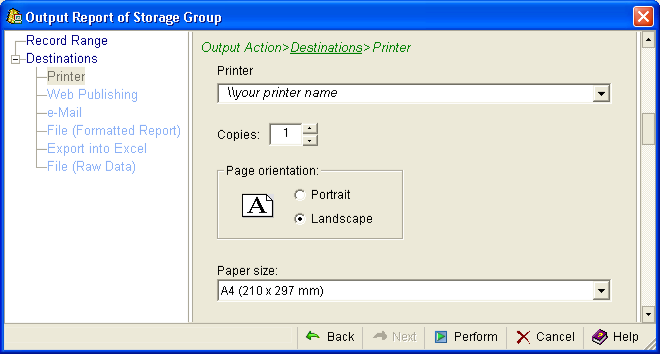
If you selected the Print Report icon , you will also be provided with the Printer destination dialog, as shown in the following sample:
See the CA Vantage Windows Client User Guide for more information about Output Definitions.
| Copyright © 2010 CA. All rights reserved. | Tell Technical Publications how we can improve this information |