

Managing Defined Applications › Registering Defined Applications › Using the Defined Application Registration Wizard
Using the Defined Application Registration Wizard
You can run the CA SRM Defined Application Registration Wizard from any computer on which the Windows Client is installed. You can collect data from any managed computer that has one of your modeled applications installed.
To run the Wizard, follow these steps:
- From the Open Systems menu of the Windows Client, select Register, Defined Application. You can also start the Wizard by selecting Configuration, Register from the Defined Applications table.
- Enter a name for the application and its type. By default, the Type field populates using the same value as you entered in the Name field. The type is the application's signature. It is a set of rules that identify storage consumption within the file-systems that belong to the defined application. To use a defined type, select it from the Load Template drop-down list.
To create a new type:
- Build the signature from these characteristics. Each of the characteristics is optional:
- Case sensitive—Check this if you want the search for the selected directories and extensions to be case sensitive.
- Directories—Sub-trees to include (for example, “\program files\app1\#” or “\data\app1\#”).
- Extensions—Files extensions to include/exclude (for example, bmp, jpeg, or mp3).
You can use wildcards when defining characteristics.
- Click Save as template when finished.
To modify an existing type, select it from the Load Template drop-down list and make your changes to the signatures. Click Save as template to update the type. If you want to save your changes but you do not want to overwrite the existing type, enter a new name in the Type field and then click Save as template.
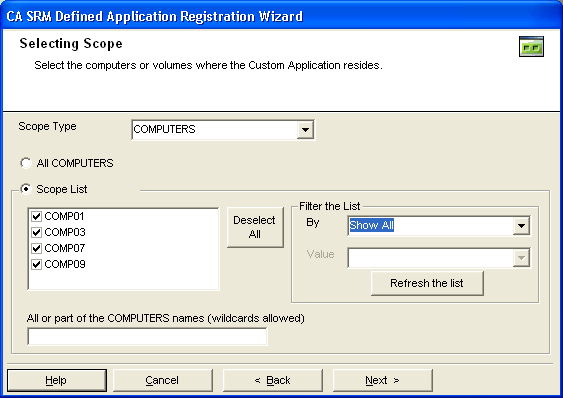
- Select the scope. Use this dialog to define the application's volumes or computers that you want to monitor and include in the data collection. To set the scope:
- Select either Computers or Volumes from the drop-down list.
- Select All to use all of the volumes or computers
or
Select Scope List to narrow the scope.
- (Optional) Select the volumes or computers from the list. You can filter this list by operating system, organization, and location. After you select your filters, click Refresh the list to execute the filter on the list.
- (Optional) Use the text box below the list to select computers or volumes by name. Type all or part of the computer or volume name in the box including wildcards. If you enter more than one name, use commas (,) as delimiters. Do not use the format: \\vol*. You only need to type the computer name or volume name. Use the format: vol*. The object type you enter here (computer or volume) needs to match the Scope Type drop-down list.
- Edit the fields in this dialog if you want to add a different location, organization, and contact:
- Location-Lets you attach a geographic location to the computer or server. Select a location from the drop-down list. You can also click New Location to add the details of the new location in the Create New Location dialog. Click OK to exit the dialog.
- Organization- Lets you attach organization to the computer or server. Select an organization from the drop-down list. You can also click New Organization to add the details of the new organization in the Create New Organization dialog. Click OK to exit the dialog.
- Contact- Lets you add a contact. Click New Contact to add a contact using the Create New Contact dialog. Enter the name, telephone number, and email address of the new contact. You can access your default address book by clicking the To: Button and select the email address from there.
Note: You can also add new contacts by clicking New Contact in the Create New Location dialog or Create New Organization dialog.
Click Register to complete the registration.
Copyright © 2016 CA Technologies.
All rights reserved.
|
|