

The User-Defined View List provides you with an overview of your User Views, including factory supplied User Views. This option allows you to manage User Views within a single window.
The following is an example of the User-Defined View List dialog:
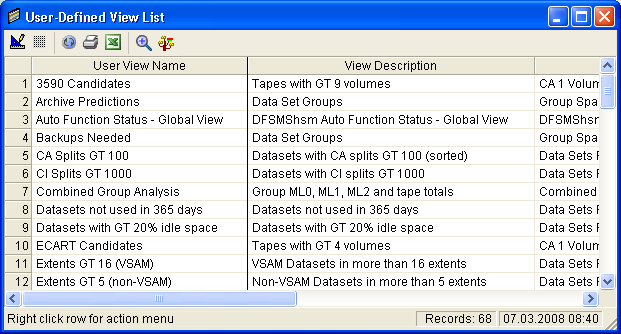
The User-Defined View List dialog includes the following icons:
|
Icon |
Function |
|---|---|
|
|
Adjust (Columns) - Clicking this icon reduces the width of all table columns to the smallest allowable size that can display all data in each column. |
|
|
Grid - This icon controls whether tables will display with or without a grid. |
|
|
Refresh - This icon refreshes any currently displayed data. |
|
|
Print - Use this icon to print the User-Defined View List table. |
|
|
Excel - Use this icon to export the User-Defined View List table to Excel. The export XLSX file is created in the C:\BRIGHTSTOR SRM DATA\DATABASE\Doc\ directory. The export file name is UVList.XLSX. Note: The Microsoft Excel application must be installed on the machine where output is performed. |
|
|
Open View - Select a row in the view and click this icon to display the User View object (you cannot click the column number, you must click in one of the other columns in the row for this option to work). |
|
|
Find View in Object Tree - Select a row in the view and click this icon and the Object Tree will open to display where the selected User view is located in the Object Tree (you cannot click the column number, you must click in one of the other columns in the row for this option to work). |
You also have the option to right click a row and a pop-up menu is displayed.
Note: If you right-click the column number the pop-up menu is not displayed, you must right-click in one of the other columns in the row for the pop-up menu to be displayed.
The following options are available from the pop-up menu when you right-click a user view in the User-Defined View List dialog:
Use this option to save the User View selected as a new User View. The newly saved User View will appear in the object tree under the related object.
Use this option to rename the User View.
Use this option to delete the User View.
|
Copyright © 2013 CA.
All rights reserved.
|
|