

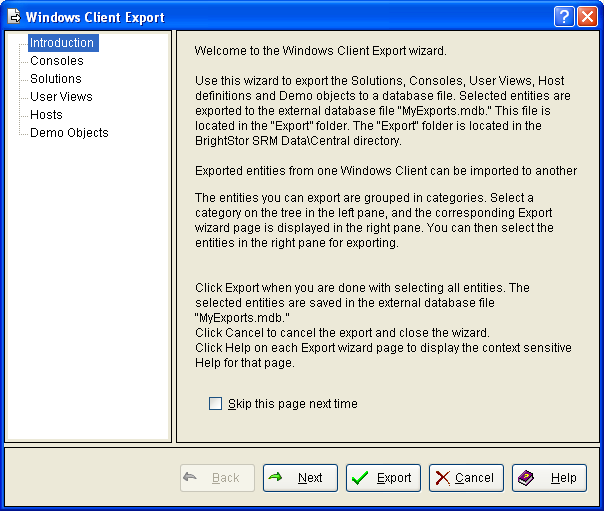
The following is an example of the Introduction page of the Export wizard:
The Export wizard is displayed when you select Export in the Tools menu.
Use the Export wizard in conjunction with the Import wizard, to copy User Views, Solutions, Consoles, Host connection definitions, and Demo Objects from one client machine to another.
Note: For an overview of the Export and Import entities process, see the topic Export and Import Entities.
The Export wizard is a multiple-page dialog that has a title bar at the top which provides the wizard title, a navigation tree pane on the left side, the page pane in the center, and the button bar at the bottom.
To export multiple entities, move from page to page selecting them until all the desired entities are completed.
Note: Before you start the Export wizard, consider moving existing export files to another directory for safe keeping. By default, entities are exported to MyExports.mdb in the BrightStor SRM Data\Central directory. The export wizard allows you to specify a different directory, export file name, or both. However, even though you might specify a different directory, export file name, or both, the system also always overwrites the existing MyExports.mdb in the BrightStor SRM Data\Central directory of the exporting machine.
In general, the following navigation methods are available in the wizard:
The navigation tree presents the pages of the definition in a hierarchical view. Click a navigation tree node to go to the page. The navigation tree allows you to perform non-sequential navigation through the wizard pages. That is, you can click a node (page title) in the navigation tree to go directly to that page. This method of navigation is useful when you want to select only a few specific Export entities.
The Export wizard navigation tree consists of the following pages (nodes):
This page provides an overview of the wizard and how to use it.
Use this page to specify Consoles for exporting.
Use this page to export factory-defined User Views, user-created User Views, or both.
Use this page to specify Solutions for exporting.
Use this page to specify the Host definitions for exporting.
Use this page to specify Demo objects for exporting.
The button bar at the bottom of the window provides the Back, Next, Export, Cancel, and Help buttons. Use these buttons as follows:
The Back and Next buttons allow back and forth sequential navigation through the wizard pages. Using these buttons is the easiest way to navigate the wizard and helps you step through the wizard pages and make all the settings needed. You should use these buttons if you are not familiar with the wizard.
Click Export when you are finished making your selections.
This displays the Windows Client Export dialog.
By default the entities are exported to MyExports.mdb in the BrightStor SRM Data\Central directory. Use the Windows Client Export dialog to indicate you want to export the entities to the default export file name and directory or that you want to specify a different directory, export file name, or both. The Windows Client Export dialog provides the following options:
Closes the Export wizard and exports the entities selected to the MyExports.mdb file in the BrightStor SRM Data\Central directory.
Note: When you click Yes, you overwrite the existing MyExports.mdb file and subsequently, any previously exported items.
Displays the Export: Specify the export file dialog. Use this dialog to specify a different directory, export file name, or both. The Export: Specify the export file dialog has the typical Windows browse to another directory and file renaming options.
The export file must be exported to or copied to a directory the import machine has access to before you start the import process. Consider using the Export: Specify the export file dialog to specify a directory that both the export and import machine have access to. For example, a directory on a shared file server.
Note: The export file must be a Microsoft Access MDB file. This means the file name extension must be mdb, do not change the extension when specifying an export file name.
In addition, the Export: Specify the export file dialog has the following options:
Save - Creates the export file to the directory you specify and displays a confirmation window. Click OK to close the confirmation window and the Export wizard.
Cancel - Cancels the export and displays a cancellation confirmation window. Click OK to close the cancellation confirmation window and close the Export wizard.
Note: When you cancel the export, the system returns the MyExports.mdb file that existed prior to starting the export process to the BrightStor SRM Data\Central directory of the export machine.
Click Cancel to interrupt the process and close the wizard without saving any data.
Click Help to get online help about the wizard. If you click Help in a wizard page, the Windows Client online Help system opens to the topic relevant for that page.
|
Copyright © 2013 CA.
All rights reserved.
|
|