

When you have configured a view, for example added filter, sorts, or created a graph view of an object you can save that view as a user-defined view and give it the name you want. Once you have created and saved a user-defined view of an object you can select it in the object tree and it will display according to the configuration you have created.
To create a User View
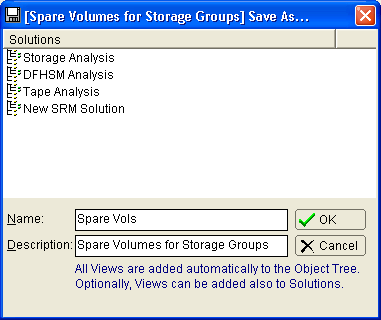
The Save As... dialog is displayed.
In the following example we name our new view Spare Vols:
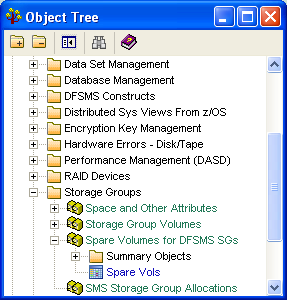
The Windows Client saves the view under the object category containing the original view from which the new view was saved. In the following example our Spare Vols view appears under the Spare Volumes for DFSMS SGs source object:
|
Copyright © 2013 CA.
All rights reserved.
|
|