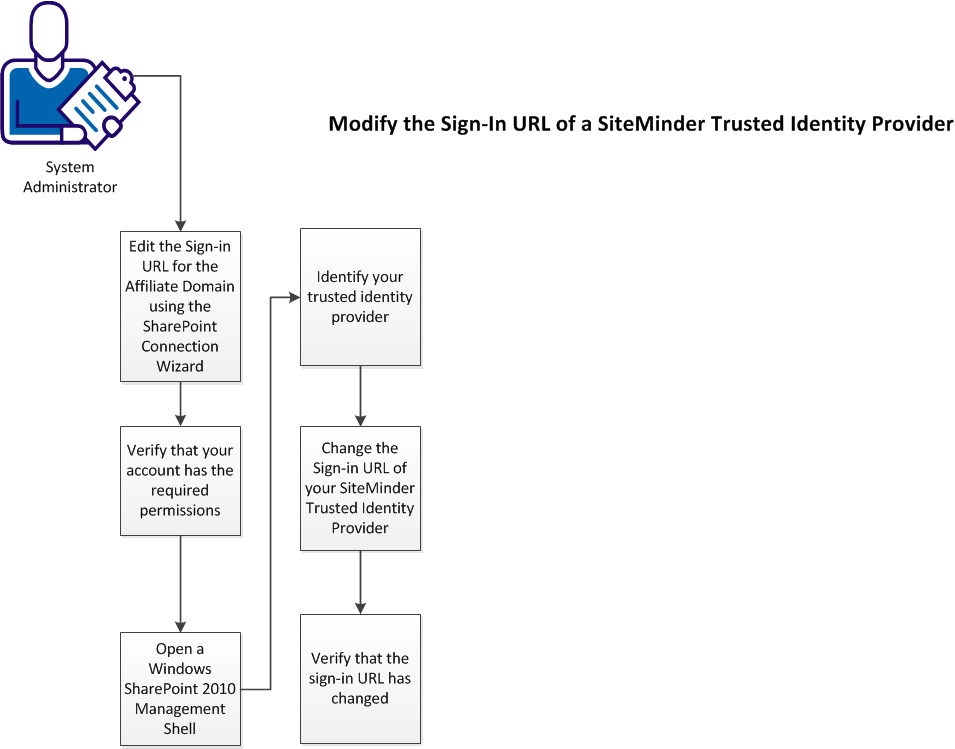

This scenario describes changing the sign-in URL of your CA SiteMinder® trusted identity provider of an existing CA SiteMinder® environment. For example, update the URL if you change the protocol of your sign-in URL from HTTP to HTTPS.
The following illustration describes the process of modifying the sign-in URL of your CA SiteMinder® trusted identity provider:

To modify the sign-in URL of your CA SiteMinder® identity provider, follow these steps:
You can update the affiliate domain with a new sign-in URL for your CA SiteMinder® trusted identity provider. This update requires running the SharePoint connection wizard on the computer hosting your CA SiteMinder® CA SiteMinder® Agent for SharePoint.
This procedure adds the new sign-in URL of your CA SiteMinder® trusted identity provider on your CA SiteMinder® Policy Server.
Follow these steps:
Agent-for-SharePoint_home/sharepoint_connection_wizard
Solaris: sh ./ca-spconnect-version-sol.bin
Linux: sh ./ca-spconnect-version-rhel30.bin
The wizard starts.
The Login Details screen appears.
Specifies the Policy Server name or IP address.
Specifies the Policy Server administrator username.
Specifies the Policy Server administrator password.
Specifies the Agent-4x. The connection with the Policy Server is established using the details given in the Agent Name.
Specifies the shared secret key that is associated with the Agent.
The Select Action screen appears.
The SharePoint Connection Properties screen appears.
Specifies the port number that is associated with the predefined protected URL which the SharePoint connection wizard adds automatically. When users try accessing a protected SharePoint resource without a SiteMinder session, they are redirected to the Authentication URL.
If you are using a default port number (such as 80 for HTTP or 443 for HTTPS), delete the <port> setting from this field.
Note: We recommend using HTTPS on production environments and pages which handle user credentials, such as login pages.
The attribute details are saved and the Commit Details screen appears.
The Save Complete screen appears.
The partnership details are saved, the SharePoint Connection is modified, and the wizard closes.
The user account with which you want to modify the CA SiteMinder® trusted identity provider requires certain permissions. Modify the permissions of your user account if it does not meet the following conditions:
Add the following privileges to your account:
Add claims to your CA SiteMinder® trusted identity provider using the SharePoint 2010 Management shell.
Follow these steps:
A SharePoint 2010 management shell command-line window appears.
A SharePoint 2010 environment can have multiple trusted identity providers. Identify your CA SiteMinder® trusted identity provider before modifying any claims that are associated with it.
Follow these steps:
Get-SPTrustedIdentityTokenIssuer
A list of trusted identity providers appears.
Your CA SiteMinder® trusted identity provider is identified.
Use the SharePoint 2010 Management Console to Changing the sign-in URL of your CA SiteMinder® trusted identity provider.
Follow these steps:
Set-SPTrustedIdentityTokenIssuer "name_of_your_siteminder_trusted_identity_provider" -SignInUrl new_sign-in_URL
This example shows how to change a sign-in URL for a trusted identity provider named SMTIP.
Set-SPTrustedIdentityTokenIssuer "SMTIP" -SignInUrl https://sharepoint.example.com
The sign-in URL is changed.
You can verify the new sign-in URL for your CA SiteMinder® trusted identity provider.
Follow these steps:
Get-SPTrustedIdentityTokenIssuer
A list of trusted identity providers and their respective settings appears.
|
Copyright © 2014 CA.
All rights reserved.
|
|