

Agent for SharePoint Guide › Features to Set Up Following Basic Installation and Configuration of the Agent for SharePoint › Office Client Integration › How to Configure Office Client Integration for the Agent for SharePoint
How to Configure Office Client Integration for the Agent for SharePoint
Office Client Integration lets users collaborate on Microsoft Office documents stored in SharePoint. When users open a Microsoft Office document on SharePoint, they use the related Microsoft Office application to edit the document.
Follow these steps:
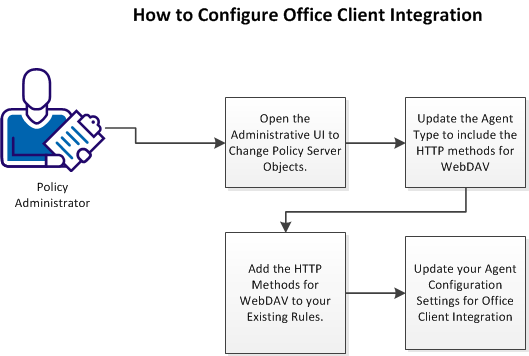
- Open the Administrative UI to change Policy Server objects.
- Update the Agent Type to include the HTTP methods for WebDAV.
- Add the HTTP methods for WebDAV to your existing rules.
- Update your Agent Configuration Settings for Office Client Integration.
Open the Administrative UI to Change Policy Server Objects
Change the objects on your Policy Server by opening the Administrative UI.
Follow these steps:
- Open the following URL in a browser.
https://host_name:8443/iam/siteminder/adminui
- host_name
-
Specifies the fully qualified Administrative UI host system name.
- Enter your CA SiteMinder superuser name in the User Name field.
- Enter the CA SiteMinder superuser account password in the Password field.
Note: If your superuser account password contains one or more dollar‑sign ($) characters, replace each instance of the dollar-sign character with $DOLLAR$ in the Password field. For example, if the CA SiteMinder superuser account password is $password, enter $DOLLAR$password in the Password field.
- Verify that the proper server name or IP address appears in the Server drop-down list.
- Select Log In.
Copyright © 2013 CA.
All rights reserved.
|
|