
Federation Guides › Partnership Federation Guide › Single Sign-on Configuration › SAML 2.0 HTTP-POST Binding Configuration
SAML 2.0 HTTP-POST Binding Configuration
For single sign-on and single log-out requests, you can enable SAML 2.0 HTTP-POST binding as a method for exchanging requests and responses. The binding maps SAML protocols to standard messaging formats and communications protocols.
Note: The authentication request binding is different than the SSO binding. The SSO binding determines the profile that dictates how assertions, protocols, and bindings work together to handle a specific use case.
This procedure assumes that you are familiar with federated environments and have created and activated one or more of the following partnerships:
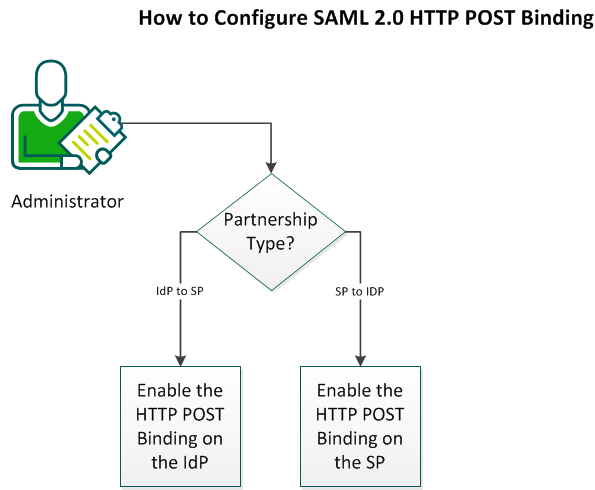
The following graphic describes how to enable SAML 2.0 HTTP POST binding:

Follow these steps:
- Perform the appropriate task for your type of partnership:
Enable the HTTP POST Binding at the IdP
You can enable the HTTP-POST binding at the IdP.
Important! Before you configure the authentication request binding, enable the session store. For the IdP to handle an authentication request that is delivered using HTTP-POST binding, the IdP must store the request in the session store.
Enable the Session Store
Follow these steps:
- Open the Policy Server Management Console and select the Data tab.
- Set the following fields
- Database
-
Session Store
- Storage
-
Select the storage repository.
- Session Store Enabled
-
Check this box.
- Complete the Datasource information.
- Click OK to save the changes.
Configure the binding in the Administrative UI
Follow these steps:
- Open the Administrative UI.
- If the partnership that you want to modify is active, deactivate it.
- Click Modify to open the partnership wizard.
- Navigate to the SSO and SLO step.
- In the SSO section, select HTTP-POST for the Authentication Request Binding.
Note: You can select the HTTP-Redirect and HTTP-POST bindings together for authentication requests.
- (Optional) In the SLO section, select the HTTP-POST check box.
Note: You can select more than one SLO binding.
- Specify a SLO service URL with a binding that matches the SLO binding. If you picked the HTTP-Redirect and HTTP-POST bindings, create two SLO service URLs, one for each SLO binding.
- Complete any other partnership information as needed.
- At the confirm step, click Finish.
HTTP-POST binding is now enabled.
Enable the HTTP POST Binding at the SP
You can enable the HTTP-POST binding for authentication and SLO requests at the SP.
Follow these steps:
- Open the Administrative UI.
- If the partnership that you want to modify is active, deactivate it.
- Click Modify to open the partnership wizard.
- Navigate to the SSO and SLO tab in the partnership wizard.
- In the SSO section, select HTTP-POST for the Authentication Request Binding.
Note: You can select the HTTP-Redirect and HTTP-POST bindings together for authentication requests.
- Specify a remote SSO service URL with a binding that matches the Authentication Request Binding. For example, if you picked HTTP-Redirect and HTTP-POST bindings, create two SSO Service URLs, one for each binding.
- (Optional) In the SLO section, select the HTTP-POST check box.
Note: You can select more than one SLO binding.
- Specify an SLO Service URL with a binding that matches the SLO binding. For example, if you picked HTTP-Redirect and HTTP-POST SLO bindings, create two SLO Service URLs, one for each binding.
- Complete any other partnership information as needed.
- At the confirm step, click Finish.
SSO HTTP-POST binding is enabled.
Copyright © 2014 CA.
All rights reserved.
 
|
|


