

|
|
|
Use WSP to modify data grids. For example, you can modify list_chg.htmpl to change what the end user sees on the form.
Note: You cannot move an existing control after the grid area.
To modify the data grid
The WSP Login appears.
The Web Screen Painter appears.
The HTMPL file opens for editing.
If you prefer Source view, the data grid appears between the following lines of code:
<PDM_MACRO name=lsStart>
<PDM_MACRO name=lsEnd>
The following example shows this data grid area in Design view:
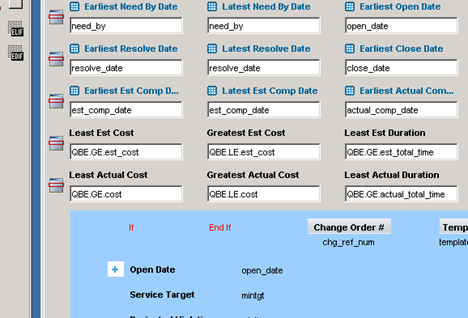
The plus sign in the data grid area represents the beginning of the expansion section of the row (the fields that are displayed only when a user clicks plus on the row in the list form grid). The following code generates the plus sign in the Source view:
<PDM_MACRO name=lsCol attr=open_date label="Open Date" sort="DESC" startrow=yes>
The startrow=yes parameter specifies to start a row, and it starts the expansion section of the row.
You can move columns between the main part of the row and the expansion section.
If you select Insert Column, WSP inserts a column to the left of the currently selected control. If you select Insert Control, WSP displays the Insert Control dialog that lets you add the desired control to the form.
Your unpublished changes appear in the web browser.
The data grid is modified.
| Copyright © 2012 CA. All rights reserved. |
|