

In most organizations, administrators spend significant time providing users with login accounts for different systems and applications. To simplify this repetitive activity, you can create provisioning roles, which are roles that contain account templates. The templates define the attributes that exist in one type of account. For example, an account template for an Exchange account defines attributes such as the size of the mailbox. Account templates also define how user attributes are mapped to accounts.
Consider an example where every employee at Forward, Inc needs access to a database and email. An administrator wants to avoid creating a database account and an email account for each employee one at a time. Therefore, the administrator creates a provisioning role for that company. The role contains an account template for a Microsoft Exchange server, to provide email accounts, and a template for an Oracle database. In this example, the Exchange server and the Oracle database are named endpoints, which are the system or application where the accounts exist.
Note: Forward, Inc. is a fictitious company name which is used strictly for instructional purposes only and is not meant to reference an existing company.

After the roles are created, business administrators, such as managers or support personnel, can assign those roles to users to give them accounts in endpoints. After users receive the role, they can log in to the endpoint.
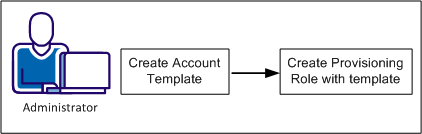
Creating a provisioning role that includes an account template is a two-step process as follows:
The following sections explain how to create a role that can be used to assign accounts:
A default account template exists for each endpoint type. In a provisioning role, you can use the default account template. However, you can create your own account templates for any endpoint that you have configured.
Follow these steps:
A screen appears with a list of endpoint types.
Each endpoint type has a different set of tabs. Click Help for field definitions.
CA CloudMinder creates the account template and makes it available for use in provisioning roles.
When you create an account template, you use rules strings to define the format of many account attributes. Rule strings are variables for the actual value. Rules strings are useful when you want to generate attributes that change from one account to another. When rules are evaluated, Identity Management replaces the rule strings entered in the account templates with data specified in the user object.
Note: Rule evaluation is not performed on accounts created during an exploration or on accounts created without provisioning roles.
The following table lists the rule strings in Identity Management:
|
Rule String |
Description |
|---|---|
|
%AC% |
Account name |
|
%D% |
Current date in the format dd/mm/yyyy (the date is a computed value that does not involve the global user information). This rule string is equivalent to one of the following: %$$DATE()% |
|
%EXCHAB% |
Mailbox hide from exchange address book |
|
%EXCHS% |
Mailbox home server name |
|
%EXCMS% |
Mailbox store name |
|
%GENUID% |
Numeric UNIX/POSIX user identifier. This rule variable is the same as %UID% as long as the global user UID value is set. However, if the global user has no assigned UID value, and UID-generation is enabled (Global Properties on System Task), several actions occur. The next available UID value is allocated, assigned to the global user, and used as the value of this rule variable. |
|
%P% |
Password |
|
%U% |
Global user name |
|
%UA% |
Full address (generated from street, city, state, and postal code) |
|
%UB% |
Building |
|
%UC% |
City |
|
%UCOMP% |
Company name |
|
%UCOUNTRY% |
Country |
|
%UCUxx% or %UCUxxx% |
Custom field (xx or xxx represents the two-digit or three-digit field ID as specified on the Custom User Fields tab in the System Task frame) |
|
%UD% |
Description |
|
%UDEPT% |
Department |
|
%UE% |
Email address |
|
%UEP% |
Primary email address |
|
%UES% |
Secondary email addresses |
|
%UF% |
First name |
|
%UFAX% |
Facsimile number |
|
%UHP% |
Home page |
|
%UI% |
Initials |
|
%UID% |
Numeric UNIX/POSIX User Identifier |
|
%UL% |
Last name |
|
%ULOC% |
Location |
|
%UMI% |
Middle initial |
|
%UMN% |
Middle name |
|
%UMP% |
Mobile telephone number |
|
%UN% |
Full name |
|
%UO% |
Office name |
|
%UP% |
Telephone number |
|
%UPAGE% |
Pager number |
|
%UPC% |
Postal code, ZIP Code |
|
%UPE% |
Telephone number extension |
|
%US% |
State |
|
%USA% |
Street address |
|
%UT% |
Job title |
|
%XD% |
Generates the current timestamp in XML dateTimeValue format, a fixed-length string format. In a dateValue or timeValue attribute, you can write an (:offset,length) substring expression to extract the date or time parts of the dateTimeValue. For example, %XD:1,10% yields YYYY-MM-DD; and %XD:12,8% yields HH:MM:SS. |
After you create the account template, you decide about the role requirements, as follows:
After you decide about the role requirements, you are ready to create a provisioning role.
Follow these steps:
Only the Name field is required unless you are using a customized version of Create Provisioning Role.
The templates that you can click are based on the endpoint type you selected.
Add admin rules that control who manages members and administrators of this role.
Add owner rules that control who can modify this role.
A message appears to indicate the status of the Create Provisioning Role task.
You have now successfully created a provisioning role. The role can now be assigned to users, so that they can access the accounts that they need.
|
Copyright © 2015 CA Technologies.
All rights reserved.
|
|