Creating a Property Sheet › Creating a Function to Work with Projects and Tasks › Modifying the Panel
Modifying the Panel
The panel scoped by Maintain Projects inherited panel elements from the panel scoped to Grid2 and Task.Edit. Next, you will reposition the elements on the panel.
To modify the panel scoped to Maintain Projects:
- Open Project.Maintain Projects.Panel. You may need to refresh the Object Browser to display the panel.
It currently looks like this:
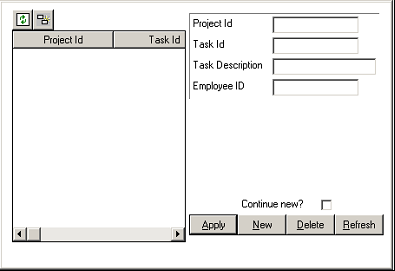
Because you made it a child panel, you have no title bar or dialog frame. You can see the panel elements that it inherited from Task.Edit.Panel, but you cannot yet see the elements inherited from Grid2.Panel.
- In the Design Window, drag the bottom edge of the dialog to make it about twice as tall.
- In the Panel Palette, select DetailP, GridP, GridButtonP, DetailButtonP, and Panel:

- In the Design Window, drag the selected elements to the bottom of the panel.
Note: There is a second grid region—it was behind the one you just moved down. Your panel should look like this.

- In the Panel Palette, expand Grid2P, and then select the Project Description field.
- Open the Properties icon. Change the Width property of this field to 400.

- Widen the entire dialog so that there is some space between the detail region at the bottom and the right edge.
- Widen the grid at the top of the dialog so that it is about as wide as the bottom section.
- In the Panel Palette, expand the GridP region and select the Project Id field. Right-click and use the pop-up menu to set the Visible property to No. It is not necessary to display the Project Id in the grid since we are restricting the grid to the tasks for a single project.
- In the Panel Palette, select Panel at the top.
- Note the size of the panel (it should be roughly 460, 540). You will need this information later.
- Save your model and close the panel.

