

|
|
|
When end users use a wizard, you give them the option to go back and change things, or to cancel the whole process before they click Finish. If they change their minds and cancel out of the wizard before clicking Finish, you do not want anything added to the database.
You can define your wizard so that it remembers what end users enter, but does not write anything until they complete the process. In database terms, you commit the changes when you are ready to write the records (the end users click Finish). The opposite of commit is rollback, which lets you cancel any changes in memory without making any changes to the database. You can use this when end users click Cancel.
To add commit and rollback processing:
![]()
Project Wizard commit SYS Parent
This enables the Project Wizard function to commit and rollback the database.
![]()
The Action Diagrammer appears, with the Select Edit Point dialog over the Action Diagram window:
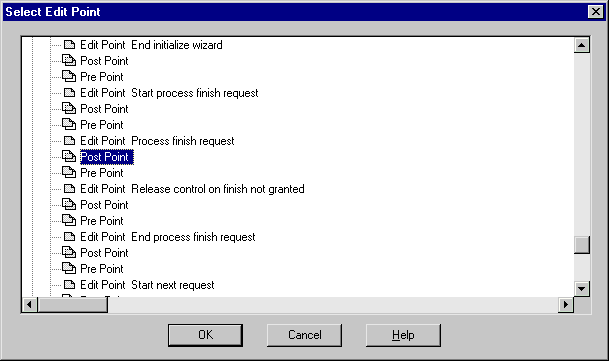
The Process Finish Request Edit Point corresponds with the end user clicking the Finish button.
The Action Diagrammer appears with the Post Point highlighted:
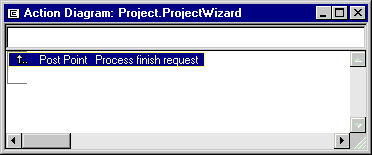
The statement is added to the body of the window:
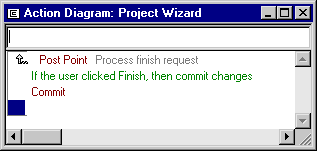
In Step 2 you added the triple Project Wizard commit Parent. This indicated that you want to do commit/rollback processing. Adding the Commit statement indicates when you want the transaction committed.
 ) next to the Post Point name in the action diagram.
The Action Diagrammer moves to the Pre Point before the Start Cancel Request Edit Point. This Edit Point corresponds to the end user clicking Cancel on the wizard.
Now, when end users cancel out of the wizard, no records are written to the database, and when the end users click Finish, the records are written to the database. In the next section, you generate, build, and test the wizard.
| Copyright © 2012 CA. All rights reserved. | Tell Technical Publications how we can improve this information |