

You must add triples to the model before you start working with it. In the next series of steps you add the following triples to the model:
Project known by Project ID
Project has Project Description
Project has Project Start Date
Project has Project End Date
To specify attributes for the Project entity
The Model Editor appears. You can see some triples already entered in the Model Editor.
Note: Instead of scrolling in the list, you can click the verb list, and press the first letter of the verb you are looking for until the verb appears. To select the known by FLD verb, press the K key once.
The Model Editor should now look like this:
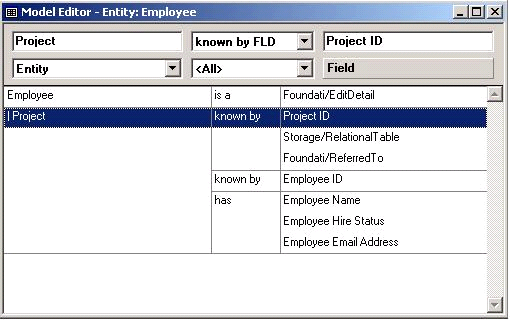
You just created the triple Project known by Project ID. This triple defines a primary key for the Project entity.
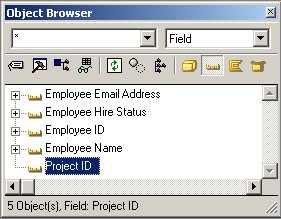
Notice the Project ID field you just added. All of the objects you define in a local model appear at the top of the Object Browser. Pattern library objects appear below the local objects.
Notice that the Employee entity and its fields Employee Email Address, Employee Hire Status, and so on have already been defined in the model you are working with.
Project should still appear in the source object box in the Model Editor.
You have created the triple Project has Project Description, which defines the field Project Description for the Project entity. You use this field to store a description of the project. This triple, ENT has FLD, creates a
non-key attribute. The values in non-key attributes do not need to be unique to each entity. For example, you may have more than one project that has the same text in the description field.
Project has Project Start Date
Project has Project End Date
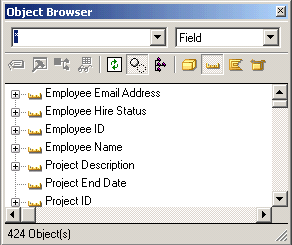
Click the Refresh toolbar button on the Object Browser.
The Object Browser shows the new fields:
|
Copyright © 2014 CA Technologies.
All rights reserved.
|
|