

You can modify the panel displayed by Project.Edit so that it displays multiple lines of text and does not extend past the edge of the dialog.
To modify Project.Edit.Panel and to define a multiline edit control
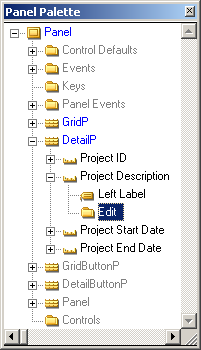
You must select an element on a panel to make a change to it. To select only the element, and not the region it is in, use the Panel Palette.
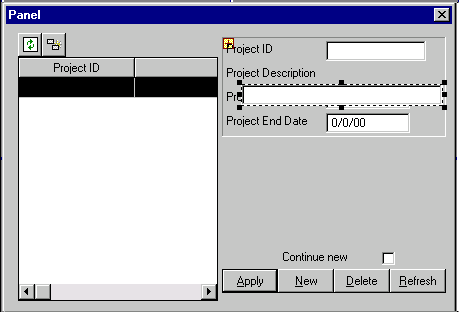
The values in the Property Sheet indicate the properties you can change for the edit box. Also, notice in the Design Window that only the edit box next to the label Project Description is selected.
In the Property Sheet, the Position (Col, Row) property will change as a result of moving the element. If you want to make fine tuning changes, you can specify the exact pixel location in the Property Sheet.
The field still extends past the right edge of the panel.
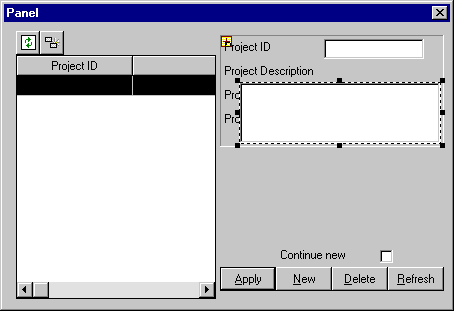
The edit control resizes so that it fits within the panel and the beveled box that surrounds the fields resizes so that it is just slightly wider than the fields.
The panel should look something like this:
You have repositioned and resized the Project Description edit box. Next, set two properties that enable end users to enter more than one line of text in the edit box.
Note: If the Scrolling property is not available, ensure that the value of the Multi-line property changed from No to Yes.
Notice that the input area at the top of the Property Sheet is changed so you can select a value from a list, but you cannot type in a value.
Setting the Scrolling property to Vertical causes the text in the multi-line edit box to wrap to the next line when the cursor reaches the right edge. If you do not set this option, text continues on the first line and extends beyond the edge of the field, rather than wrapping to the next line.
When you change the size and shape of the Project Description edit box, it covers the Project Start Date and the Project End date fields. Next, move those two fields down.
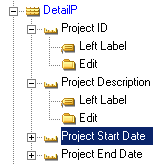
You can see that the beveled box around the fields resizes to fit around all of the fields:

|
Copyright © 2014 CA.
All rights reserved.
|
|