Previous Topic: Predefined AnalysesNext Topic: Duplicate an Analysis


Create a Custom Analysis

Predefined analyses cannot be permanently modified. Create a custom analysis to preserve filters or analytical work flows.

Follow these steps:

  1. Click New Analysis in the Analysis pane.

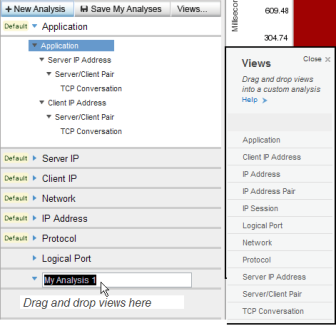
    A new item appears in the Analysis pane. The default name, My Analysis 1, is highlighted.

    The Views pane opens to the right of the Analysis pane.

    Analysis Menu with Views menu to the right.

  2. Type a name for the new analysis in the highlighted field.
  3. Select a view to add to your custom analysis in the Views pane.
  4. Drag the view to the "Drag and drop views here" section of the Analysis pane.
  5. Repeat Steps 3 and 4 to add data views to your analysis. We recommend adding views in a hierarchical flow of increasing granularity, with more items filtered out as the views proceed downward.
  6. (Optional) Add advanced filters. Right-click a view and select Add Analysis Filter.

    The Add Analysis Filter dialog opens. For descriptions of the fields, see Filters for Data Views.

  7. Click Save My Analyses.

    The custom analysis is saved. Multiple changes can be saved simultaneously.

    Important: If you are viewing an emailed analysis, clicking Save My Analyses overwrites all saved analyses.