

When you want to add or update data, import it into CA APM using the Data Importer. The data that you import is inserted, or updates existing data, in the CA MDB.
Important! In this scenario, the system administrator performs the data import. However, the administrator can grant Data Importer User Access or Data Importer Admin Access to any CA APM user role. User access allows users to create imports, modify or delete their own imports, and view any import that was created by another user. Admin access allows users to create imports and modify or delete any import that was created by any user.
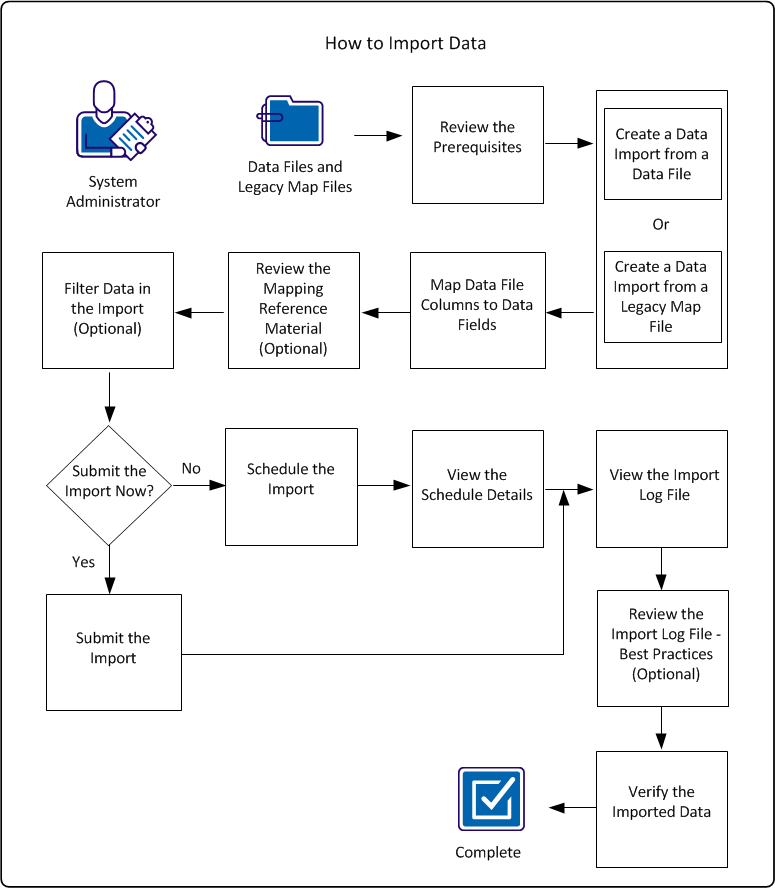
The following diagram illustrates how a system administrator imports data.
To import CA APM data, perform these steps:
Example: Import New Employees
Sam, the CA APM system administrator at Document Management Company, wants to import a group of new employees. The new employees use the product to manage hardware assets. Sam received a comma-separated value (CSV) source data file from Human Resources that contains the employee information. All of the new asset manager employees belong to the IT department and work at the company headquarters. However, the source data file also contains data about some new employees who work at other locations and do not belong to the IT department.
Sam only wants to import the data for the IT employees at headquarters. Using the Data Importer and the source data file, Sam creates a data import to incorporate the new employees into the CA MDB. To ensure that only employees in the IT department at headquarters are imported, Sam creates an exclusion filter. After Sam runs the import, he checks the import statistics and the import log file and user interface to verify that the import was successful.
|
Copyright © 2013 CA.
All rights reserved.
|
|