

Follow these steps:
 icon from the Toolbar.
Notice in the DDL Generation diagram the five columns:
The Type column describes the type of database object you are referring to, while the Name column gives the name of that database object. For example, SCORING_RECORD is a database table, while scoreid is an index on that table. The database itself is named IEFDB.
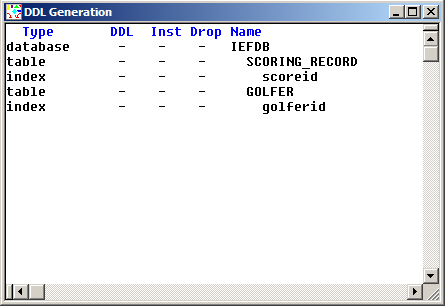
We can select individual database objects for generation by selecting the dash (–) under the DDL column. Selecting the dash will replace it with a Y. However, selecting just the dash under the DDL column just causes the DDL to be generated, and not installed. To have it install as well, or to have a remote file created for installing on a different machine, you need also to select the corresponding dash under the Inst column. Finally, if we wanted a drop statement to be added to the generated DDL to first drop an existing database object, we would also need to select the corresponding dash under the Drop column. After making the appropriate selections, you would then select Generate from the Main Menu and then select DDL, Selected.
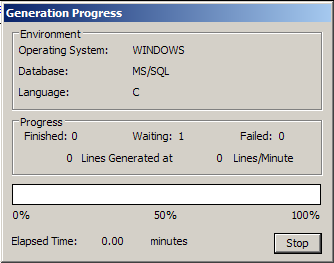
 icon from the Toolbar. The Generation Progress dialog shown below opens, and will close automatically if the DDL generation is successful.
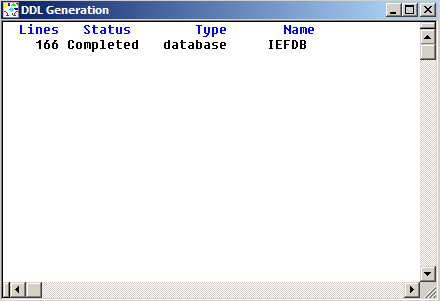
If the generation is successful, in the DDL Generation diagram you will see that the list of database objects to be generated has been replaced with a count of the total number of lines of DDL generated. The number of lines generated can vary, depending on your settings.
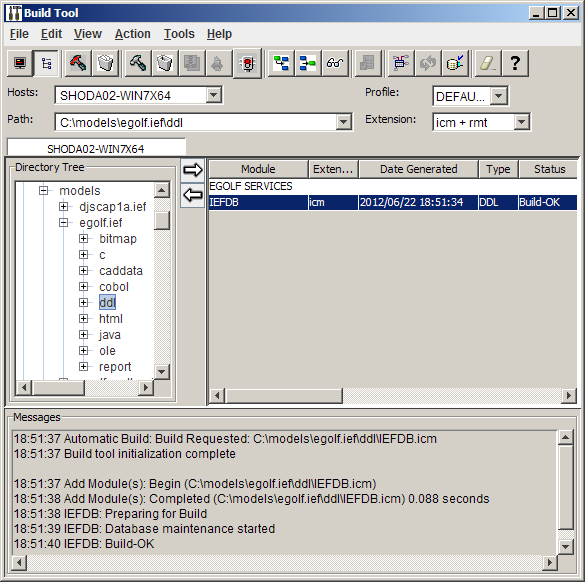
The DDL generation happens in foreground, which means that you cannot use the Toolset while the generation is taking place. The installation happens in background by starting up a separate program called the Build Tool. If everything works successfully, the Build Tool displays the Build-OK status message as shown below.
 icon on the Build Tool toolbar.
|
Copyright © 2013 CA.
All rights reserved.
|
|