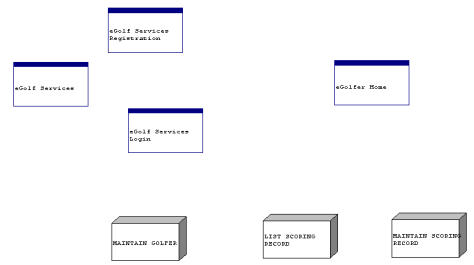

The following steps explain the window navigation diagram.
 icon and, with the cursor, select any location in the Navigation Diagram that is above and to the left of the Maintain Golfer server procedure. If the cursor resembles the international no symbol, it is because you have a server highlighted. You can ignore that symbol for now.
 icon and with the cursor (which now resembles the international no symbol), click directly on the eGolf Services primary dialog you just added. In the Window/Dialog Properties panel, notice that the Type is already set to Dialog and cannot be changed. Change the Initial Position to System Placed, remove the check from System Menu, for the Title: enter eGolf Services Registration, and for the Name: enter egolfer registration. Select the OK push button.
 icon and select a position on the Navigation Diagram somewhere above the Maintain Scoring Record server procedure. In the Window / Dialog Properties panel, change the Type to Primary Dialog Box, under Style un-check the System Menu, in the Title: enter eGolfer Home, and for the Name: enter egolfer home. Select the OK push button.

While it is not imperative that you use the names suggested earlier, using the recommended names will help avoid confusion later in the Tutorial, as statements in the procedure step action diagrams will reference these dialog names.
Note: If you need to change the names or properties of the dialogs, select the dialog. Then from the Main Menu select Detail, and then select Properties.
Your dialogs should have a solid blue bar across the top as shown in the previous diagram. If they do not, you can have added them as primary windows instead of as primary dialogs. If you need to change them, go to their Properties panel. Alternatively, you can select them, delete them, and add them back again as primary dialogs.
|
Copyright © 2013 CA.
All rights reserved.
|
|