

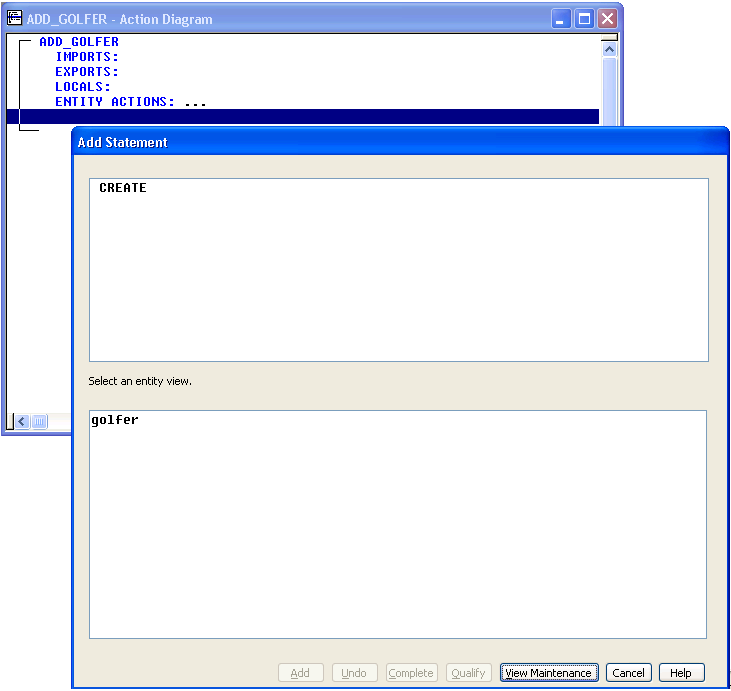
The Add Statement dialog now gives us the choice of selecting the golfer Entity Action view that we added to the diagram.
Note: In the background the ADD GOLFER – Action Diagram has an ellipsis (…) next to ENTITY ACTIONS: indicating that there is now a contracted view (of GOLFER) there.
Follow these steps:
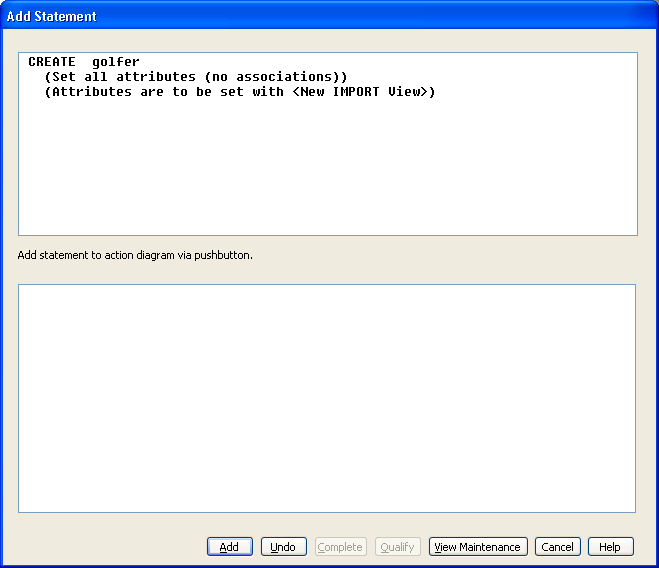
Note: A golfer is added to the statement we are creating in the upper panel and we are presented with new choices in the bottom panel. This will continue until we finish building the statement and then add it to the action diagram. If we make the wrong choice along the way, we can select the Undo push button to back up one or more selections.
In many cases, the Toolset tries to help you out by automating some tasks and selections. For example, when we create an occurrence of golfer, we have to set its first name, last name, and so on, to a specific value. Usually these values will be passed to us through the import views. We can add the Set statements manually, much like we are adding this Create statement, or we can allow the Toolset to add them for us. Sometimes it is easier to add them manually; sometimes it is easier to let the Toolset add them. In this case, it is going to be easier to allow the Toolset to add them for us, since all of our attribute values will be set from the import view, which we have yet to define.
The Toolset now knows that we want it to set all of the attributes for us, but it does not know from which view to get the values to set the attributes. Normally, the bottom panel would show us a listing of the transient views in our diagram to choose from, but since we have no other views defined, there is nothing to list. However, we know that we want the attributes set from an import view, and we can let the Toolset create one for us.
Select <New IMPORT View> from the bottom panel.
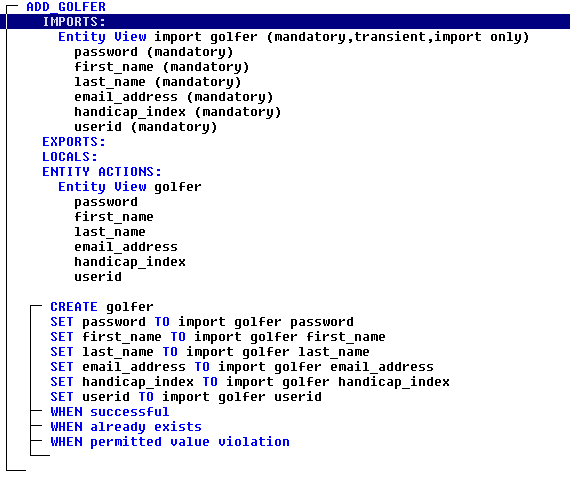
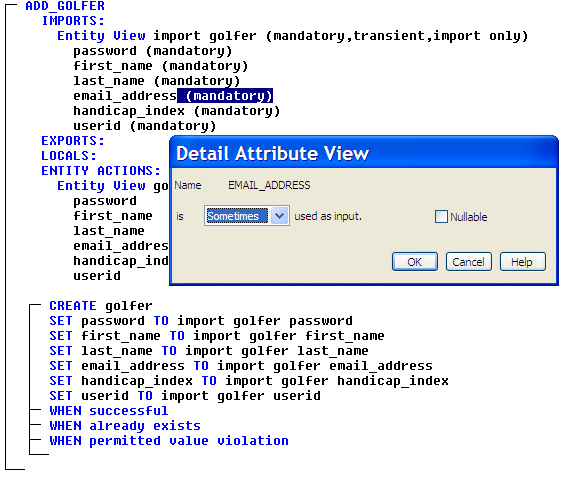
There are only a few things left to do to complete the ADD GOLFER action diagram.
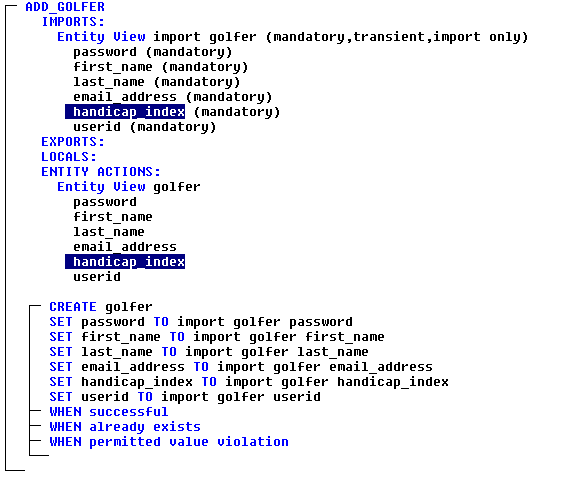
Highlight the entire statement SET handicap index TO import golfer handicap index by selecting, the word SET in the statement. Select the Delete icon from the Tool Bar and select the Yes push button when prompted for confirmation.
|
Copyright © 2013 CA.
All rights reserved.
|
|