

You can customize an interface in the Editor view. Use the Editor view to manage the mapping functions for all the parameters that are associated with the current interface.
You can customize the import view in the Input Mapping tab and the export view in the Output Mapping tab in the Editor view.
To demonstrate the use of custom interfaces, the following illustration shows the Action Diagram of the Employee Detail Procedure Step from the sample model with both the Import Views and Export Views expanded:
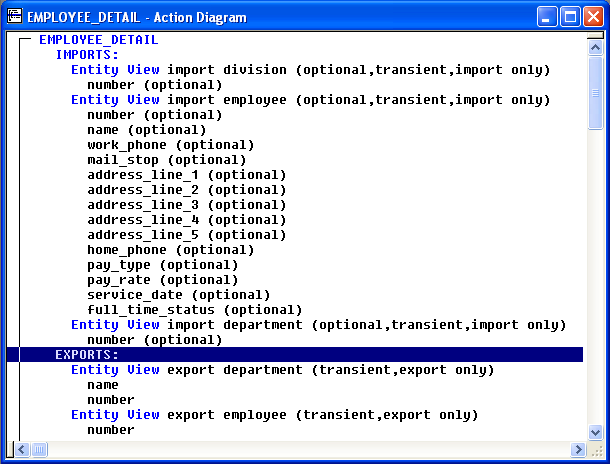
You can customize one or more interfaces using the import and export views as defined in the preceding procedure step.
Follow these steps:
The Editor view opens and displays the parameters of the import and export views as defined by its associated procedure step. If you double-click more than one interface, each interface displays on a different tab in the Editor view.
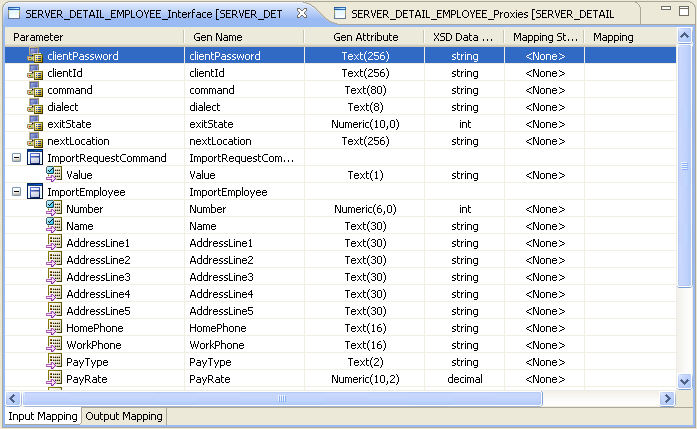
Defines the name of the parameter. You can change the name of this parameter to add a user-friendly name including view names.
Identifies the original name of the parameter. This column is read-only.
Identifies the data type of the parameter. This column is read-only.
Specifies the data type of the parameter that conforms to the XML schema definition. Map the Gen Data Type to the XSD Data Type.
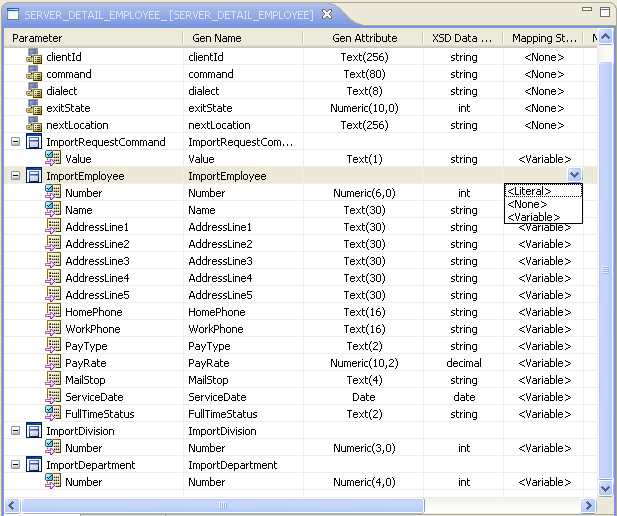
Specifies the mapping style of the parameter.
Default: <None>
To change the mapping style of all the parameters in an entity or group view simultaneously, you can select the mapping style cell for the entity or group view.
Example:
To change the Mapping Style of the ImportEmployee parameter, select the Mapping Style from the drop-down and press the Enter key.
The Mapping Style for the parameter is changed.
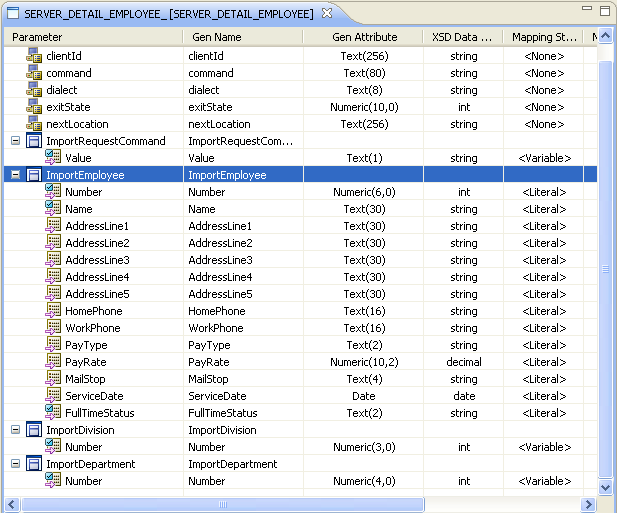
Defines any data specific to the parameter of the interface. You can edit this field only if you select the Mapping Style value as <Literal>.
|
Copyright © 2015 CA Technologies.
All rights reserved.
|
|