

The web service connector feature lets you access data from remote web services for display in the mobile application dashboard. Any RESTful web service with Basic, Digest, OAuth 1.0a, NLTM or no authentication and responses in XML, JSON, or ATOM format is supported, for example, CA APM Cloud Monitor, Yahoo Services, General Sentiment, Markit On Demand, and Klout.
The web connector feature supports:
Note: The Knowledge Base Articles at https://support.ca.com/irj/portal/anonymous/redirArticles?reqPage=search&searchID=TEC604364 provided more information on how to create a web service connector using actual web service examples.
|
Request Type |
What You Should Know |
|---|---|
|
Metric |
|
|
Metadata |
|
A common example of using variables is where one web service call is an authentication request that returns a “sessionId,” and a second web service call uses this “sessionId” as one of the inputs to get metric data. In this case, you must configure the first request as type “metadata” (which produces the variable sessionId), and the second is a “metric” request that consumes this variable as ${sessionId} to get the metric data.
Other notes:
The following illustration describes how an administrator configures a connector for a Web Service.
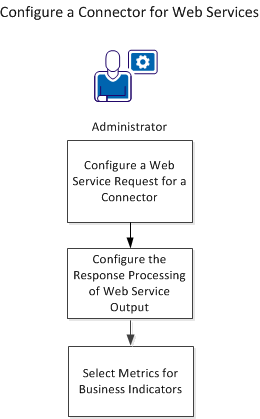
Follow these steps to configure a connector for a Web Service.
CA Executive Insight allows users to obtain metrics via RESTful web services. To do this, you must first specify the information related to the web service, including any authentication information.
Note: A connector can contain more than one request, however multiple requests should be added to the same connector only if they have an interdependency. If a single request fails to execute, the connector enters a 'Failed' state' and will not execute other requests until all requests can execute successfully.
The Metric Connectors page opens.
The New Universal Web Service Connector page opens.
Defines the name of the connector.
Limits: Up to 225 characters.
Note: The connector name is used internally and does not need to match any value for the web service.
(Optional) Defines a description for the connector.
Limits: Up to 512 characters.
Defines the name of the request. This will become the name shown in the Active Request drop-down once the request is saved.
Specifies the HTTP method to be used for the request. Either GET or POST methods are available.
Specifies the URL to be used for the web service you are making the request to.
(Optional) Defines HTTP parameters that are needed for the request and will be added to the URL. Parameters are added as Key and Value pairs.
If POST Method is selected:
(Optional) Defines request message body parameters that are needed for the POST request and application/x-www-form-urlencoded media type (content.
(Optional) Defines Body parameters for POST requests that can be added as Key and Value pairs. Raw Body parameters take precedence over Payload.
Defines the type of authentication method to be used for the request.
Default: Set as None.
(Optional) The content type that is acceptable for the request.
(Optional) Defines HTTP headers that will be used for the request. Headers are added as Key and Value pairs.
Specifies whether or not to use a HTTP proxy fo rthe request.
Default: Set to not use a HTTP proxy
The web service connection is tested and a response is displayed with the status of the request.
After the request configuration is completed and successfully tested, you create the response processing configuration. This is used by the web services connector to obtain metrics and their values from the web service response body. You can use the Test button along with the Body option button for Response to help with determining what needs to be processed.
The response processing fields should contain XPath or JSON Path parsing instructions that the web services connector uses to create a model of a response.
Follow these steps:
Defines the type of response.
Options: Metric or Metadata.
Defines the parser to be used for the response body.
Default: Auto
Specifies the unique name to identify a metric from one call to another.
Example: An XPath expression: //field[@[name='name']
Example: A constant value: {CAStock}
Example: Multiple expressions and constant values, which results in three metric names selected: //resource{2}/field{@name='name'];{CAStock};//resource[25}/field[@name='name']
Specifies the value of the metric.
Example: //field[@name='price'] //LastPrice
Specifies the timestamp of the metric value.
Example: //field[@name='ts'] //Timestamp
Specifies the format string used to parse metric time stamps.
Options: milliseconds, seconds, minutes, hours, days, or a string in the Java Simple Date Format
Example: //field[@name='ts'] //Timestamp
Example: yyyy-MM-dd'T'HH:mm:ss'Z'
A new Web Service metric connector is created and the connector metrics form is displayed.
This response model contains fields that can be used as a metric name, metric value, and metric timestamp. The metric name should be unique and is used similarly to a primary key in a database to unique identify this metric for all requests made for the given connector.
Response:
<StockQuote>
  <Symbol>CA</Symbol>
  <LastPrice>31.98</LastPrice>
  <Timestamp>Wed Dec 18 12:47:46 GMT-05:00 2013</Timestamp>
</StockQuote>
The XPath processing instructions for such response would be:
Metric Name: //Symbol
Metric Value: //LastPrice
Metric Timestamp: //Timestamp
The Date/Time Format string would be:
EEE MMM d HH:mm:s z yyy
This configuration produces one metric.
The subcases show variations on the different models of web service responses, depending on the information that is available.
The response does not contain a metric timestamp, or the metric timestamp can not be parsed using a simple format expression or match one of the predefined constants, it should be left blank. If you do not specify a timestamp expression or format, then the polling request time is used as the timestamp of the corresponding business indicator data.
Response:
 <StockQuote>
   <Symbol>CA</Symbol>
   <LastPrice>31.98</LastPrice>
</StockQuote>
Given the response example above, the XPath processing instructions for such model would be:
Metric Name: //Symbol
Metric Value: //LastPrice
The response does not contain a field that can be used as a metric name. In this case, enter a metric name as a textual value surrounded by the {} brackets instead of a parsing expression.
Response:
<StockQuote>
   <LastPrice>31.98</LastPrice>
   <Timestamp>Wed Dec 18 12:47:46 GMT-05:00 2013</Timestamp>
</StockQuote>
Given the response example above, the XPath processing instructions for such model would be:
Metric Name: {My Metric Name}
Metric Value: //LastPrice
Metric Timestamp: //Timestamp
The Date/Time Format string would be:
EEE MMM d HH:mm:ss z yyy
The response does not contain a field that can be used as a metric name and metric timestamp.
Response:
<StockQuote>
   <LastPrice>31.98</LastPrice>
</StockQuote>
Given the response example above, the XPath processing instructions for such model would be:
Metric Name: {My Metric Name}
Metric Value: //LastPrice
This response model contains multiple child elements inside a root element that can be used as a metric names, metric values, and metric timestamps. The metric name should be unique and is used similarly to a primary key in a database to unique identify this metric.
Response:
<weather>
  <humidity>50</humidity>
  <temperature>98</temperature>
  <date>Wed, 18 Dec 2013 1:52 PM EST</date>
</weather>
Given the response example above, the XPath processing instructions for such model would be:
Metric Name: //{Temperature}; {Humidity}
Metric Value: //temperature; //humidity
Metric Timestamp: //date; //date
The Date/Time Format string would be:
EEE, d MMM yyy HH:mm a z
This configuration produces two metrics: one for humidity and one for temperature. The single date value is also used for both metrics.
This response model contains a list of records where fields in each record can be used as a metric name, metric value, and metric timestamp. The metric name should be unique and is used similarly to a primary key in a database to unique identify this metric.
Response:
<resource classname="Quote">
        <field name="name">USD/ARS</field>
        <field name="price">6.375500</field>
        <field name="ts">1387395903</field>
</resource>
<resource classname="Quote">
        <field name="name">USD/KRW</field>
        <field name="price">1052.199951</field>
        <field name="ts">1387395903</field>
</resource>
Given the response example above, the XPath processing instructions for such model would be:
Metric Name: //field[@name='name']
Metric Value: //field[@name='price']
Metric Timestamp: //field[@name=’ts’]
The Date/Time Format string would be
Seconds
This configuration will produce a list of metrics for each quote.
This response model contains one metric name and a list of metric values with timestamps. In this case, CA Executive Insight will get a list of metric values for a particular metric in a single polling request.
Response:
<collection>
   <name>Brand Name</name>
   <record>
        <sentiment>0.4567</sentiment>
        <timestamp>20131218</timestamp>
   </record>
   <record>
        <sentiment>0.4893</sentiment>
       <timestamp>20131219</timstamp>
   </record>
</collection>
Given the response example above, the XPath processing instructions for such model would be:
Metric Name: //name
Metric Value: //sentiment
Metric Timestamp: //timestamp
The Date/Time Format string would be
yyyMMdd
This configuration produces a single metric that has a list of values. If metric name is not available consider using metric name in {} brackets.
|
Copyright © 2014 CA.
All rights reserved.
|
|