

To record a virtual service from an HTTP/S website, enter information about the HTTP transport protocol in the bottom pane of the Create Virtual Service window.
Follow these steps:
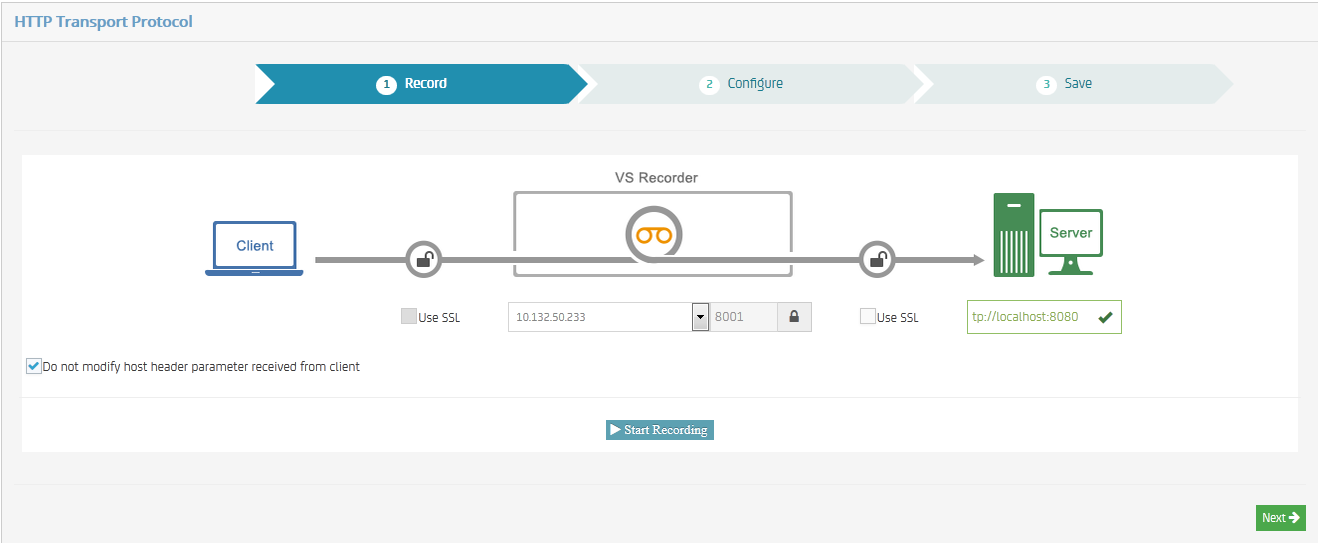
Note: As the target URL is typed into this field, VSE validates that the URL format. Once the field is fully typed, and you tab out or enter, VSE makes a call to the target server to ensure that it is reachable. An appropriate error message is shown.
If selected, this option instructs the live invocation to forward the host header that is received from the client application to the target server. If cleared, the live invocation regenerates the host header parameter to be host: <target host>:<target port>.
Note: As you enter information, watch the top of the window for error messages that highlight invalid entries.
Note: Notice that the graphic for the recording changes color as the components are validated. In the preceding graphic, both the VS Recorder and the server are colored, indicating that they have been validated.
The status of the recording changes from "Draft" to "Ready" when all the mandatory information required for recording is entered. The status shows on the blue Status button. To get more details for the recording, click Status.
Note: For more information about SSL, see "CA Service Virtualization and SSL".
Specifies the name of the keystore file.
To find a keystore file on the file system, click Browse.
Specifies the password that is associated with the specified keystore file.
Designates an alias for a public key.
Specifies the password that is associated with the specified alias in the keystore file.
Note: If you start a recording at the recording panel, record some transactions, click Next, then click Prev to go back to the recording panel, you go back to the configuration steps.
|
Copyright © 2014 CA Technologies.
All rights reserved.
|
|