

To start working with test cases:
See DevTest Registry in Using CA Application Test.
See Project Panel in Using CA Application Test.
See Create a Test Case in Using CA Application Test.
You can open a test case from inside a project or from outside a project by selecting File, Open, Test Case from the main menu.
The multi-tier-combo.tst test case is shown in the following graphics. For more information about the multi-tier-combo test case, see Multi-tier-combo Test Case in Using CA Application Test.
DevTest Workstation is divided into the following main areas (from left to right):
Project Panel
The Project panel, which is located in the left portion of the window, is dockable. You can open or close the Project panel by using the Project ![]() button on the left.
button on the left.
When DevTest Workstation first opens, the last project you had open opens by default.
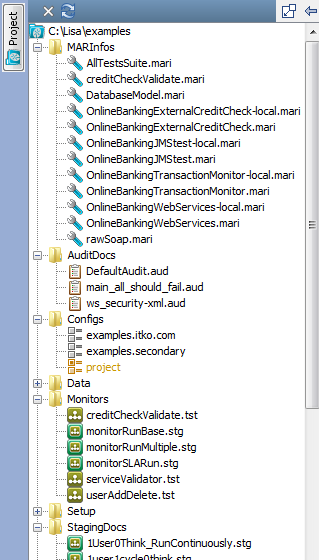
For more information, see Project Panel in Using CA Application Test.
Model Editor
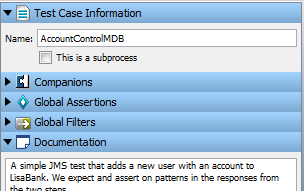
The model editor is where you create and view the test case workflow. The test case workflow consists of all test steps, filters, and assertions that are applied to a specific test case.
The model editor is the place to create and view test cases. The middle portion of the window displays a tab that is the name of the test case.

The green arrow marks the start of a test case.
The workflow in the model editor provides a graphical view of a test case. This view is helpful, because it gives a quick visual validation on the test case workflow.
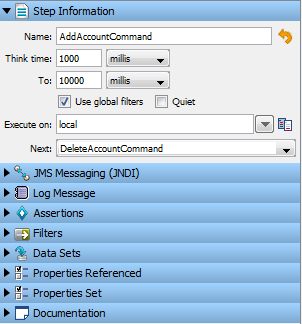
In the model editor, an icon in the workflow represents each step in the test case. The icons change according to the type of test step. For example, if you have a database-related step, a database icon and the associated filters and assertions are attached to the step.
Element Panel
The Element panel contains the elements that are required for a test case or a test step.
To change the step name back to the default step name, click Revert to Default Name ![]() .
.
You can add or delete an element by clicking the required test case or test step element.
Some elements can be applied at the global level (to an entire test case). Some elements can be applied at a step level (only to a specific test step).
Enter some required information at the beginning of a test case.
For example:
After you add steps to this test case, a workflow of steps begins to form. A new set of elements appears at a test step level in the Element panel.
|
Copyright © 2014 CA Technologies.
All rights reserved.
|
|