

After creating the user-defined metadata that is needed to integrate Content Collector with CA DataMinder, you must apply that metadata to CA DataMinder task route(s).
To apply user-defined metadata to CA DataMinder task routes
Note: The following instructions and screenshots refer to IBM Content Collector V3.0.
The New Task Route dialog displays:

1 Browse button. 2 Choose a Template tab.
The Browse For Folder dialog appears.
The CA DataMinder task route templates are listed in the Choose a Template tab of the New Task Route dialog.
For example, select the template for Exchange emails:
CA DataMinder_CSS_EX_Archiving Template.ctms
The new task route displays:
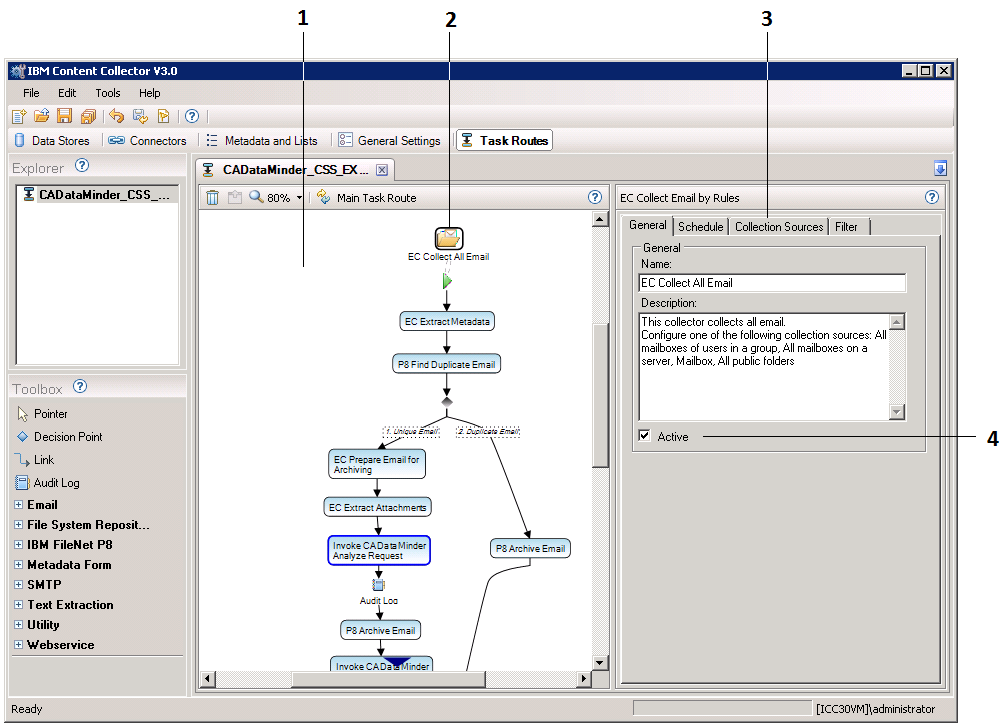
Task Route screen: 1 Individual tasks in task route. 2 Task collector. 3 Task properties. 4 Activate check box.
Invoke CA DataMinder Analyze Request
Edit the task properties. For details, see the following section.
Audit Log
Edit the task properties. For details, see the following section.
Note: This is the Audit Log task that immediately follows the CA DataMinder Import Analyze Response Metadata task. It is the first of two Audit Log tasks.
Invoke CA DataMinder Commit Request
Edit the task properties. For details, see the following section.
Audit Log
Edit the task properties. For details, see the following section.
Note: This is the Audit Log task that immediately follows the CA DataMinder Import Commit Response Metadata task. It is the second of two Audit Log tasks.
Invoke CA DataMinder Rollback Request task
Edit the task properties. For details, see the following section.
In the Schedule tab, specify how often the task runs.
In the Collection Sources tab, specify the email source, typically a Journal or Mailbox. For example, enter a mailbox SMTP address such as sales@unipraxis.com.
In the General tab, select the Activate check box to activate the task (see the previous screenshot).
|
Copyright © 2013 CA.
All rights reserved.
|
|