

As a system administrator, it is important to regularly update CA Business Service Insight. Upgrading ensures that you can take advantage of all new features and bug fixes.
The upgrade file recognizes which server is running the program and it updates the necessary files. First, upgrade the application server that contains the Alerts service. The migration script automatically runs on the application server that includes the Alerts service.
To upgrade to a multiserver environment, perform the upgrade process on the application server first. Then, perform the upgrade on the web server. The upgrade on the application server automatically performs the database migration.
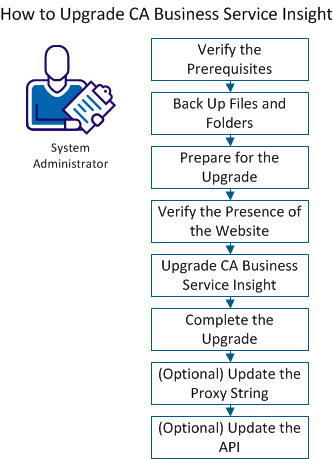
Use this scenario to guide you through the process:
To ensure that you can complete the upgrade, verify the following prerequisites:
Note: If autoextend is on, the datafile maxsize is at least 15 percent more than the current size of the datafile.
To ensure that you do not lose any information during an upgrade, back up the following files and folders.
Note: To perform a rollback, uninstall all versions, install the previous version, and import the backup data.
Follow these steps:
To ensure a successful upgrade, perform the following tasks before you begin the upgrade.
Follow these steps:
Note: The use of a different language setting for the upgrade may cause errors.
Important! Do not stop the WWW service or the IIS Admin service.
Important! The Distributed Transaction Coordinator service is required for upgrading only.
To ensure that the website functions, verify the presence of the website on the server. Choose the option that applies to your server topology.
Follow these steps:
The server is designated solely as an application server:
The server is not designated solely as an application server:
Note: On 64-bit systems, the entry is: HKEY_LOCAL_MACHINE\SOFTWARE\WOW6432node\Oblicore\Install Data.
To take advantage of new features and functions in CA Business Service Insight, upgrade to the most current version.
Follow these steps:
Note: This prompt appears only if a previous version of JBoss is installed.
The upgrade dialog opens and displays the upgrade dialogs.
Note: See Upgrade Dialogs for more information.
The installation begins.
If you selected Run Migration Script, follow the instructions.
The system restarts.
The Install wizard includes dialogs that CA Business Service Insight uses to update information. Only dialogs that are related to the features you select open.
The following table lists the upgrade dialogs and related parameters and values:
Important! Do not use double-byte characters for entries marked with a double dagger (‡).
Note: Oracle does not support the use of certain characters in its naming conventions. Refer to the Oracle literature for their specific requirements (for example ASCII) and limitations (such as special characters and double-byte characters).
|
Dialog Name |
Parameters |
Values |
Notes |
|---|---|---|---|
|
Database Creation |
Run Migration Script |
Selected or deselected. |
Automatically selected on the application server that includes the CA Business Service Insight Alerts service. |
|
|
Oblicore Database instance TNS name |
Type the TNS name as it appears in the TNSNAMES.ORA file. ‡ |
CA Business Service Insight Database Instance TNS Name. |
|
|
Schema user name |
Type the name of the schema user for the upgrade. |
|
|
|
Schema password |
Type the password of the schema user for the upgrade. |
Default: Oblicore |
|
|
System password |
Type the system user password. |
|
|
Login Information |
User Name |
Name of user. ‡ |
Default: The user account that you used for installation. Note: We recommend that you change the user and password to a dedicated domain account. |
|
|
Password |
User password. ‡ |
|
|
|
New User Information button |
See New User Information row. |
|
|
New User Information |
Domain or server |
Name of the local server. |
|
|
|
Group |
Administrators |
|
|
|
User Name |
Name of user. |
|
|
|
Password |
User password. |
Conforms to company policy. |
|
|
Confirm Password |
Confirm password. |
|
The following table describes configuration files and related parameters.
Important! Do not assign any double-byte character to any of the entries in the following configuration table.
Note: The values for parameters marked with * must begin with a single quote and end with a backslash and a single quote, for example, ‘C:\Temp\’.
|
Config File |
Parameters |
Default Values |
Remarks |
|---|---|---|---|
|
Config_Ini.ini |
ORGANIZATION_NAME |
The organization name |
If your organization name contains special characters (for example, &), add the ^ character before each special character (for example, AB&C is written as AB^&C). |
|
|
TEMPLATE_PATH* |
'<installation directory>\Export Templates\' |
The location of the export templates folder. |
|
|
BOOKLET_TEMPLATE_PATH* |
'<installation directory>\Booklet Templates\' |
The location of the booklets templates folder. |
|
|
WEB_SERVER |
The web server name |
|
|
|
DB_NAME |
|
|
|
|
OBLICORE_USER |
|
|
|
|
OBLICORE_PASS |
Oblicore |
The CA Business Service Insight user password in the database. |
|
|
MPX_CONFIGURATION_DIRECTORY* |
'<installation directory>\Packages\Configuration\' |
The location of the packages configuration folder. |
|
|
MPX_INPUT_DIRECTORY* |
'<installation directory>\Packages\' |
The location of the packages input folder. |
|
|
MPX_LOG_DIRECTORY* |
'<installation directory>\Packages\Log\' |
The location of the packages log folder. |
|
|
MPX_OUTPUT_DIRECTORY* |
'<installation directory>\Packages\' |
The location of the packages output folder. |
|
|
MPX_TEMP_DIRECTORY* |
'<installation directory>\Packages\Temp\' |
The location of the packages temporary folder. |
To complete the upgrade, perform the following tasks.
Important! Log in as sadmin after upgrading CA Business Service Insight. The default password is sadmin.
Follow these steps:
begin
prc_recreate_all_synonyms ('YES');
end
or
exec prc_recreate_all_synonyms ('YES');
alter user oblidbadmin account lock;
alter user oblidbadmin identified by ‘<new_password>’;
You now have the most recent version of CA Business Service Insight.
A reverse proxy forwards support requests to the website. The requests place the prefix string into the value of the ProxyPrefix and key in the AppSettings section of the web.config file. This prefix string is configured to route the request to the website in the proxy configuration. To use a reverse proxy, update the proxy string.
Follow these steps:
For example, if the prefix mapped to the website is “ca”, then the web.config file is updated as follows:
<appSettings>
<add key="ProxyPrefix" value="/ca/" />
</appSettings>
If the ProxyPrefix key does not exist, or if its value is an empty string, the website functions in normal mode.
For example, if the Oblicore web application proxy access URL is http://proxy/ca/ (ca is the prefix), the web.config file is updated as follows:
<appSettings>
<add key="ProxyPrefix" value="/ca/" />
</appSettings>
In addition to this update, a new header is added in the proxy web application configuration file with the following key name: "X-Forwarded-CA-Oblicore-Proxy".
To use the API code from versions previous to 8.1, update the API interface.
Note: For detailed information, see API Backwards Compatibility in the CA Business Service Insight SDK Guide
Follow these steps:
Note: If there are compilation errors, locate the code that requires manual changes. Update the code according to the changes made to the new API (field order, type). Recompile your API code after these changes.
|
Copyright © 2013 CA.
All rights reserved.
|
|